Durofix RV332 Battery LED Replacement
ID: 22998
Description: This guide can be used to replace a defective...
Steps:
- Remove the six 13 mm screws from the side of the power screwdriver using a #0 Phillips screwdriver.
- Using a plastic opening tool, separate the case in two to expose the internals of the cordless screwdriver.
- Remove the printed circuit board, LED, battery, and motor assembly from the screwdriver casing.
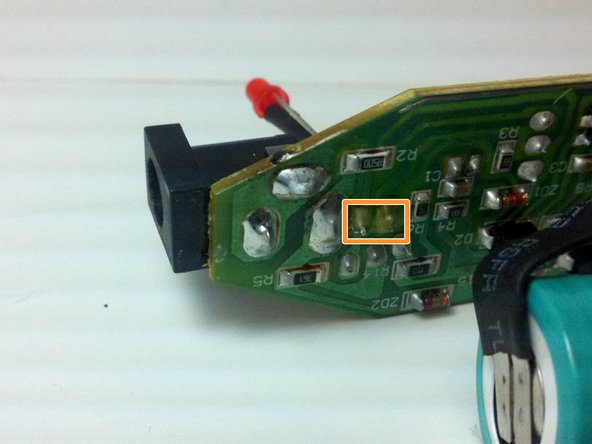
- Use a soldering iron to melt the solder from the LED's two pins on the printed circuit board.
- Remove the LED from the circuit board while the solder is still melted.
- Place the positive leg of the new LED through the positive hole in the printed circuit board and solder it into place.
- Place the negative leg of the LED through the negative hold in the printed circuit board and solder it into place.