Mercedes W123 Glow Plug, Pencil Style Replacement
ID: 23313
Description: This guide focuses on the replacement of the...
Steps:
- It is highly recommended to use glow plugs made by the original OEM supplier, Bosch.
- Some brands of glow plugs have been known to fail prematurely; others have been known to fall apart inside the pre-chamber leading to much more work to remove them.
- When using Bosch, it's good to keep in mind that fraudulent reproductions exist on the market. Look for the proper authenticity marking. Be careful where you buy them, and look to see what country they are made in.
- If you want to be sure, Bosch offers a way to check the code on the package against their code database.
- There are other brands that can be used instead, but be sure to do your research.
- To make this job much easier, consider removing your injector hard lines. It makes it easier to get the correct tools on the glow plugs for removal. For guidance on this, see the injector hard line removal guide.
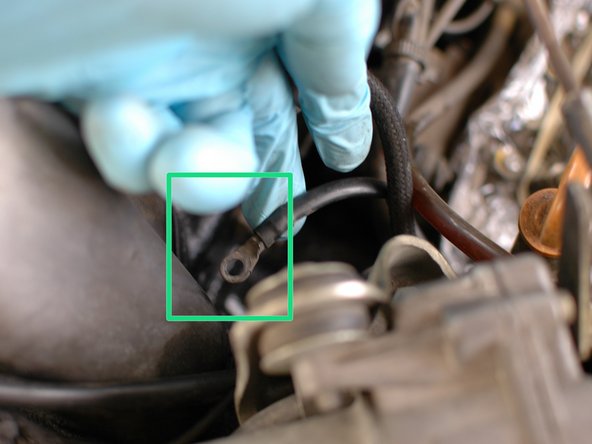
- Begin by removing the small nut that holds the wire to the top of each glow plug. Use an 8mm wrench.
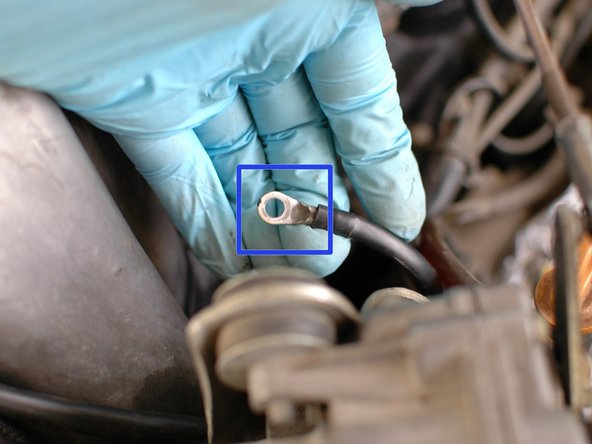
- You'll now be able to pull the wire off the end of each plug.
- Not that it's likely the wire ends will be corroded or dirty or both.
- Wipe them down with a shop towel, and then consider rubbing them with a fine grit sandpaper, steel wool, or emery cloth to remove any corrosion. You should end up with shiny metal. This will help reduce resistance and make the system work better.
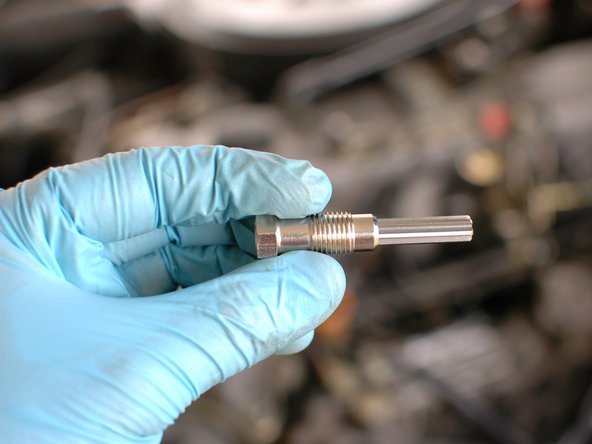
- Now loosen and remove each of the five glow plugs with a 12mm wrench.
- Work your way from front to back, with the knowledge that you're saving the hardest for last; the glow plug on cylinder number 5, furthest at the back of the engine, is difficult to reach. Be patient...
- Once removed you can inspect and test the glow plug to see if it was the one that was faulty.
- While the glow plugs are out, it's now time to ream the openings in the pre-chambers.
- Reaming them removes excess carbon which will make the new glow plugs work better, and will help prevent premature failure.
- It's recommended you use a reamer made for the job; it threads directly in to the glow plug opening and makes this job quick and easy.
- To ream the cylinders, begin by coating the blades of the reamer with some sort of oil like automatic transmission fluid or gear oil. This will help the reamer pick up and pull out the excess carbon.
- Now push the reamer in to the cylinder gently while turning it. Thread it by hand as far as you can in to the pre-chamber hole. Then, use a 12mm wrench to continue to thread it. You'll feel resistance come and go as it carves out the carbon.
- Insert the reamer until it stops turning against the head, then back it out. Clean it between cylinders with some brake cleaner.
- Here is what the reamer pulled out of the #1 pre-chamber at the front of the engine.
- Test each new glow plug before installing it. Nothing would be worse than struggling to install the #5 glow plug back behind the oil filter housing only to find it was bad out of the box.
- See the glow plug testing technique guide for help with this.
- Install the new glow plugs once reaming is complete.
- Just like any project on your W123, sometimes things don't go as planned. On this car, two of the glow plugs had been rounded off by a previous owner or mechanic.
- They then gave up and left these old plugs in there. As expected, one of the two rounded off plugs was the bad one.
- It just took patience and some vice-grips to convince these to come out. There was so much carbon build up the "squeaked" as they rubbed on it on the way out. Reaming them made the new plugs go in easily.