Canon Speedlite 430EX II Diffusing Disc Panel Replacement
ID: 23836
Description:
Steps:
- At first of all: Remove Batteries!
- Be Careful: Electronic parts need a few minutes to discharge. If you touch them you may get an electric shock or damage your device.
- Open the silicone covers slowly. The're fixed with double faced adhesive tape.
- In the worst case: You damage the covers. It's very hard to damage the flash at this step
- Remove the screws on the bottom of the flash-head
- Remove all 8 screws which holds the outer case on the joint.
- Separate the screws from each other - that makes the re-assembling easier
- Open the head slowly - attention with the cables
- Remove the flash unit
- Remember: Electric parts!
- Remember the order of the diffusing discs
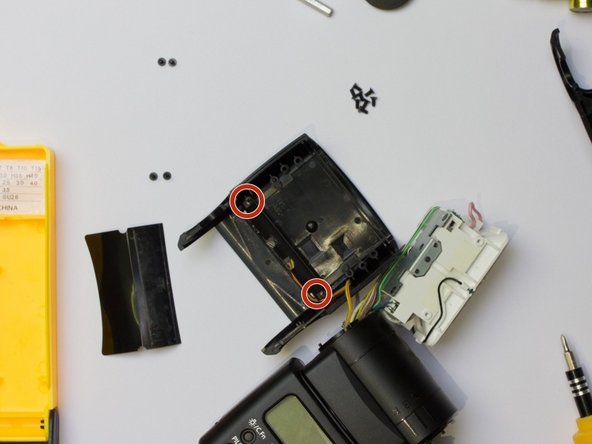
- Remove the 4 screws of the holding plate.
- You need to remove the plastic film - don't worry you can stick it back when you're ready and it holds fine.
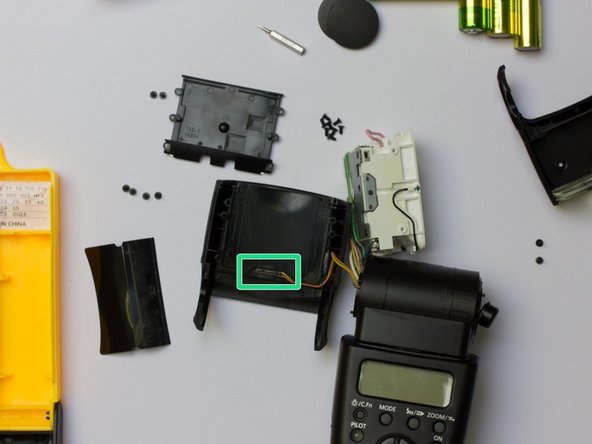
- The thing in the square is the contact which detects if the panel is in or out.
- Now you're ready to install the panel
- Hold it in the position (just to check that everything is correct and fit in the head.
- Now you need to re-assemble backwards. Careful with the cables
- Hold the diffusing discs while you plug the top and bottom together
- stick a little piece of double faced adhesive tape to the silicone covers
- Both covers have those tiny silicone pins and the fitting hole for alignment