HP Pavilion DV1000 Screen Replacement
ID: 23887
Description:
Steps:
- Shut down the computer.
- Disconnect all external devices and cables from the computer.
- Flip the laptop over.
- Locate the gray sliding tab next to the black bar where the battery is located.
- Slide the gray sliding tab to the left until you hear a distinct click.
- The inside edge of the battery should pop up.
- Grasp the inside edge of the battery.
- Lift the inside edge of the battery up to detach the battery from the laptop.
- Remove the highlighted screws.
- After removing the screws, flip the laptop over.
- Open the laptop.
- Use the spudger to lift the keyboard.
- Do not pull the keyboard up and away from the computer, because it is still attached by a ribbon cable.
- Press the two white clips forward with your fingers and gently pull the ribbon from the clips.
- Turn the laptop upside-down again.
- Remove the highlighted screws.
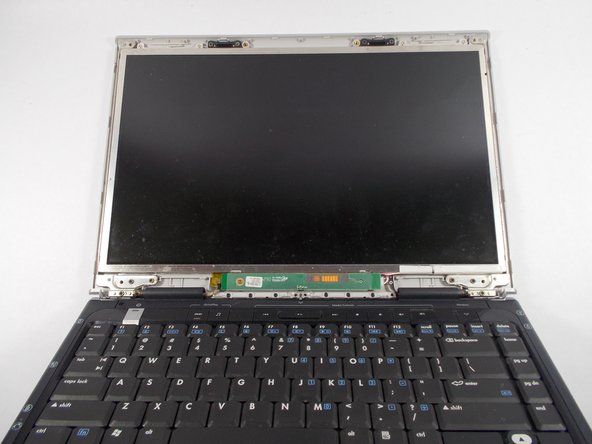
- Turn the laptop right-side up. Open the screen and tilt it all the way back.
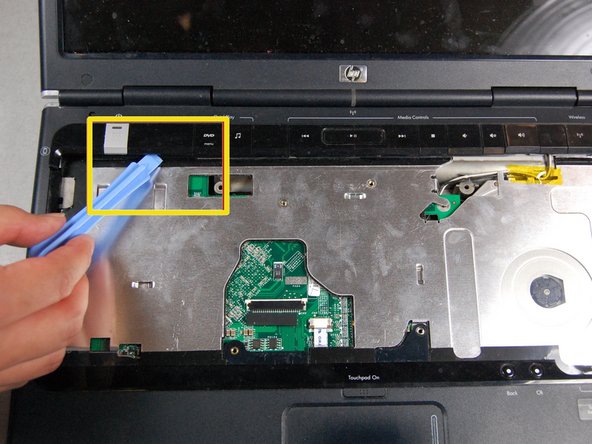
- Locate the media keys.
- Gently lift up the media key strip using the plastic pry tool.
- If there is too much resistance when prying, stop and search for cause of the resistance. Do not force the media keys.
- Remove the rubber inserts with the spudger.
- Note: When reassembling, notice that the two lower rubber pieces are flatter than the four rubber pieces located at the top of the screen.
- Remove the screws behind the rubber inserts.
- Carefully pry loose the screen casing with a plastic prying tool.
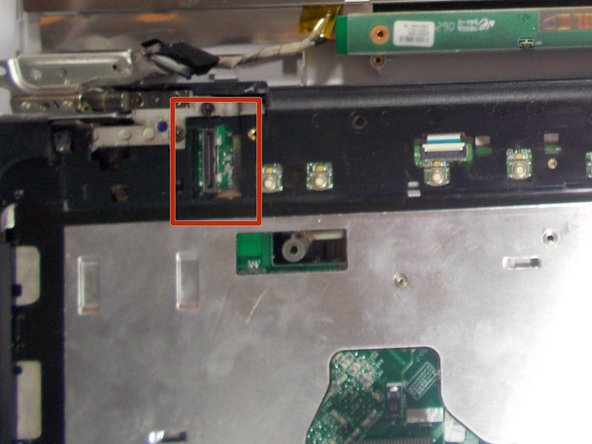
- Remove the plug by prying it loose with the spudger.
- Pulling the plug with your fingers could be potentially dangerous unless you are wearing work gloves.
- Remove the single screw marked in the image.
- Be careful not to break the clips or pull any wires.
- Remove the 4 screws marked in the picture.
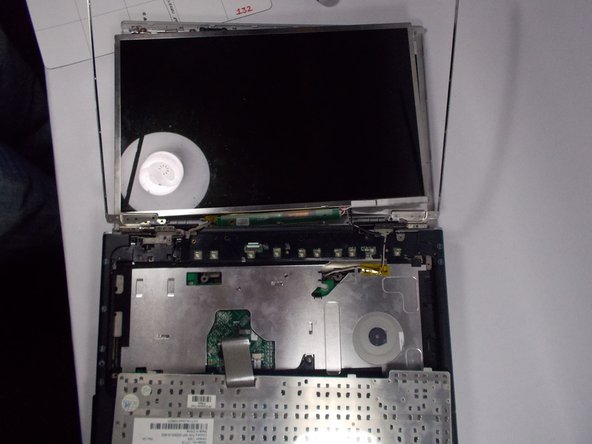
- Support the back cover and set it down on the desk. Do not pull off the back cover.
- Remove the screws on each side of the screen. There are four screws on each side.
- Remove the screen.