MacBook Pro 13" Retina Display Mid 2014 MagSafe DC-In Board Replacement
ID: 27846
Description: Use this guide to replace a faulty MagSafe...
Steps:
- Remove the following ten screws securing the lower case to the upper case:
- Two 2.3 mm P5 Pentalobe screws
- Eight 3.0 mm P5 Pentalobe screws
- Throughout this repair, keep track of each screw and make sure it goes back exactly where it came from to avoid damaging your device.
- Wedge your fingers between the upper case and the lower case.
- Gently pull the lower case away from the upper case to remove it.
- The lower case is connected to the upper case with two plastic clips near its center.
- During reassembly, gently push down the center of the lower case to reattach the two plastic clips.
- If necessary, remove the plastic cover adhered to the battery contact board.
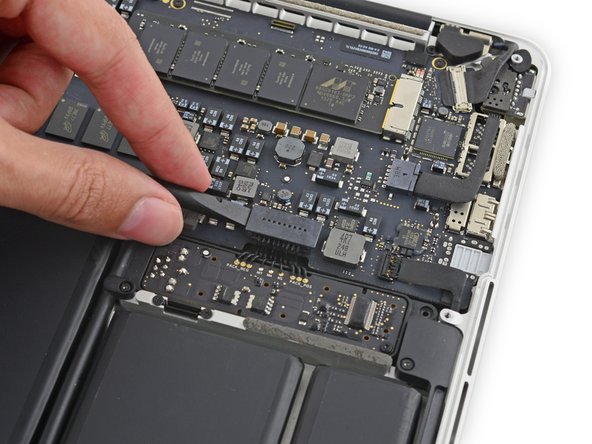
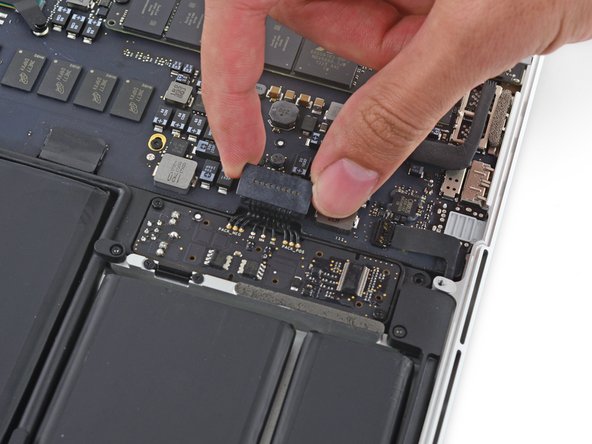
- Use the flat end of a spudger to lift the battery connector straight up out of its socket on the logic board.
- Be sure you lift up only on the connector itself, not the socket, or you risk permanent damage to the logic board.
- Bend the battery connector up out of the way to prevent accidental contact with its socket during your repair.
- Grab the black plastic tab to flip the display cable connector open and pull it straight out of its socket on the logic board.
- Pull in the direction of the cable, parallel to the logic board. Do not pull up.
- Pull the DC-In board connector straight out of its socket on the logic board.
- Remove the two 3.5 mm T5 Torx screws securing the MagSafe DC-In board to the upper case.
- You may need to gently push the display cable out of the way to expose the screws.
- Use the MagSafe DC-In board cable to pull the board out and up from the upper case to remove it.


