Nintendo GameCube Regional Modification Selector Switch
ID: 35482
Description: So, you bought a cool japanese import game for...
Steps:
- Turn over the Gamecube so that the bottom side is facing up.
- Use the 4.5 mm Gamebit screwdriver to remove all four screws.
- With the bottom side of the GameCube facing upward and the screws removed, carefully pull the outer shell of the unit away from the top half.
- Move the GameCube so that the inside is facing upwards.
- Gently press down on the clips located on either side of the back panel.
- Carefully remove the back panel from the GameCube.
- Unclip the controller ports at the front of the unit.
- A ribbon cable (outlined in orange) is still attached to the unit. Do not disconnect this cable.
- Controller ports are where the controllers plug into the game console, and are a half circular shape.
- This step may not be necessary depending on your end goal
- Use a Phillips #2 screwdriver to remove the two screws on the back of the control port.
- Carefully separate the gray outer casing of the control port and the circuit board.
- The left side of the unit contains the cooling fan and its housing.
- Carefully remove the two screws attaching the cooling fan housing to the unit.
- Do not detach the red and black cooling fan wire from the main unit. Boxed in orange.
- Remove the four Phillips #1 screws retaining the ground springs.
- Carefully remove the ground springs from the main unit.
- The optical drive is secured to a metal plate.
- Using a Phillips #2 screwdriver, unscrew the twelve screws that are around the outer edge of the optical drive.
- Carefully separate the optical drive assembly from the rest of the GameCube unit.
- The optical drive assembly is secured to the motherboard underneath by a slot; some force may be required to carefully free the assembly.
- The metal plate and the actual optical drive will remain attached.
- With the Optical Drive Assembly removed, your GameCube should now look like this.
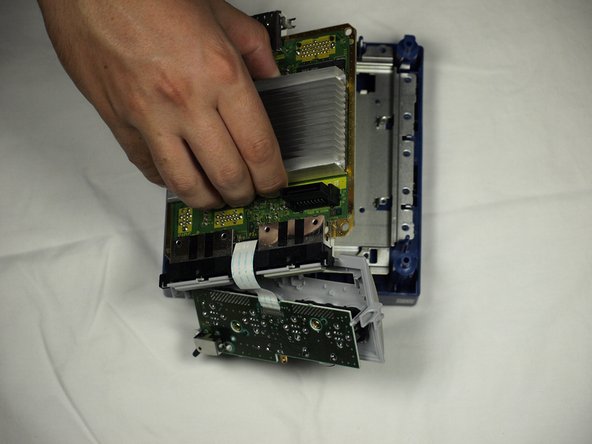
- Remove the 6 screws (circled in orange) on the heat sink using a #1 Phillips screwdriver.
- Gently lift the motherboard from base (as shown in second picture).
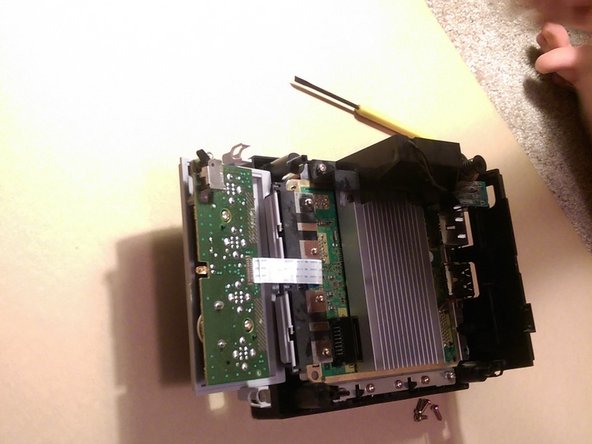
- Carefully disconnect the ribbon cable connecting the motherboard with the front panel.
- At this point you can replace the old motherboard with a new one and enjoy your now-functional GameCube!
- Locate the R5 and R6 pads.
- They are situated to the right of where the heat sink's back middle screw was. If you are working with an American system (like me), the R5 pads will be empty. On a Japanese console, R6 will be empty.
- Solder the wires to either side of the empty pad (R5 for American consoles, R6 for Japanese).
- US products are NTSC-U format, while Japanese NTSC-J. European models are PAL and are not addressed in this guide.
- Make sure that the wires are not soldered to each other. If they are, this will become a permanent change.
- When reinstalling the heat sink, I used a bit of electrical tape to avoid shorting the R5 connections.
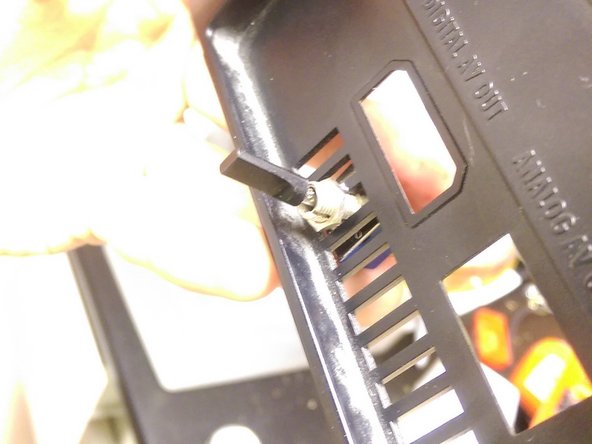
- Insert the switch. In this example, a slot was removed from the vent to allow a larger switch. Make sure your switch is firmly attached and that its position will allow it to fit into the system.
- Solder the two sides from the R pads to your switch. Attach one to either middle terminal and attach the other wire to the terminal above or below the other.
- Use a two pole double throw switch if you want to add an indicator light.
- Reassemble. Route the new wires so that they won't be pinched during reassembly and be sure they can't get pulled.
- Make sure you reverse the directions exactly or you'll find yourself doing steps over.