Oculus Rift Control Box Motherboard Replacement
ID: 35811
Description: The following guide will help you take apart...
Steps:
- Use a plastic opening tool to carefully pry off the four rubber feet from the control box.
- You have now revealed the four 9 mm Phillips #1 screws underneath the rubber feet.
- Use a Phillips #1 Screwdriver to unscrew the four 9mm Phillips screws on the bottom of the control box.
- You can now remove the bottom lid of the control box. It should come apart easily.
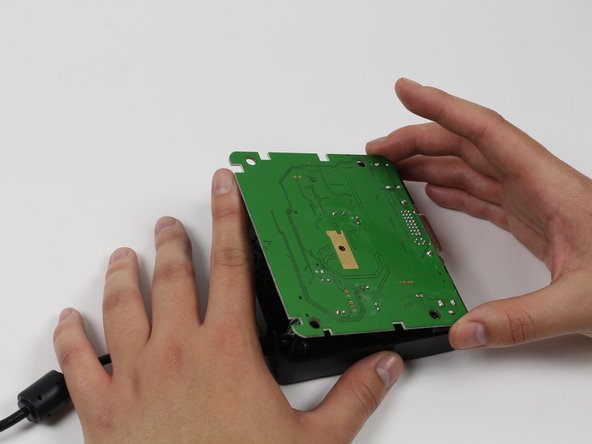
- Use your finger(s) to start lifting the motherboard from the control box casing. While doing so, use your other hand to push the DVI connector into the control box casing.
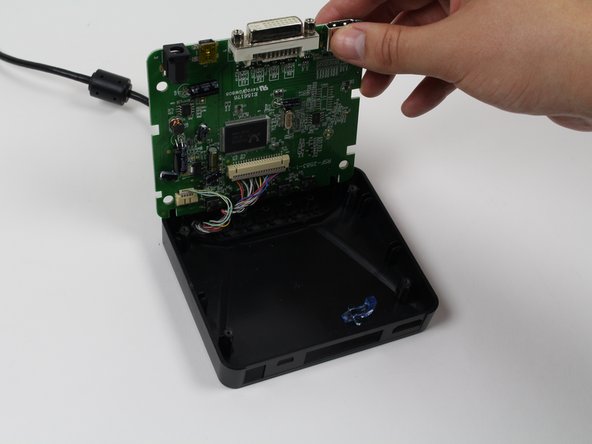
- When the DVI connector has cleared the casing, lift the motherboard.
- Be careful! There should be two sets of wires still connected to the control box - do not tug on them. Simply flip the motherboard over to access these wires.
- When reassembling the device, ensure that all of the wires are clear of the buttons.
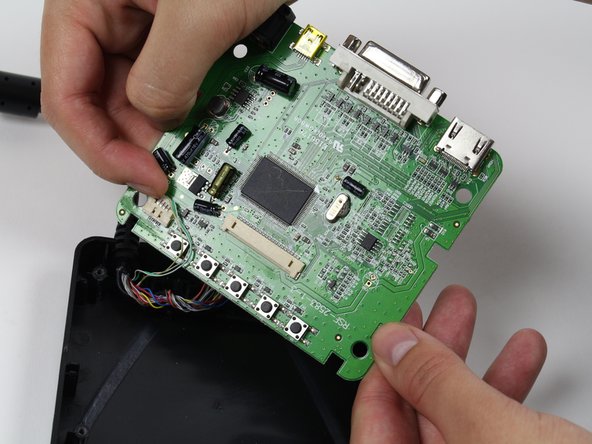
- Use a plastic opening tool or your fingernails to disconnect the grey wire connectors. To make removal easier, pry the left and right edges to carefully remove the connector.
- Do so for both of the wires attached to the motherboard.
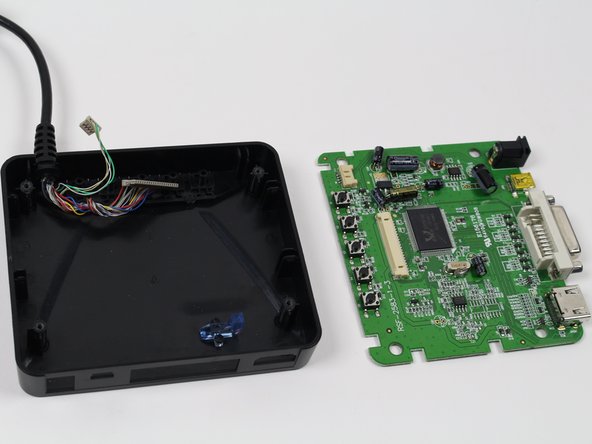
- Now fully separate the motherboard from the control box casing.