HP Probook 6450b Fan Cleaning & Thermal Paste Replacement
ID: 37688
Description: Is your laptop constantly overheating and...
Steps:
- Shut down your laptop completely.
- Do not simply power off your computer using the power button. This will put the laptop into sleep mode. Instead, shut down the laptop from the start menu.
- Unplug the charger cord and all devices connected to the computer.
- Flip the laptop over and locate the battery compartment release latch.
- Slide the release latch to the left to release the battery.
- Remove the battery.
- Electrostatic shocks can damage the internal components of the computer.
- Press and hold the power button for a minimum of 10 seconds to allow electric charge to dissipate from the motherboard and internal components.
- Optional: You may also wear an anti-static bracelet during the repair as a safety precaution. This grounds you to the computer chassis and prevents accidental static discharge from your fingers.
- Locate and loosen the 3 Phillips PM 2.5 x 11.0 screws on the bottom side of the computer.
- Flip the laptop right side up and open the screen.
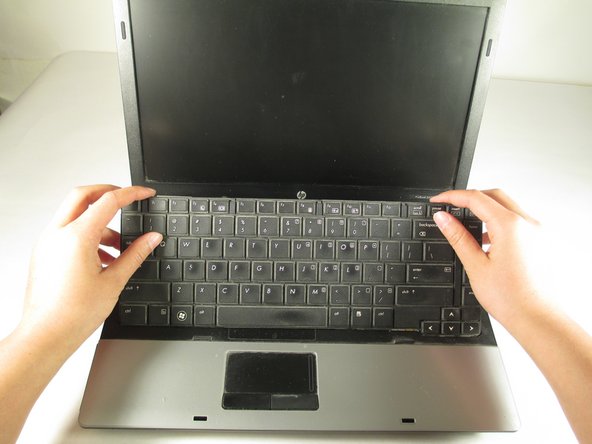
- Locate the 4 keyboard tabs. Slide the tabs towards you.
- Lift the keyboard by the upper edge, then flip it over so the ribbon cable is exposed.
- Do not attempt to remove the keyboard until the ribbon cable has been disconnected.
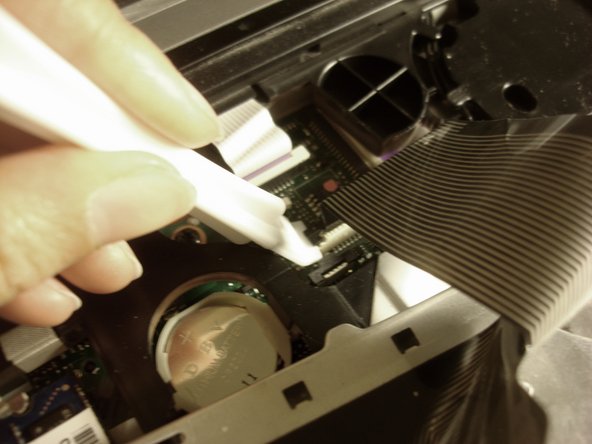
- Lift both ends of the plastic tab securing the ribbon cable to the system board with the help of a spudger.
- If you don't have a spudger, any plastic item with a thin edge, like the plastic opening tool pictured here, will work just as well. Guitar picks are also a good alternative.
- Remove the keyboard ribbon cable and set the keyboard aside.
- Close the laptop and turn it upside down.
- Remove the 3 PM 2.0 x 3.0 screws securing the switch cover.
- Flip the laptop right side up, and open the display.
- Locate the LED board ribbon cable. Lift both ends of the plastic tab securing the ribbon cable to the system board.
- Slide out the LED board ribbon cable.
- Remove the switch cover.
- You may need to use the spudger or opening tool to pry open the switch cover. It is easiest to start from the top edge, closest to the screen.
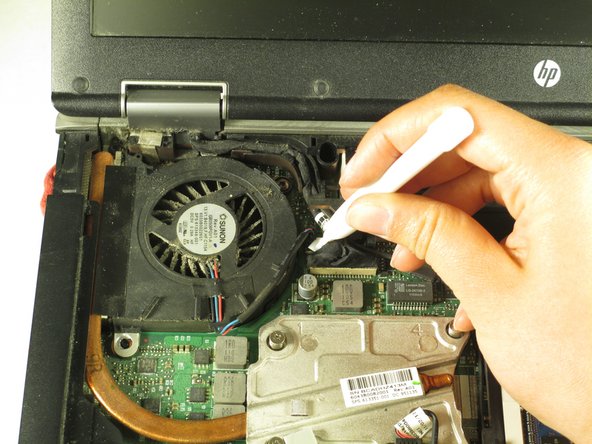
- Locate and loosen the 2 slotted Torx T8M 2.5 x 7.0 screws securing the fan to the motherboard.
- Disconnect the fan cable from the board.
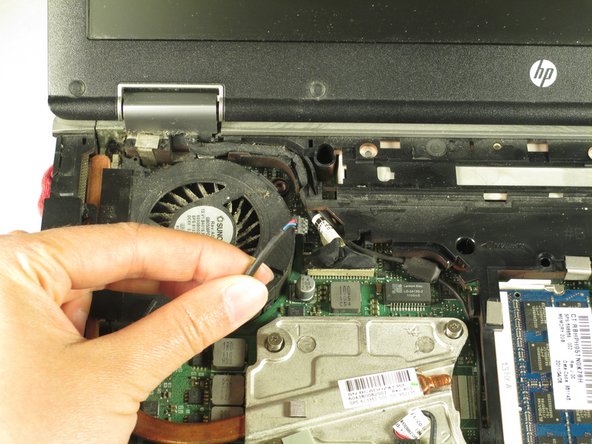
- Lift out vent fan.
- Clean the dust from the fan with a small brush and/or compressed air.
- When using compressed air, avoid tilting the bottle greater than 40 degrees from vertical. Doing so will cause the part and your hand to rapidly cool.
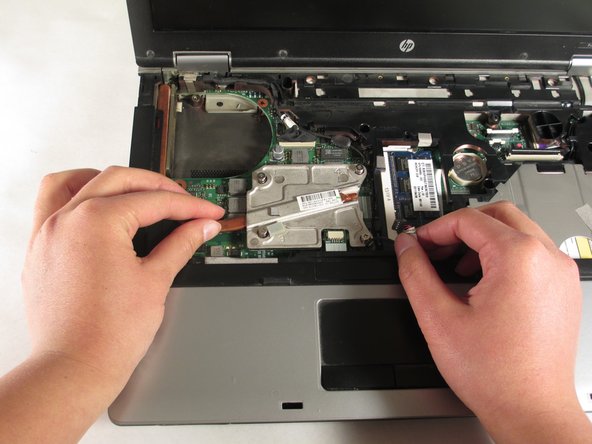
- Locate and loosen the 4 Phillips PM 2.5 x 9.0 screws securing the heat sink.
- You may wish to disconnect the cable adjacent to the heat sink, to make removal easier.
- The thermal paste may have stuck the heat sink to the motherboard. Gently jimmy the heat sink back and forth until it is loose.
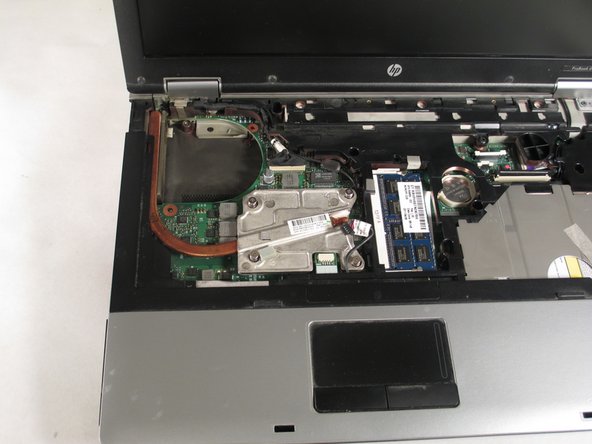
- Extract the heat sink.
- Remove dust trapped in the heat sink vent with compressed air and/or a small brush.
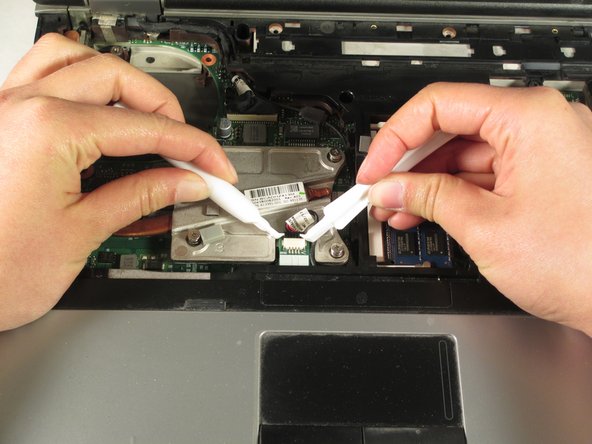
- Remove the old thermal paste from the heat sink and the CPU with a lint free wipe or cotton swab dipped in rubbing alcohol.
- Allow the rubbing alcohol to dry completely.
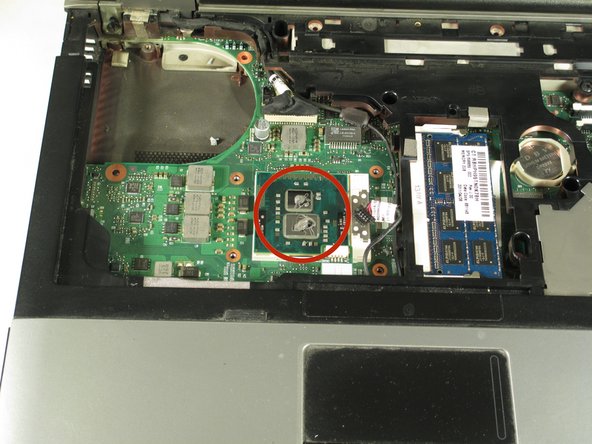
- Squeeze a small quantity of thermal paste onto the component's surface. The gobs should be about the size of a grain of rice.
- Reinsert the heat sink into the laptop. Tighten the screws to secure it into place.