Nintendo Wii mini Motherboard Replacement
ID: 37774
Description: This guide details the replacement of the...
Steps:
- Remove the two rubber feet at the back of the console to reveal the hidden screws.
- Remove the four 6mm Phillips #0 screws.
- Turn the Wii mini right-side up. Then run a plastic opening tool around the middle edge of the console to loosen the top piece.
- Gently lift the top piece of the console and set it aside.
- Turn the Wii mini around so that the back of the device is facing you.
- Using a Phillips #0 Screwdriver, unscrew the two 6mm screws on either side of the fan piece.
- You may need to use tweezers to pull out the screws once they are loosened.
- Using your fingers, gently pull the top of the pin connector straight up to detach the fan from the console.
- Do not wiggle the connector or cable while removing. This may cause the connector to come loose
- Remove the fan piece and set it aside.
- Using your fingers, slide out the blue ribbon cable from the the top of the power board.
- Using a Phillips #0 Screwdriver, unscrew the two 4mm screws at the top and bottom of the power board.
- Using your fingers, gently pull the pin connector to disconnect the power board from the disc drive.
- Lift the power board from the console and set it aside.
- Using a Phillips #0 Screwdriver, unscrew the four 6mm screws.
- Lift the disc drive out of the console and set it aside.
- Using a Phillips #0 Screwdriver, unscrew the 6 mm screw at the top of the black tray.
- Using your fingers, pull the black plastic tray toward you to loosen it from the console.
- Make sure the black square pieces are separated from the metal square pieces before trying to lift out the tray.
- Once separated, lift the plastic tray out of the console and set it aside.
- Trying to remove the tray before it is completely loosened may result in damage to the metal square pieces.
- Using a Phillips #0 screwdriver, remove the eleven 5 mm screws holding the silver metal plate to the console.
- These screws are indicated by small arrows on the metal plate. (See Photo #2)
- Lift out the metal plate and set it aside.
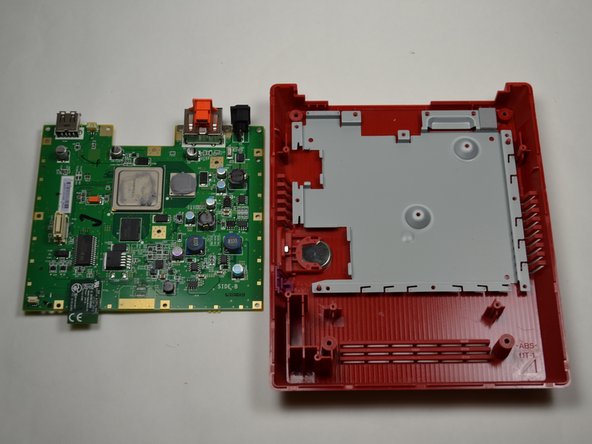
- Lift out the motherboard and set it aside.