iPhone 5 Display Assembly Replacement
ID: 37793
Description: This repair is for an Apple iPhone 5. This...
Steps:
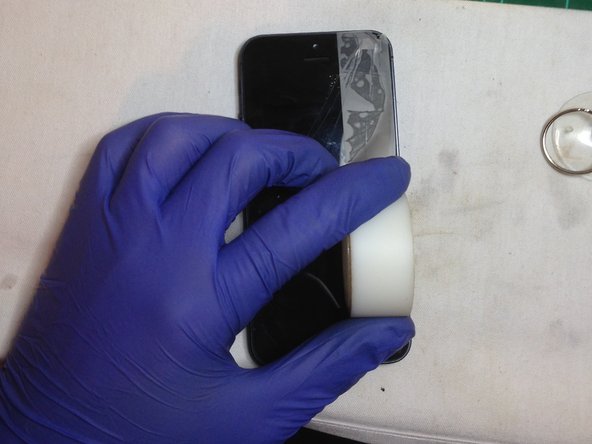
- If your display is cracked, keep your eyes and skin protected. Wear Safety glasses to protect your eyes and wear latex or nitrile gloves to protect hands from shrapnel (Make sure you are not allergic to the material of the gloves.).
- Laying clear packing tape over the broken glass until the whole screen is covered. Doing this can prevent any injuries or glass from being scattered on the table.
- Before removing the Display assembly, be sure to power off your phone. This can prevent power shortages.
- Take the 5-Point Pentalobe screwdriver to remove two 3.6 mm Pentalobe screws next to the Lighting Connector (Charging Port).
- An X-acto blade will be used for this step. Take immense caution when using the blade. Always cut away from you.
- Extend the blade 2mm from closed position.
- Place blade between the display assembly and the phone housing.
- Push down between the display assembly and the phone housing until you see a gap. Once you see the gap, pry up using the blade to keep the gap.
- Now that there is a fixed gap, use your plastic pry tool to pry around the display assembly, to separate the screen from the phone.
- If you hear clicks, that means the display bezel is un-clipping from the phone, which is good.
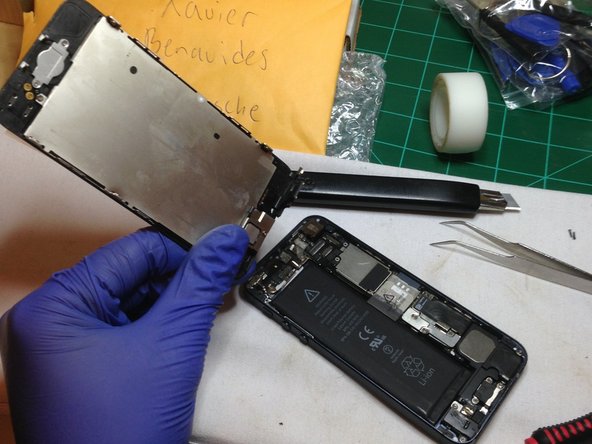
- Gently lift the display assembly away from the phone, and make a 90 degree angle with respect to the horizontal.
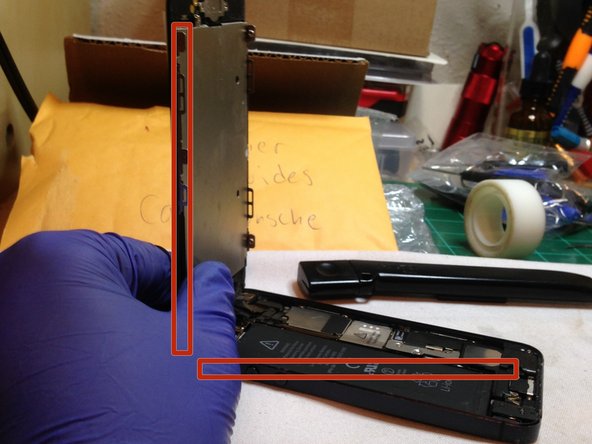
- Locate the Connector Protective plate, it is at the top right of the phone. Along the side of the power button.
- Take your #000 Phillips head screwdriver to unscrew three Phillip screws holding the Connector Protective plate to the logic board.
- Once all the Phillips screws and removed, remove the Connector Protective Plate from the phone.
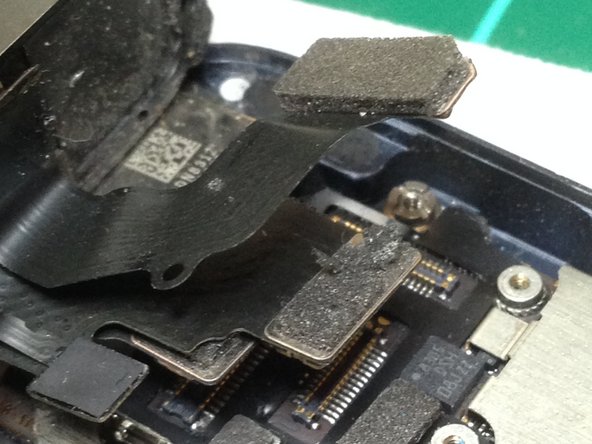
- Locate three cables that link from the back of the display assembly to the logic board.
- Slowly, remove each cable with pliers.
- Now that the three cables are disconnected, remove the old Display Assembly and store it safely.
- Using compressed air specifically for electronics, blow away any dust and trash from the phone.
- Perform everything in reverse with the new Display Assembly.