Hamilton Beach 25460Z Top Heating Element Solders Replacement
ID: 37800
Description: This guide requires you to solder. If you are...
Steps:
- Unplug your device before proceeding with disassembly.
- On the back of the press, remove the locking washer by prying upwards with the nylon or metal spudger tool.
- Repeat for the other washer across from the first one.
- Using any long, thin object, push the 43mm bolt from the inside towards the outside to expose the end of the bolt.
- Pull the end of the bolt out to completely remove it.
- Repeat for the second bolt.
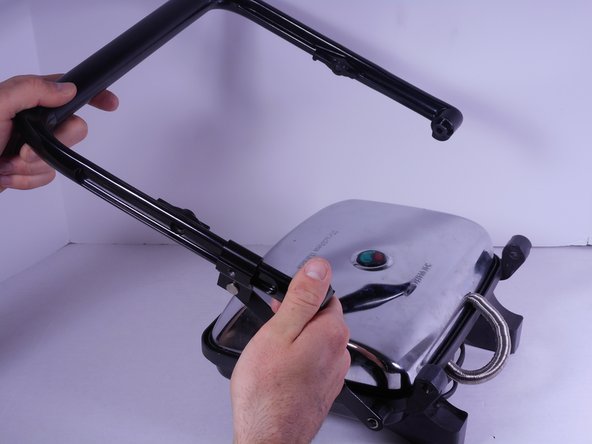
- Using the 4.0mm Allen Wrench, unscrew the two 26mm bolts connecting the handle to the upper heating element housing on both sides.
- Unscrew the locking knob all the way to remove it.
- Slide the locking knob couple down to the base of the handle, then pull up on the free end of the handle. It will easily pop off.
- Gently separate the heating element housing from the cooking surface by pulling up on the housing and pushing down on the surface.
- Pulling too far or too hard can break the delicate internal wiring.
- On the underside of the housing, use the PH2 Screwdriver to remove the single 12mm screw to disconnect the LED tray.
- The housing can now be completely removed.
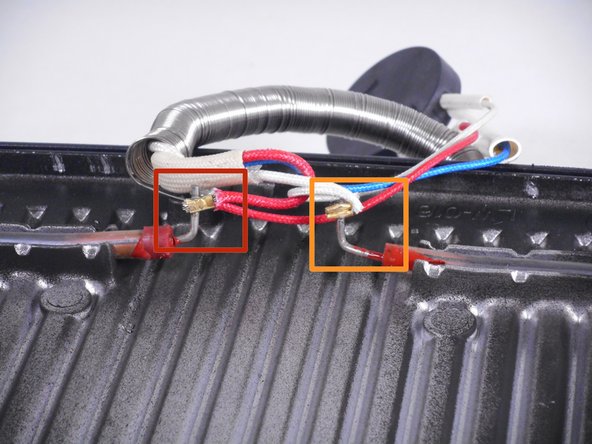
- The left lead needs to be connected to the two red wires.
- The right lead needs to be connected to the two white wires.
- One or both of the leads can have damaged solder, resulting in poor connections between the lead and the wire ends.
- De-solder the existing solder joints on the lead(s).
- Solder the wire ends back to their corresponding leads.
- Refer to this page if you need to brush up on your soldering skills.