Kindle 7th Generation Battery Replacement
ID: 37825
Description: Having battery issues that require replacement?...
Steps:
- Power off your Kindle before beginning disassembly.
- At each corner, use the blue plastic opening tool to unhook and separate the front panel from the adhesive.
- Run the tool along the seams to pry open the front panel.
- Peel the front panel off to remove it from the Kindle.
- If this is the first time the front panel has been removed, the adhesive may require a significant amount of force to undo.
- To prevent damaging the front panel, peel the panel from the corners towards the middle of the Kindle.
- When reassembling your device, if you are replacing the front panel, additional adhesive may be required.
- Remove the ten 5.0 mm T5 Torx screws.
- A magnetized screw mat can help you keep track of your screws.
- Working evenly along the corners and edges, separate the internal contents from the back panel.
- There are many clips securing the screen to the back panel. Force will be required to remove the back, but you should never feel that the Kindle may break.
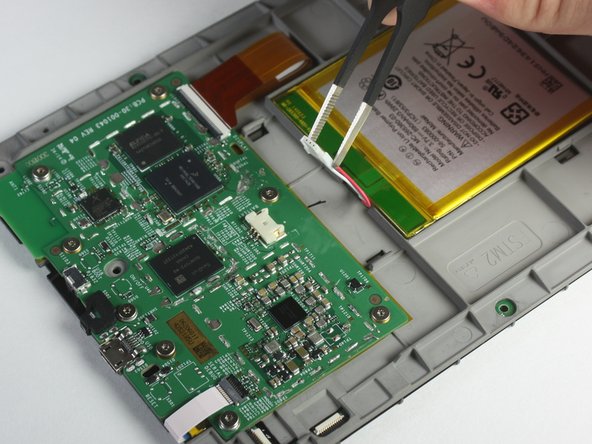
- Flip the Kindle over, exposing the battery and motherboard.
- Use the blunted precision tweezers to pinch the ends of the clip securing the battery cord to the motherboard.
- Gently slide the cord from the motherboard connection.
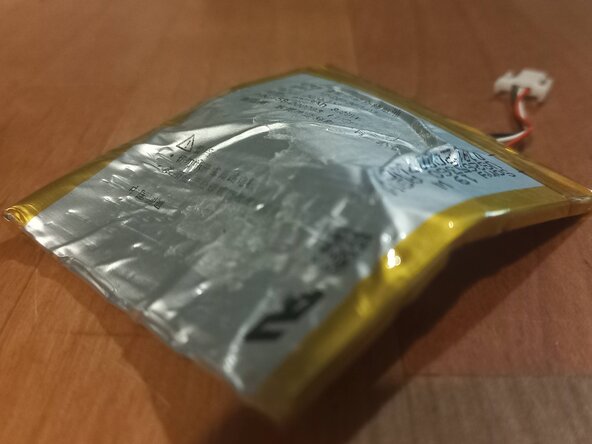
- Use the plastic opening tool to pry the battery from the backside of the screen.
- Set the battery aside.
- The battery has excessive adhesive so this may take some extra effort. See picture of battery deformed by prying tool during removal.
- If replacing your battery, safely dispose of your damaged battery and use adhesive to insert the new battery.