Altec Lansing inMotion iM9 iPod Dock Replacement
ID: 37915
Description: The iPod Dock is the part of the speaker that...
Steps:
- Gently push down on the two tabs at the top of the battery door.
- While holding them down, slowly pull the door towards you.
- Once the door is open, use your hand to pull out the four batteries.
- Pry off the control panel on top of the speaker using the metal spudger. You may need to use a lot of force.
- Start in the middle and work your way around the perimeter.
- Using a Phillips #1 screwdriver, remove the two 7mm screws that hold the volume button circuit board to the control panel.
- Also remove the single 7mm screw from the power button circuit board on the opposite side.
- There will be a little plastic piece under the eject button that you can just remove and set aside.
- Desolder the three solders joints connecting the wires to the volume button circuit board.
- Do the same to the power button circuit board on the other side (the board with only one screw).
- Pull out the wires using a lot of force.
- If you are not familiar or comfortable with soldering, use this guide
- Gently pry open the silver plastic lining of the iPod dock using the plastic spudger.
- It is best to start from the top or bottom, then work your way around if it has not popped out yet.
- Remove the silver lining.
- Pry open the metal mesh by working the plastic spudger around the inside of the mesh.
- Once loose, lift up the metal mesh.
- Remove the fourteen 30mm screws with Phillips #1 Screwdriver.
- Remove the 7mm screw with the Phillips #1 Screwdriver.
- Carefully separate the front and back case plates at a corner of the speaker.
- Lots of cables are still connected, so be very gentle when separating case plates.
- Guide the white button cables through the hole on the top of speaker case.
- Use your fingers to peel the glue off of the red and black cables.
- Careful not to touch the green capacitors or you might shock yourself.
- Using a Phillips #1 screwdriver, remove the two 7mm screws from the filter.
- Repeat the previous step on the other side of the speaker. There are two more 7mm screws on the filter mirroring the first.
- Don't touch the green capacitors; you might get shocked.
- Don't touch the green capacitors. They might shock you.
- Using the Phillips #1 screwdriver, remove the four 10mm screws from the corners of the motherboard.
- On the back side of the motherboard, pry out the connector to the filter using the plastic spudger. You will have to use a lot of force.
- Pry out the second connect to the filter similarly.
- Desolder the two battery connections from the motherboard.
- Do not touch capacitors to avoid being shocked.
- Use the pointed end of the plastic spudger to pry the glue off of the iPod dock. You will probably have to use some force.
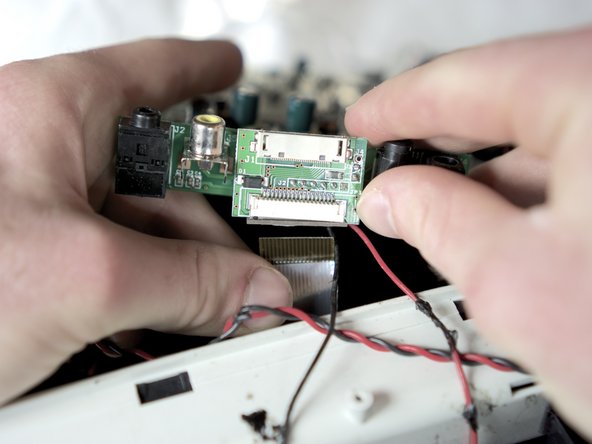
- Unlock the ribbon cable dock by pressing down on the two tabs at the bottom of the dock.
- Detach the copper ribbon cable by gently pulling it down, freeing the motherboard completely.
- To remove the iPod Dock, unscrew the four 8mm screws located on the corners of the dock casing using the Phillips #1 screwdriver.
- Remove the iPod Dock from the speaker.