Hamilton Beach 25460Z Bottom Heating Element Solders Replacement
ID: 37951
Description: This guide requires basic soldering skills and...
Steps:
- Unplug your device before proceeding with disassembly.
- Remove the four 14mm screws from the bottom of the Panini Press using the T10 Screwdriver.
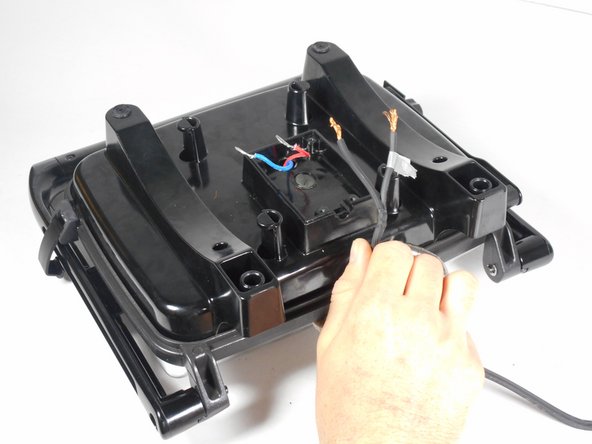
- Lift up the plastic cover to expose the plug wiring.
- Mark the plug wire connected to the red wire with a piece of tape. This will be used as a reference for reassembly.
- Use the pliers to pinch the widest point of the cap. This should be done opposite of the already existing crimps.
- Slide off the white cap.
- Repeat these steps for the second white cap.
- Remove the two rubber screw covers from the bottom of the Panini Press.
- Remove the four uncovered 10mm screws with the PH2 Screwdriver.
- Lift the plastic lower heating element up and place to the side for reassembly. You have now disconnected the plug wiring completely.
- Using the PH2 screwdriver and a bit of force, remove the two 10mm screws holding the thermal switch to the cooking surface.
- These screws may be difficult to remove.
- Using the PH2 screwdriver, remove the single 10mm screw connecting the red wiring cover to the cooking surface.
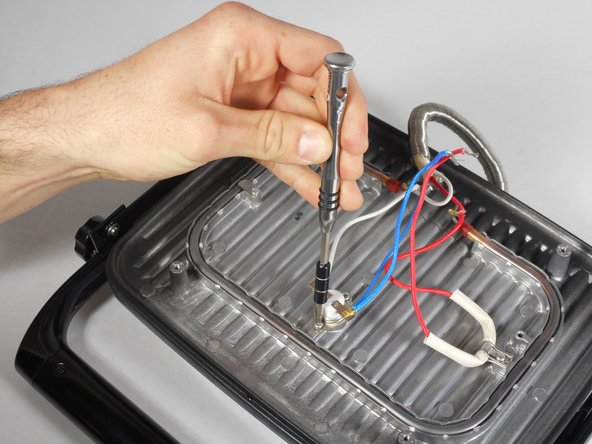
- Now pull both the thermal switch and the red wire to the back of the press, allowing easier access to the heating element leads.
- Replace the missing solder.
- The left lead, marked with a red circle, is connected to 2 white wires.
- The right lead, marked with a yellow circle, is connected to 2 red wires.