How to Repair a Headphone Jack
ID: 40579
Description: Ever have that problem where you have to hold...
Steps:
- Get all of the tools and parts together and ready for use.
- Use wire strippers to cut off the broken headphone jack.
- Be careful when using the wire strippers. Handle them like you would with scissors. Keep the cutting end away from your body.
- Disassemble the new headphone jack.
- Measure the inside length of the new headphone jack.
- Add half an inch to the length you measured, and mark the new length on the old headphone wire.
- Clamp the wire strippers around the wire where the mark is. Press tight enough to cut through the insulation but not the wire. Pull (Strip) the insulation from the mark to the cut end.
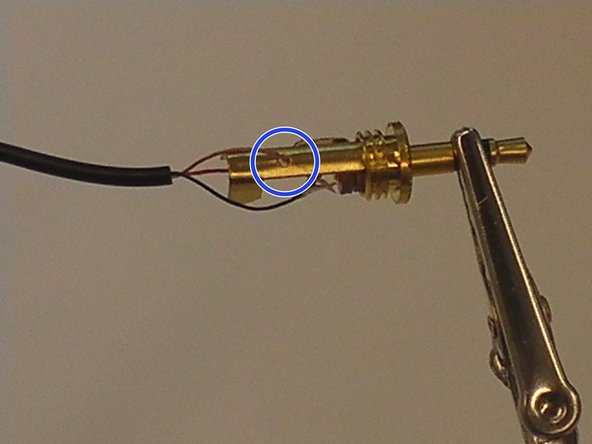
- Put the exposed cord through the metal and plastic sleeves of the jack, as shown.
- Separate the wires by color. Make sure that they are not touching.
- Place the jack in the helping hands stand.
- Solder the ground wire to the bottom terminal.
- Check out this awesome guide on How To Solder and Desolder Connections.
- Solder the green wire to the left terminal.
- Solder the red wire to the right terminal.
- The soldering iron is hot. It may cause severe burns if it comes in contact with skin.
- Push the plastic sleeve back over the jack to cover the solder points.
- Apply electrical tape if desired.
- Push the metal sleeve over the plastic sleeve and connect to the jack.
- Test the headphone by plugging it into a computer or music playing device.
- If there is adequate sound coming out of both headphones then you have successfully repaired the headphone jack. If not, take the sleeve off and check if the soldering points are still connected and nothing has broken off.