Kinivo ZX100 Mini Portable Speaker LED Indicator Replacement
ID: 40806
Description: If you can only rely on your Kinivo ZX100 Mini...
Steps:
- Open the circular portion at the top of the speaker by twisting it until it reaches the maximum possible height.
- Make sure it is twisted fully, as this will allow access to four screws to be removed in the next step.
- Remove the four 12 mm Phillips screws from the enclosure.
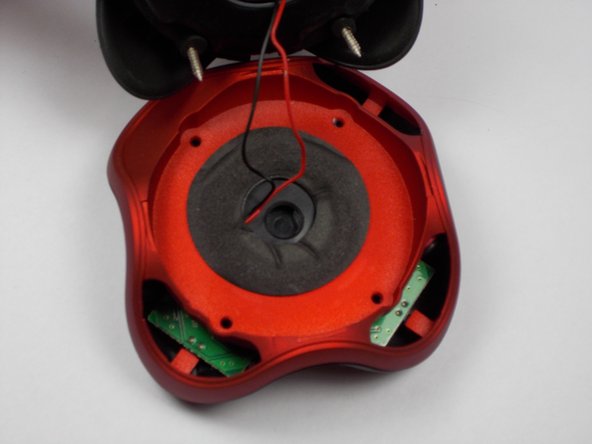
- Separate the resonator portion from the base of device to reveal the middle separator of the enclosure. The enclosure will now be in two pieces.
- Hold the resonator portion of the enclosure gently aside to make sure there is no tension on the black and red wires coming from the bottom portion of the device.
- Excessive force may disconnect the black and red speaker wires from the circuitry in the bottom portion of the device.
- Separate the very bottom portion of the enclosure (marked in red) by pulling vertically on the red portion of the enclosure (marked in orange).
- Gently set the very bottom portion and the resonator section aside once they have both been separated.
- Remove the circuit board with your hands by lifting and sliding the board away from the LED indicator.
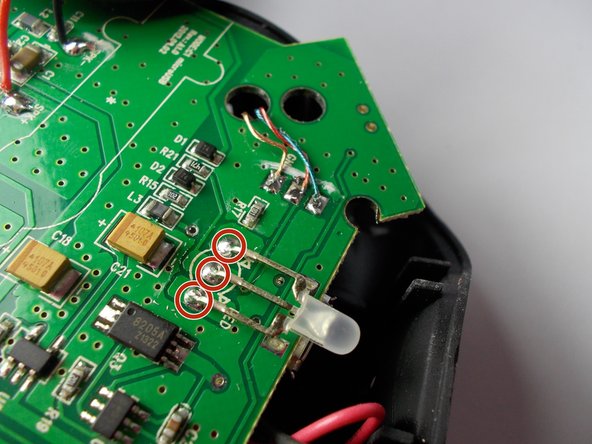
- LED Locating
- Locate the three, metal prongs found near the edge of the circuit board. They are found directly behind the LED light.
- Soldering
- If you are not familiar with the process of soldering, please refer to an online manual.
- Heat the soldering iron to operating temperature.
- Avoid touching the heated tip of the iron to ensure that you do not burn yourself.
- Prong Removal
- The picture in this step calls for speaker wire, but it can also be applied for the removal of each prong.
- Remove a single prong by pulling it directly up from the circuit board using tweezers.
- Repeat the previous until all three prongs have been removed.
- Replacement
- Obtain a new LED component from a manufacturer.
- Perform the steps in reverse order to reconnect the new LED to the circuit board.