Logitech K750 Keyboard ML2032 to CR2032 Battery Conversion
ID: 49181
Description: NOTE: You can now buy ML2032 batteries online,...
Steps:
- Before you begin, flip the keyboard's power switch into the OFF position.
- Flip the entire keyboard over, keys facing down.
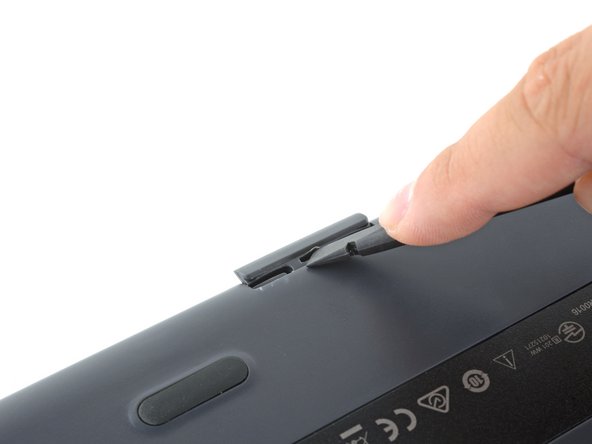
- The ML2032 rechargeable coin cell battery is located in a tray at the back edge of the keyboard.
- Insert the flat end of a spudger into the gap between the battery tray and the top surface of the keyboard.
- Pivot the spudger down, towards the top of the keyboard, to begin to pry the tray out of its cavity.
- Use the flat end of the spudger to push the battery tray out and away from the keyboard.
- The tray is held in by small "ears" and may take a significant amount of force to dislodge.
- If you're having trouble, use the end of a spudger or a flat blade screwdriver to "walk" the tray out, pushing on alternating sides instead of directly in the middle.
- Remove the battery tray.
- During reassembly, firmly push the battery tray into its slot until it clicks into place.
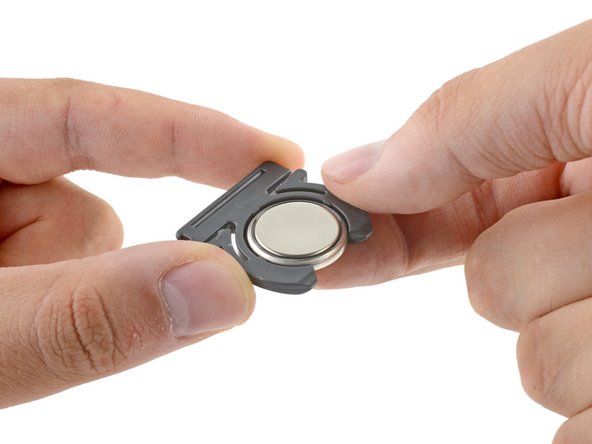
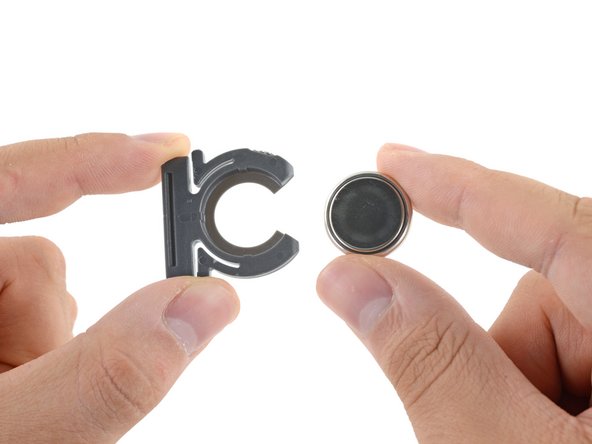
- Push the battery out of the tray to remove it.
- Note the battery orientation—it can only go in one way. Set the battery into the tray with side with the text and the "+" sign facing down.
- Use only a rechargeable ML2032 coin cell battery as a replacement. Although it's the same size and shape as the more common CR2032, CR2032s are not rechargeable.
- Steps are described in this guide Logitech K750 Keyboard Battery Replacement. Turn off the keyboard before removing the battery.
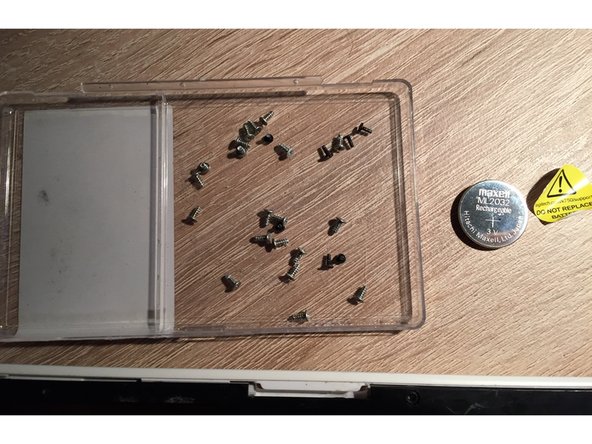
- ML2032 battery can be dangerous so be carefull. For more details read Maxell Safety Data Sheet and Maxell Safety Instructios.
- For more information about ML type bateries read this Lithium Manganese Dioxide Rechargable Battery.
- Trash old ML2032 battery in special container!
- You can just simply cover both solar panels with some thick black tape (like electrical tape) and then continue to the step 10. If you decide for this you need to make sure (this is really important!) that your Solar app is showing zero energy received from the solar panels (CL2032 can not be recharged)!
- Or you decide for 100% working but more complicated solution which involves peeling off keyboards plastic top deck (it covers screws) and desoldering wires form the solar panels. Your keyboard cover might not stick back as good as it was. In this case continue to the next step.
- Be careful to not crack the plastic deck. Don't pull it off hard.
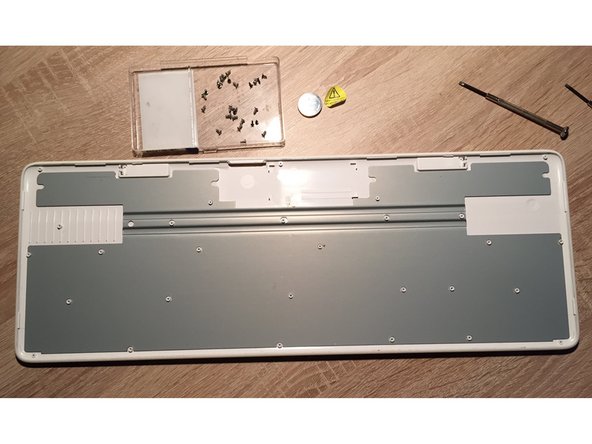
- Remove the seven black Phillips screws.
- Remove the 22 silver screws.
- Your model may only have 21 silver screws.
- Put the screws somewhere into the bowl to not lose them and try to remember the position of the black ones.
- Unclip the back pannel from the front (keys) pannel.
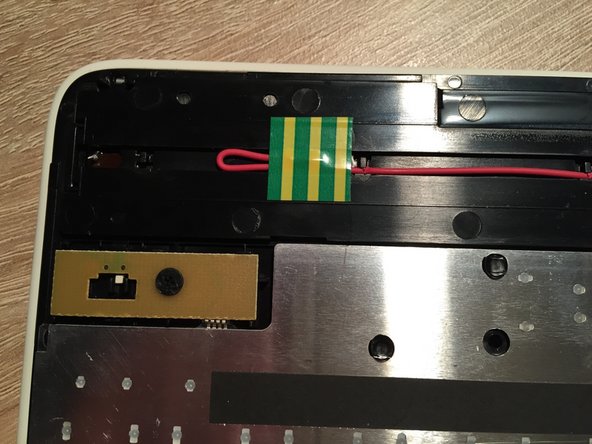
- When you flip the (keys) pannel you can notice that both solar panels have a pair of cables.
- I have decided to desolder the long cable (red and green one) because they are far away from the logic board so I will not transfer heat to it while desoldering them.
- Tape desoldered cables so they do not come in contact with anything.
- Insert fresh CL2032 battery in the battery compartment - check the polarity a close battery tray.
- Note: your Solar app will be showing zero energy because there is not power coming from the solar panels to the logic board.