Vtech InnoTab 3S Buttons Replacement
ID: 50090
Description: Are the buttons no longer working on your...
Steps:
- While holding the battery compartment locks down, slide the two battery doors outwards from the sides of the device.
- Remove the batteries from the device.
- Remove six 7 mm screws from the interior of the battery compartment using a Phillips #1 screwdriver.
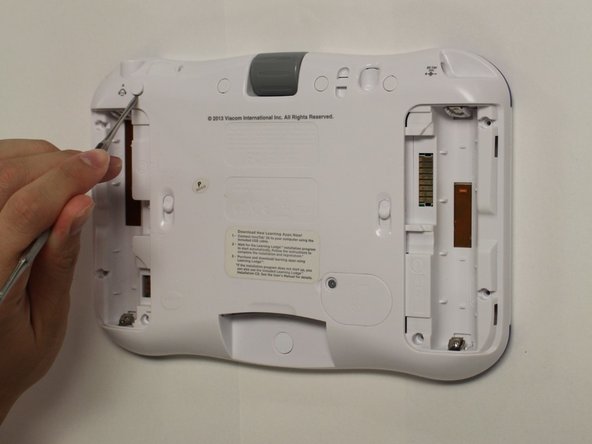
- Using a nylon spudger, remove the five caps that hide the screws.
- Potential for device damage: Be careful not to scrape the plastic from the device using the spudger.
- When removing the caps, hold the spudger vertical to the board to make removal easier. Also try to push in with your spudger pointing towards the bottom of the device.
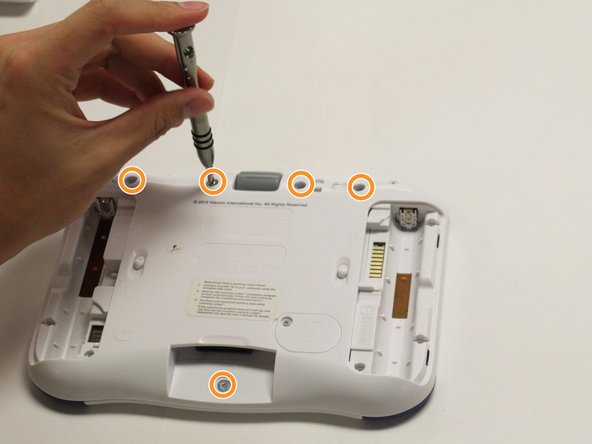
- Remove the five 5 mm Phillips #1 screws from the rear panel of the device.
- Carefully remove the rear panel from the front panel of the device.
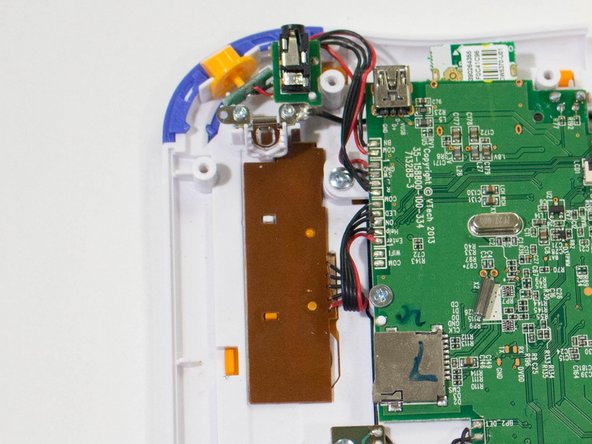
- Once the rear panel is removed, you'll be able to see the motherboard and other components within the Vtech InnoTab 3s.
- The buttons on the InnoTab 3S are located in three areas. One on the left side of the tablet, one on the right side of the tablet, and on in the middle towards the bottom of the tablet.
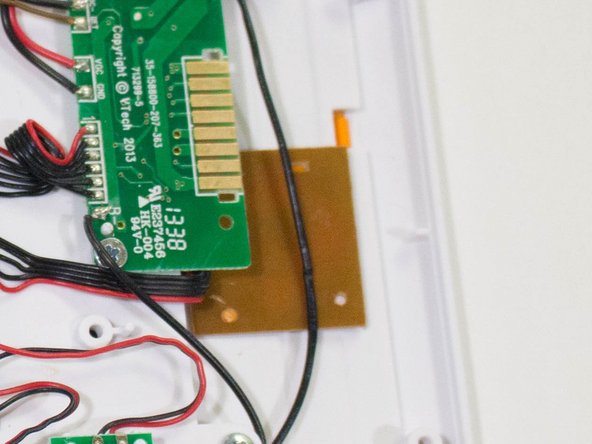
- Using a Spudger, gently lift the brown squares located on the left and right sides of the tablet to gain access to the buttons.
- Replace the malfunctioning buttons and lower the brown squares back into place to secure the buttons to the device.
- Unlike the other two buttons, the buttons located in the middle towards the bottom of the device can not be accessed without further dismantling of the device.
- Remove the motherboard to access the lower buttons. To remove the motherboard please see our Motherboard Guide
- Now that the motherboard is removed, use a Spudger to gently lift the brown square at the bottom of the device.
- Replace the malfunctioning buttons and lower the brown square back into place to secure the buttons to the device.