Garmin Nuvi 50LM Charging Port Replacement
ID: 52104
Description: The motherboard is the lowest replaceable unit,...
Steps:
- Place the device on a flat surface with the LCD touchscreen face down.
- Remove the four 9 mm screws on the back of the GPS with the Torx T-4 screwdriver set.
- Use the iFixit Plastic Opening Tool to separate the front cover and the rear cover on all four sides.
- Be careful not to damage the orange ribbon cable while opening the device.
- Remove the two 0.5 cm screws using the T4 Torx screwdriver attaching the motherboard to rear cover of the GPS unit.
- Unplug the battery from the motherboard.
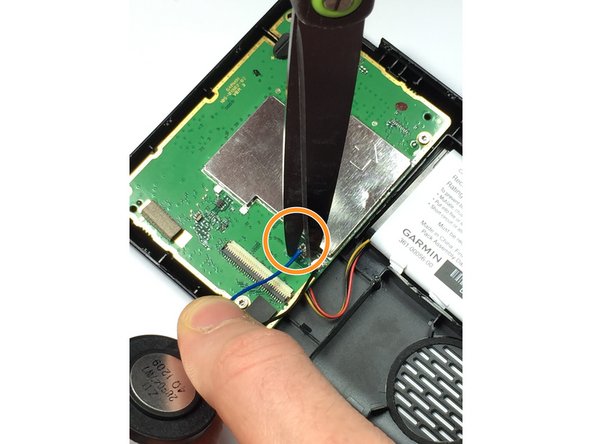
- Use a pair of wire cutters to cut and separate the black speaker wire from the motherboard.
- Use a pair of wire cutters to cut and separate the blue speaker wire from the motherboard.
- To reattach the new speaker, you must use a soldering iron to solder the speaker cables to the motherboard.
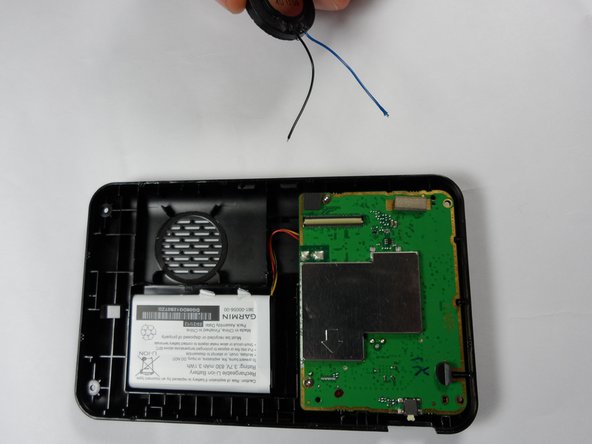
- Use your fingers to remove the motherboard from the rear case of the system.
- Place the replacement motherboard in the navigation system, and solder the speaker cables on the replacement motherboard.
- Solder the black wire to the motherboard.
- Solder the blue wire to the motherboard.
- The soldering iron is extremely hot, so use prudence when working with the soldering iron.
- The black speaker wire is the wire closest to the battery.