Braven BRV-1s Motherboard Replacement
ID: 52142
Description: Learn how to properly open the Braven BRV-1s...
Steps:
- Using a 0mm Philips Head screwdriver, unscrew the four 0.9mm screws located on the bottom of your device.
- Take a metal spudger and insert it into the bottom seam.
- Work the spudger around the bottom seam making sure that bottom of the speaker is no longer glued onto the rest of the speaker.
- Pry upward on the spudger until the bottom of the speaker is removed.
- This is very difficult. Be sure to pry with care and avoid prying towards yourself. You will want to pry away from yourself in case the metal spudger suddenly becomes loose.
- Underneath the bottom of the case you will find the speaker driver, also known as a woofer.
- Using a 0mm Philips Head screwdriver, unscrew the 0.6mm 10 screws located around the outside of the woofer.
- This area is glued down as well. Use a heat pad or other heating device if needed.
- Insert the metal spudger between the seam of the woofer.
- Work the spudger around the seam to loosen the woofer and get rid of excess glue.
- Pull upward on the woofer until it is removed.
- Remove the foam padding located in the Braven BRV-1s.
- Using a 0mm Philips Head screwdriver unscrew the three 0.6mm screws on the motherboard.
- Push the motherboard via the outer auxiliary ports out of the speaker.
- You may wish to use a tool to push the circuit board out via one of the auxiliary ports.
- Soldering irons get extremely hot. Be sure to wear proper protective wear and keep it away from exposed skin while it is turned on.
- Turn your soldering iron on to high.
- You may wish to use a heat gun to melt any excess glue that may be holding the wires down.
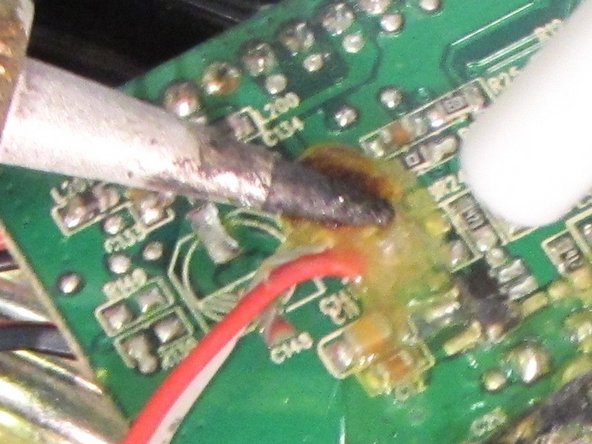
- Using the soldering gun, desolder the wires off the motherboard.
- You can also just pull up this circuit board carefully; it is easier if you scrape off the glue that is holding it to the posterior frame (arrow)
- Once you have soldered off the wires, remove by pulling upwards.