Bose SoundLink Mini Speakers Replacement
ID: 52239
Description: This guide will assist you in replacing the...
Steps:
- Peel back the rubber battery cover and remove the four circled 6.0 mm screws using a T8 Torx Screwdriver.
- While holding the cover back, pull straight up on the battery to remove it.
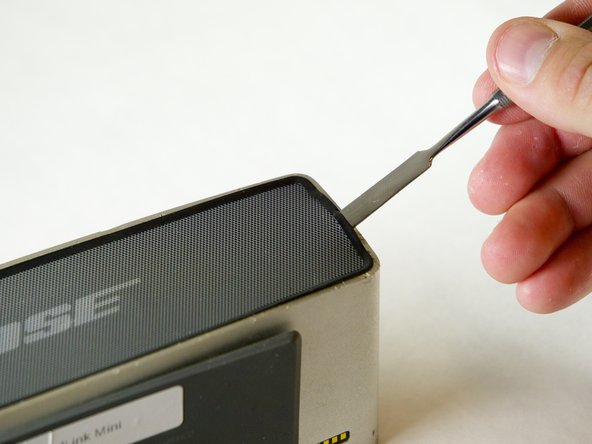
- Insert the Metal Spudger between the rubber edge on the grille and the aluminum casing.
- Place Metal Spudger in the location shown.
- Slowly pry up the grille until the two tabs shown pop out.
- Be very gentle, the grille will bend.
- The grille is attached to the speaker with double sided sticky tape. To remove the grill gently pull upward while keeping tension to the right.
- Be very gentle, the grille will bend.
- Repeat steps to remove the back grille.
- Remove the four 15.0 mm screws on the left and the four 9.0 mm screws on the right using the T8 Torx Screwdriver.
- Remove the circuit board by pushing it with your index finger in the direction shown while using a nylon or metal spudger to lift it up and out of place.
- Carefully pull on the battery cover until the rubber tab slides out of the aluminum casing.
- Remove the sponge (save for later replacement) and gently flip the black tab 90 degrees to release the connectors grip on the ribbon cable. Remove the ribbon cable from the connector.
- The black tab must be flipped up in order to reinsert the ribbon cable on reassembly.
- Use a Metal Spudger to pry up the plastic divider.
- When removing the plastic divider be careful not to damage the wire strip sliding through it.
- Reach through the battery compartment hole and unplug the power strip shown.
- Remove both circuit boards by wiggling them up and out of the casing.
- Unplug the speaker wires connected and fully remove both circuit boards.
- When unplugging the speaker wires, squeeze the white connector piece to release the wires.
- Unhook the speaker wires clipped onto the button switch circuit board.
- Use a nylon or metal spudger to slightly lift up on the button switch circuit board.
- Pull the button switch circuit board straight out from the casing.
- Remove the eight 9.0 mm screws using the T8 Torx Screwdriver.
- Using a nylon or metal spudger, pry up the plastic divider and remove it.
- Gently lift the speakers up and out of the casing.