enTourage Pocket eDGe Motherboard Replacement
ID: 52259
Description: If basic troubleshooting does not fix your...
Steps:
- Make sure the device is powered off before beginning.
- Open the Pocket Edge and place device with the screens face down. The side containing the stylus should be on the left.
- Remove all eight elliptical rubber tabs covering screws using your finger or spudger.
- Using your J1 Phillips head screwdriver, remove all eight 6mm screws from the back of your device.
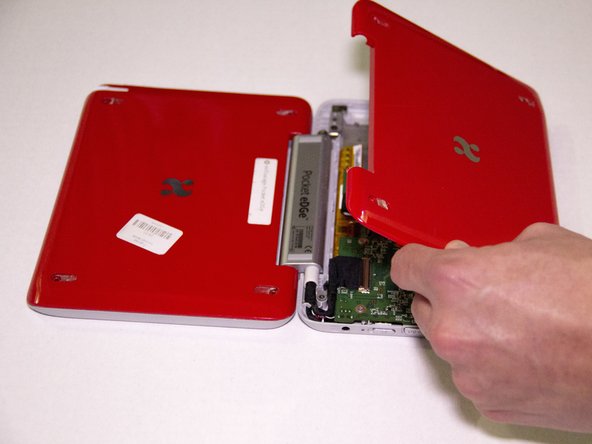
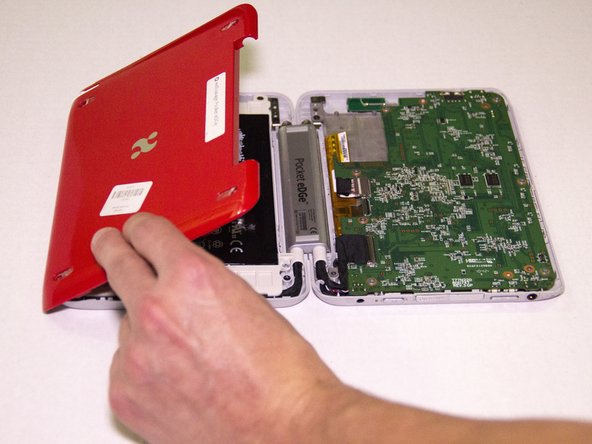
- Using the plastic opening tool, lift the back plate from both sides of your device and remove them.
- Locate the side containing the battery. Lift the top of the battery out using your finger and the indentation at the top.
- Carefully unplug the bottom side of the battery from the connecting plug and set the disconnected battery aside.
- Locate the side of the device containing the motherboard.
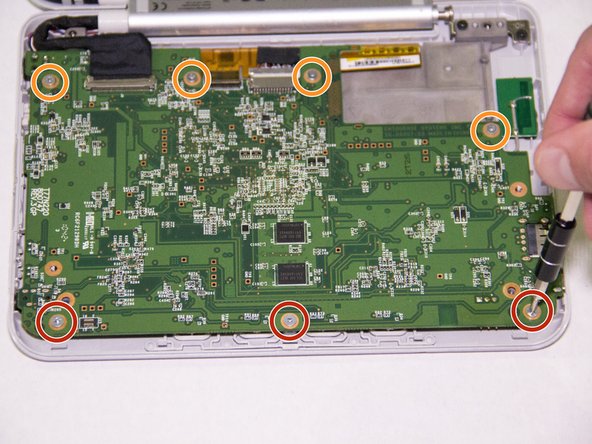
- Using your J0 Phillips head screwdriver, remove the three 5mm screws from the bottom of the motherboard.
- Using your J0 Phillips head screwdriver, remove the four 3mm screws from the top of the motherboard.
- Using the plastic spudger, carefully pry the bottom of the motherboard up and away from the casing.
- Position your device so the inside edge of the motherboard is closest to you.
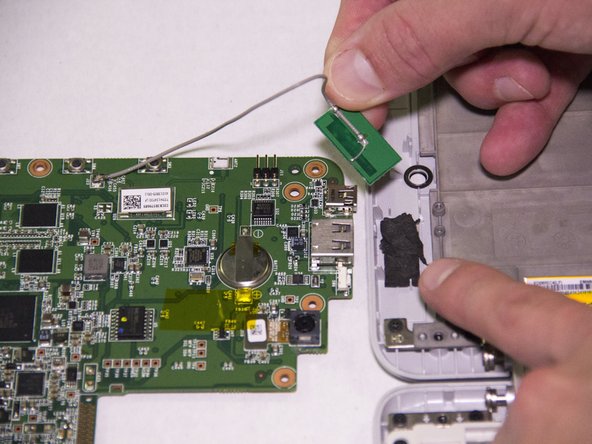
- Locate the three wires connecting the motherboard to the rest of the device.
- Using your finger or a pair of tweezers, gently remove each of these from the motherboard.
- Lift the outer edge of the motherboard up. Carefully disconnect the 3 connections on bottom of the motherboard by pulling gently.
- The motherboard is now connected in only one place on the edge of the device. Being careful of this, flip the motherboard outside of the device, leaving it connected to the foam padding inside of the device.
- Carefully pry the small rectangle apart from the thin strip of foam.
- If the foam is still intact you may leave the foam in order to reattach the new motherboard.