RCA Voyager II RCT6773W22 Disassembly
ID: 56082
Description: Taking apart the RCA Voyager II is pretty strai...
Steps:
- Have Workstation Prepped
- remove the two screws on the top of the device with a PH000 screwdriver
- Starting from the top, place pick or plastic tool between the power button and screen edge and push apart slightly.
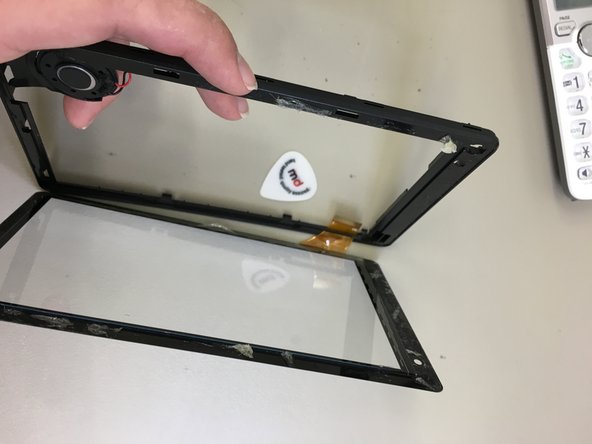
- Run pick across the top to the right and then down the right side and around the rest of the tablet.
- There is a good amount of space between the bezel and the board. Be gentle, but the risk of breaking components is low.
- lift section out of the black casing from the bottom, lift and remove by pulling away from tablet.
- Battery connection (on older models, may be soldered to board)
- Front Camera
- Digitizer
- LCD
- Speaker
- Remove battery Connection First
- Do not use any metal tools while the battery is plugged in. It may cause a short.
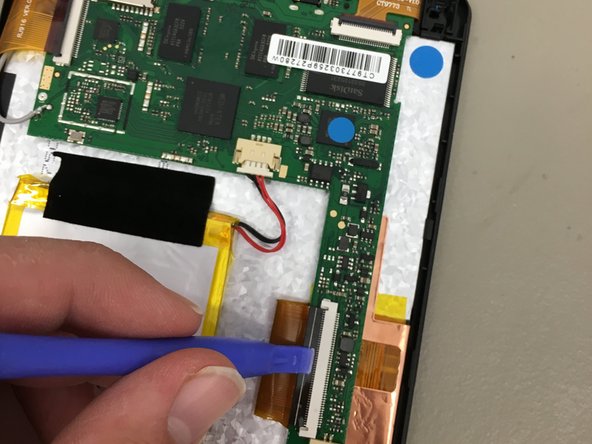
- unplug the speaker
- Lift the black cover over all three flex cables (Camera, LCD, Digitizer) with a plastic tool.
- The covers are incredibly fragile, and easy to break
- gently disconnect all three cables with your fingers by pulling slightly
- remove the three screws securing the board with your PH000 Screwdriver
- lift the board out gently
- Do not tug the board out too hard, the antenna cable on the left is soldered in!
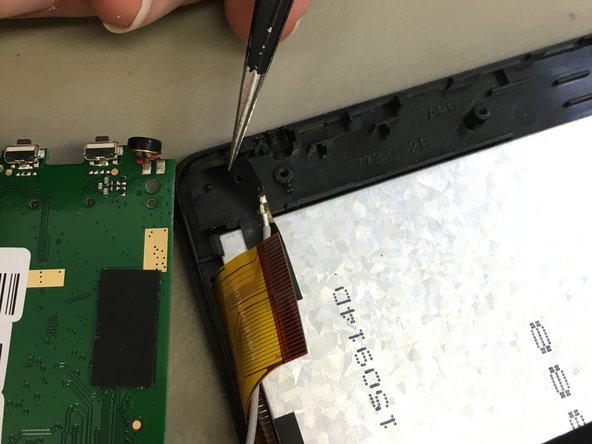
- Fold board over the left side of the tablet and gently remove tape securing antenna to the case. Use a small amount of heat if necessary.
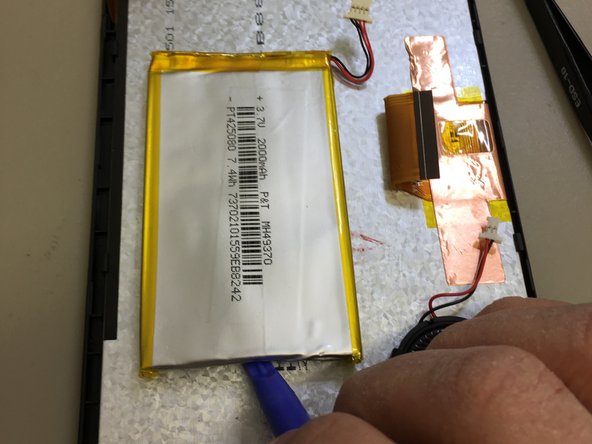
- remove tape from top and bottom of the battery.
- with a plastic piece, lift battery from adhesive securing it in place.
- do not use a metal or sharp tool to remove the battery, tearing or puncturing it may cause it to explode or heat rapidly, and may damage your device.
- The battery is secured directly to the back of the LCD. Exercise caution while removing the battery not to damage the LCD.
- The battery is soft and somewhat malleable - it can bend slightly without damage.
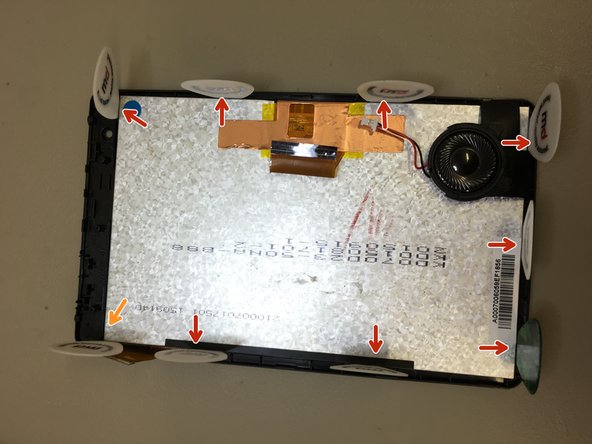
- Place picks between the lcd and the plastic clips holding it in place.
- The pick placement to the top left side (near the power button) is smaller and on a corner. I recommend inserting this pick last.
- Gently push top right pick down to lift LCD from the clip. Run across the top and right side to further lift LCD.
- Use picks as needed to separate LCD in other areas.
- Once separated and loose, remove picks so you do not damage the LCD while removing it.
- To remove, lift top of LCD and pull out of case away from the speaker, which is fixed to the digitizer frame.
- to remove Digitizer/Glass from the frame and speaker, slide a pick under a corner between the glass and frame to loosen adhesive
- If you're having issues loosening the adhesive, use a heat gun around the edges, then try again.
- You have completely dismantled the RCA Voyager II