Logitech Harmony 1100 Logic Board Replacement
ID: 56100
Description:
Steps:
- Remove the battery cover by pushing down on the circled areas and pushing outward.
- Remove the battery by lifting up the battery on the corner exposed by the indent in the case
- Use a J0 screwdriver head
- Remove the 3 screws from battery compartment
- Open the connector port on the side.
- Remove screw with a PH00 screwdriver head.
- Use plastic opening tool to pry at the open slits on the side.
- One or two silver foam cubes may pop out of the device. These belong in the slots shown in the third picture. They do not need to go back until reassembly.
- The plastic connector door will fall off. It will need to be put back upon reassembly.
- Pop out the plastic screen backing on front of device.
- Loosen the screen backing by pushing back on the plastic clips that hold the screen backing in place.
- Use the PH00 Phillips head from the iFixit Tool Kit to remove the 3 screws from the circuit on the back half of the device.
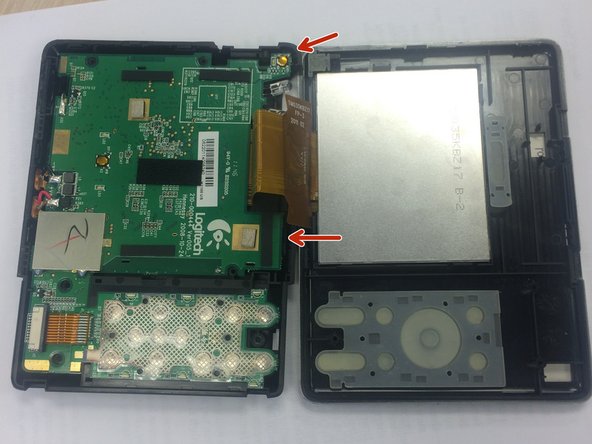
- Use the edge of the larger circuit board to flip the board over to the left.
- The connector port in the top right corner may make removal difficult. Lift the logic board above the screw ports, and the connector port should slide out easily.
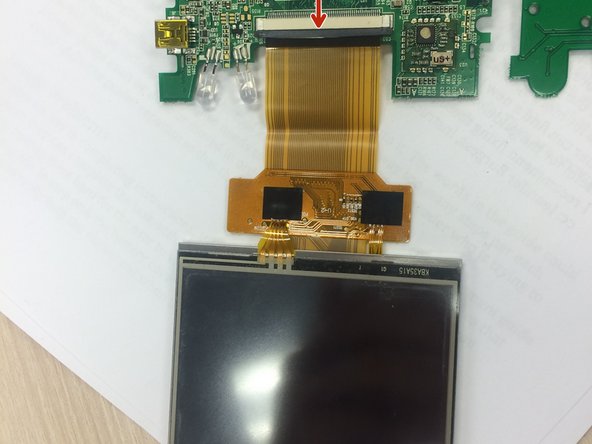
- Find the wire that attaches to the screen.
- Push the dark grey bar that is used to lock the screen in place, outward from the beige bar to disconnect it.
- Remove the screen wire.
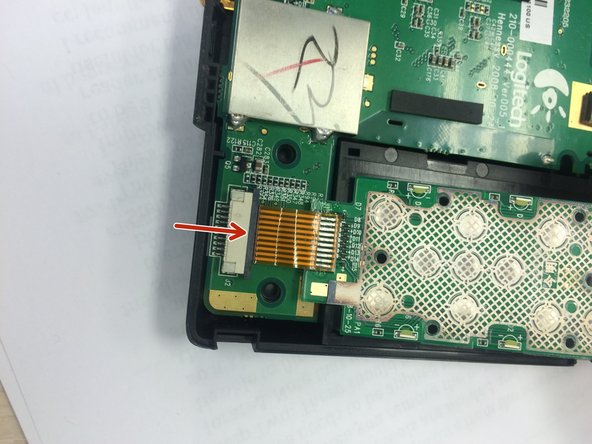
- Push grey bar away from the beige bar
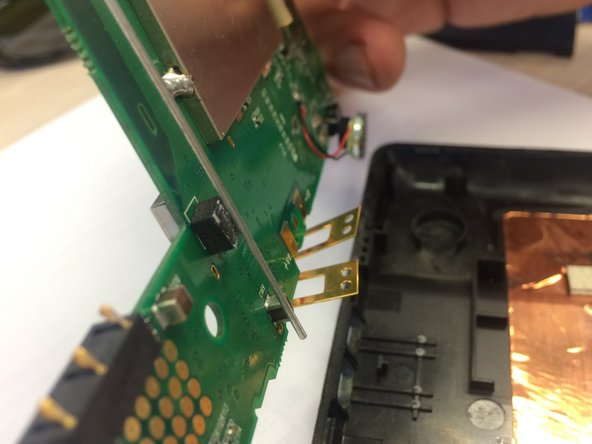
- Remove button tab wire from logic board
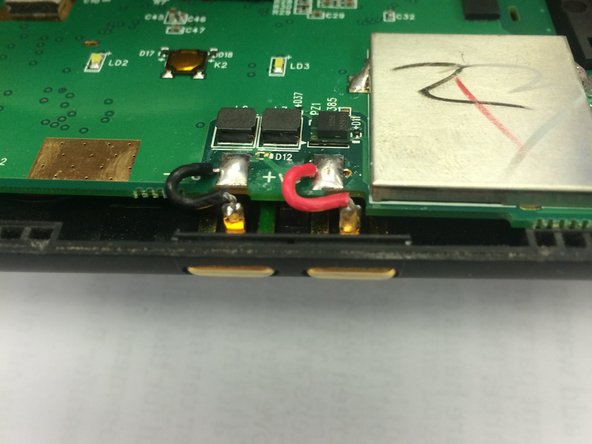
- Lift on back of gold tab to unsecure positive and negative wires from device
- Pull the gold buttons in towards the center of the device to detach logic board from case