Lenovo Thinkpad X220 LCD Screen Replacement
ID: 56268
Description:
Steps:
- Turn laptop over to expose the battery.
- Slide and unlock the sliders while removing the battery casing at the same.
- Place battery in a safe spot.
- Grab the Phillips screwdriver with the JIS, J00 head.
- Remove all 10 screws on the backside where the battery was removed.
- Place the 10 screws in a safe spot.
- Remove the plate next to the battery.
- Remove the side panel.
- Flip laptop over to battery side is facing down.
- The screen needs to be open when separating the keyboard and trackpad from the base.
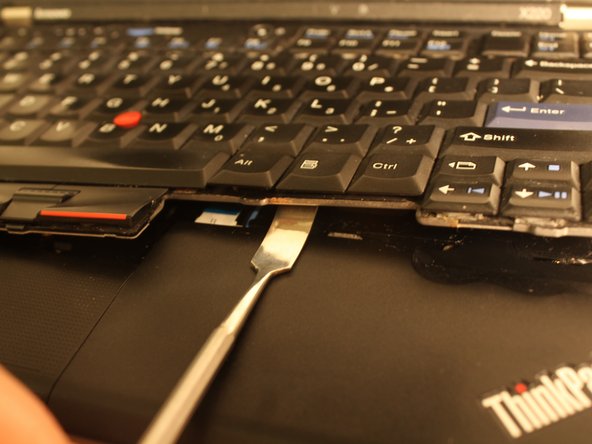
- Using the Metal Spudger, place between the trackpad and the keyboard and lift up to remove the keyboard and trackpad.
- Pull keyboard towards yourself.
- Grab the tab on the ribbon wire, pull off to release the keyboard.
- Now, you can get to the trackpad ribbon wire.
- The trackpad ribbon wire in blue, unhinge the clamp to release the blue ribbon wire.
- Get a hold of the trackpad and pull up and out of the laptop.
- With the Metal Spudger gently remove the wires that are on the outline plate.
- Disconnect the thin black and silver wire from the outline plate.
- Remove the 2 screws that is holding the outline plate.
- Close laptop.
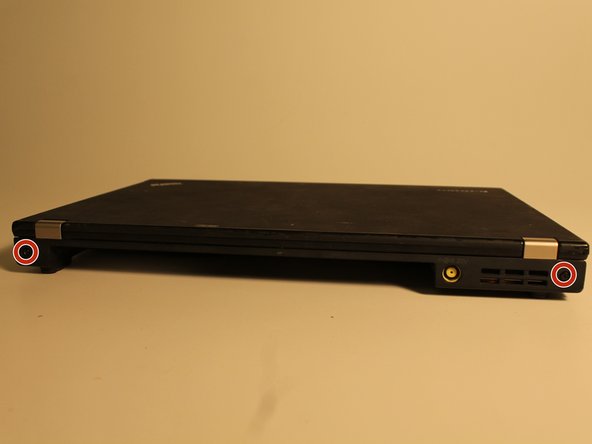
- From the backside remove the remaining two screws that are holding down the LCD screen.
- Turn laptop around facing you and open back up exposing screen.
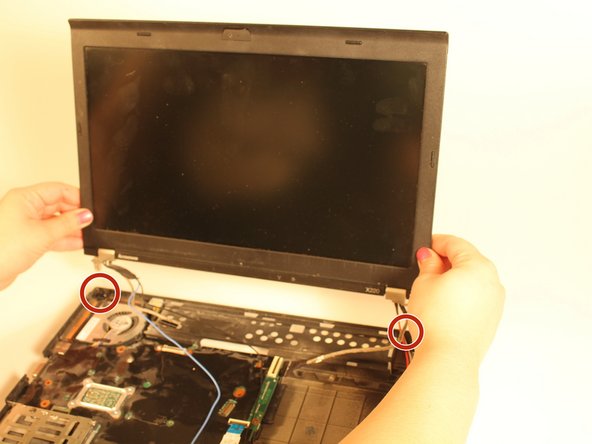
- Un-clamp the two silver wires.
- Gently lift up on the screen and set the screen aside.
- Replacing the new screen you will need to put the silver pegs into the designated spots.
- Re-attach the thin silver and black wires in the correct spots.
- Put the thin red and silver wires a back into place.
- Re-attach the blue and black wires to the outline plate.
- Re-attach the black wire to its designated port.
- Close the screen, turn laptop back around and re screw screws into designated spots.
- Re-insert the 2 silver screws into the outline plate
- New screen is ready for regular use.