HP Pavillion dm4t-2100 Finger Print Scanner Replacement
ID: 56391
Description: You will need to remove many parts of the...
Steps:
- Shut down the computer.
- Shutting down the computer by holding power button can cause damage to computer.
- Turn computer upside down so the base is facing upward.
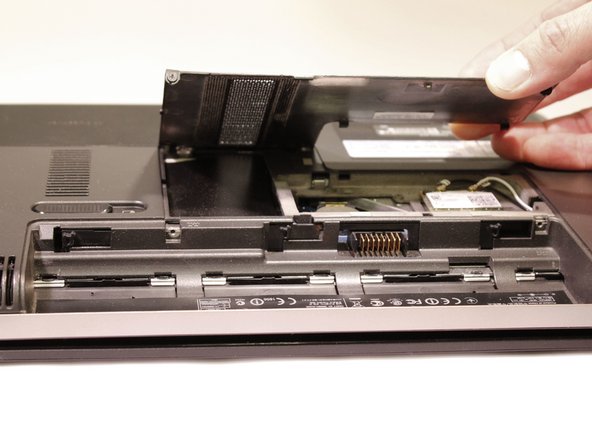
- Slide latch next to battery icon until battery pops up.
- Pull the battery away from the computer until completely detached.
- Position the computer so the front is towards you.
- Remove two 5mm Phillips #1 screws
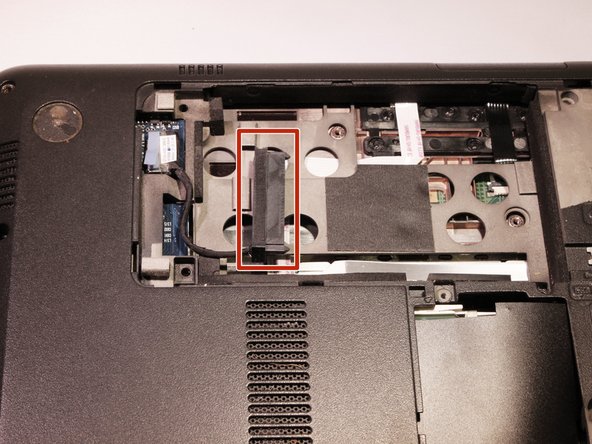
- Slide the hard drive cover towards the empty battery spot and remove it.
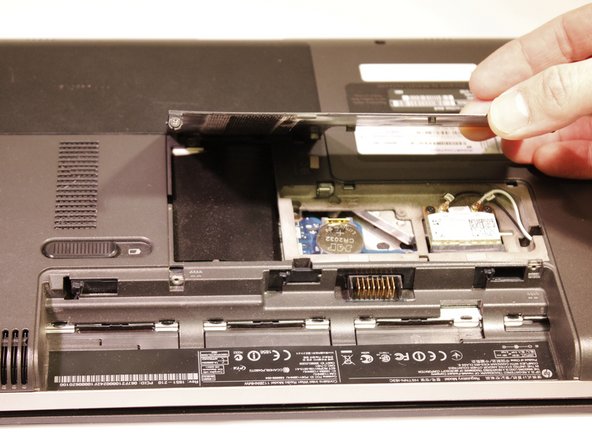
- Loosen two 5mm Phillips #1 screws securing plastic cover, until cover is detachable.
- Slide cover toward empty battery area and remove it.
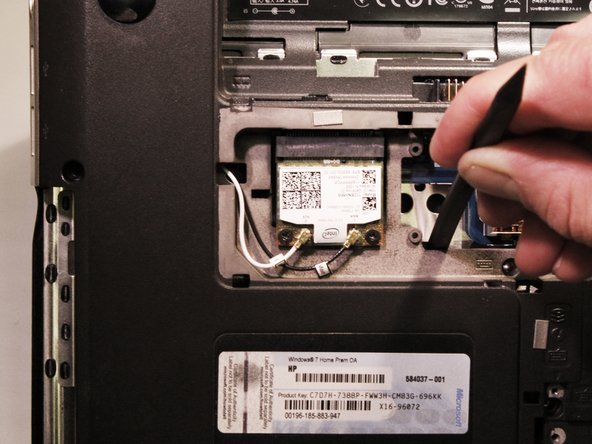
- Disconnect the hard drive cable that is plugged in.
- Lift the tab on the hard drive to pull it out of the computer.
- Hard Drive is removed.
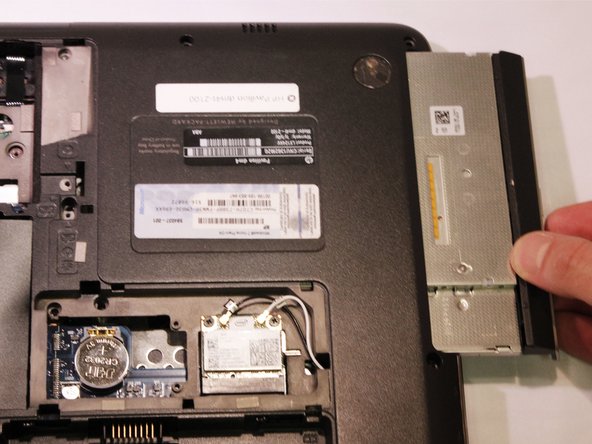
- Remove one 5mm Phillips #1 Screw that is securing the optical drive.
- With the nylon spudger push the optical drive until you can grab it.
- Pull the optical drive all the way out, until removed.
- Remove two 6.5mm Phillips #1 screws from the back of the computer.
- Keyboard icons next to keyboard bolts
- Turn the computer upside down with the front towards you, and, remove the two rubber feet near the battery.
- Organizing screws would be helpful
- Remove 13 Phillips M2.0X7.0 screws.
- Remove 6 Phillips M2.0X2.0 broad head screws.
- Turn the computer over, and open the computer as far as possible without breaking it.
- Release the top of the keyboard by lifting up and gently pull the top up until the whole keyboard is up.
- Lift plastic cover to release the ZIF connector that is holding the keyboard in place. Then remove the keyboard.
- Remove four 4mm Phillips #0 screws near the top of the keyboard area.
- Lift top cover from the base and release the ZIF connector that the power button is connected to. The cover should now be removed.
- Using a nylon spudger could be helpful
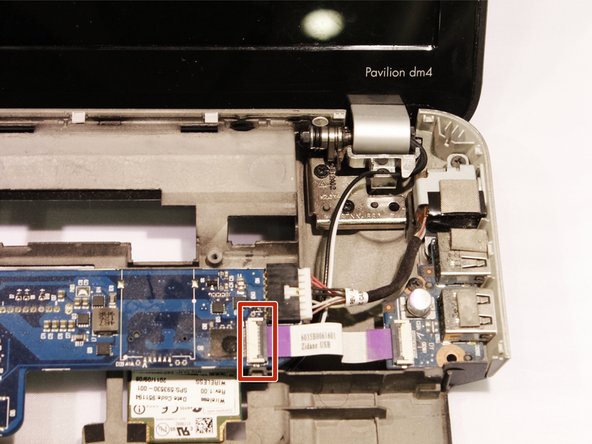
- Release 2 ZIF connectors where the touch pad cable and fingerprint reader are connected.
- Take the top cover and put it upside down and remove one 3mm Phillips #1 screw.
- Release ZIF connector on fingerprint reader and remove.