Gateway Lt4004u Back Panel Replacement
ID: 61364
Description: By using this guide, you will learn how to...
Steps:
- Place the laptop face down in front of you.
- Locate the battery lock switches on the left and right top corners of the bottom of the device indicated by the red circles.
- Pinch the switches and slide toward the edges of the computer to unlock.
- Once the switches have both been unlocked, push the battery upwards away from the rest of the laptop.
- Remove the battery from the laptop.
- Open the laptop so that the screen and keyboard are facing you.
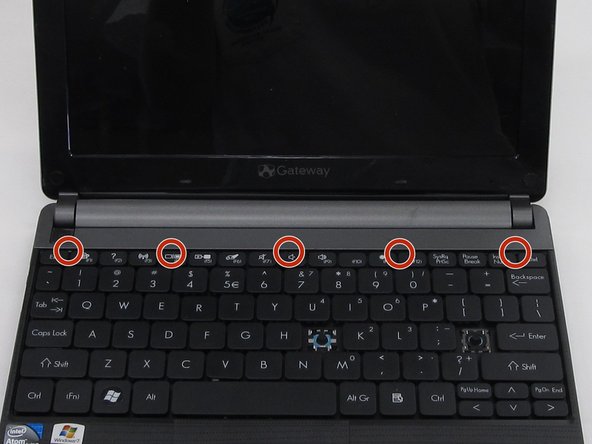
- Identify the 5 tabs above the function keys in the crevice that attaches the keyboard to the main frame.
- Use an opening pick to push each tab away from you.
- Use an opening tool to push the middle tab until you hear a click. Begin to push the tool downward into the computer and slide the card along the length of the keyboard, as you overcome the five tabs.
- A clicking sound is normal and no cause for alarm.
- Begin to slide the plastic card under the top edge of the keyboard. You will hear popping sounds and the keyboard will eventually be released.
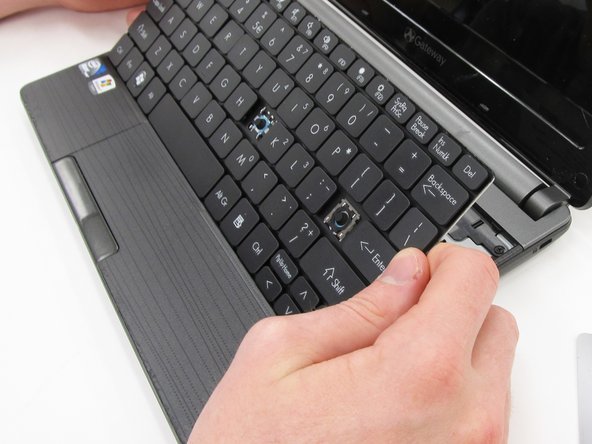
- Carefully pry the keyboard from the main frame, starting at the top section.
- Look at the intel sticker in this step and the next to orient your computer with the pictures.
- Look at the intel sticker in this step and the previous step to orient your computer with the pictures.
- Unplug the thin blue connection piece beneath the keyboard. It may pop off on its own while you are prying off the keyboard.
- The popping noise will not hurt the computer.
- Once the thin blue plastic has been detached, remove the keyboard from the rest of the laptop.
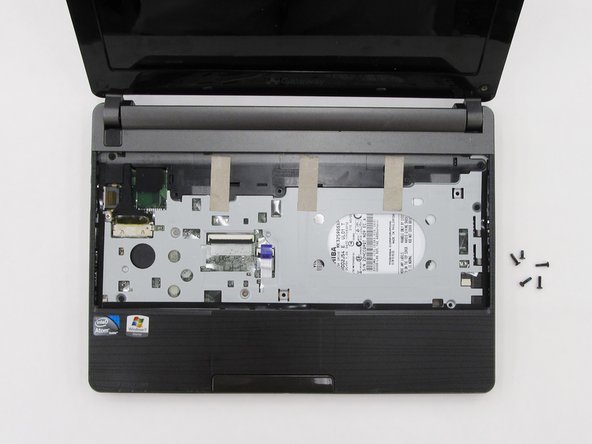
- Locate and unscrew the five screws indicated by the red circles in the picture using a Phillip's #0 screwdriver. All of the screws are 8.0 mm, excluding the top right screw which is shorter. It should be 5.0mm.
- Each screw should have the word "DOOR" engraved beside or above it.
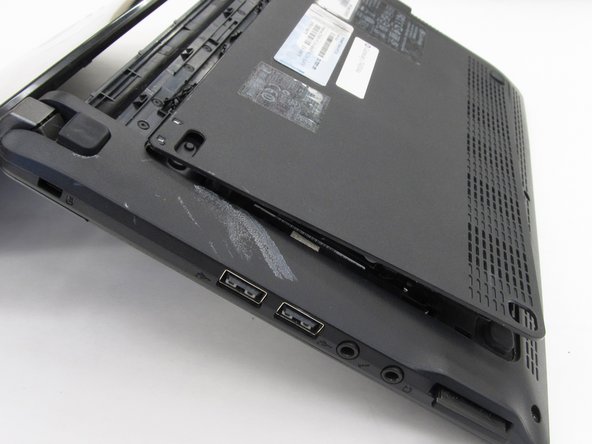
- Hold the computer in your hands and use the tip of your screwdriver or a spudger to push through the bottom right hand hole left by the removed screw. This hole is shown in the picture within a red box.
- The tip of the screwdriver will push against the bottom casing of the laptop and pop it away from the rest of the frame.
- There will be a loud cracking noise as the bottom of the computer detaches. You are not breaking it!
- Close the laptop and place it in front of you face-down with the hinge connecting the screen and keyboard away from you on the table. Pry the rest of the bottom casing away from the computer, exposing the inside.
- Note that the laptop in this picture has both been placed upside down and rotated 180 degrees from the previous picture.