Acer Aspire One AO756-2623 LCD Sceen Replacement
ID: 61372
Description: A functioning screen is essential for using a...
Steps:
- Orient the ACER Aspire One to where the bottom of the laptop is facing upward as shown in the picture.
- Locate the circular slot positioned at the bottom right of the battery.
- Insert a spudger and slide the tab to the right.
- When working with electronics, it's important to choose a tool that's ESD-safe to avoid accidental damage to the device. The regular black nylon spudger or a plastic opening tool should be used whenever possible.
- Hold the tab in the right-hand position and firmly push or pull the battery upward to remove it from the laptop.
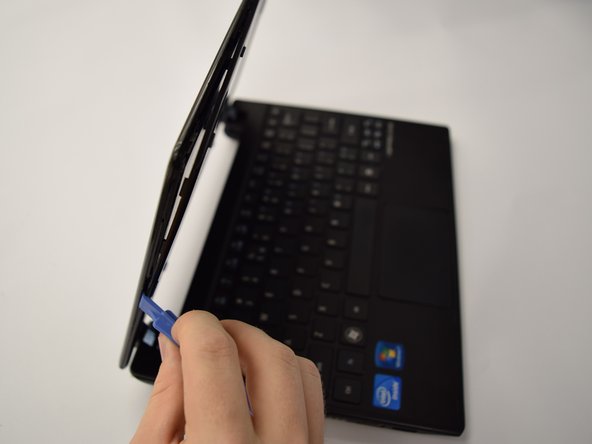
- Orient the laptop as shown in the picture with the open screen facing toward you.
- Insert the spudger into the indicated crease.
- Firmly slide spudger around the edge of the entire laptop to remove the front plate of the screen.
- Loud cracking noises from the plastic tabs separating may occur, do not worry, they are to be expected.
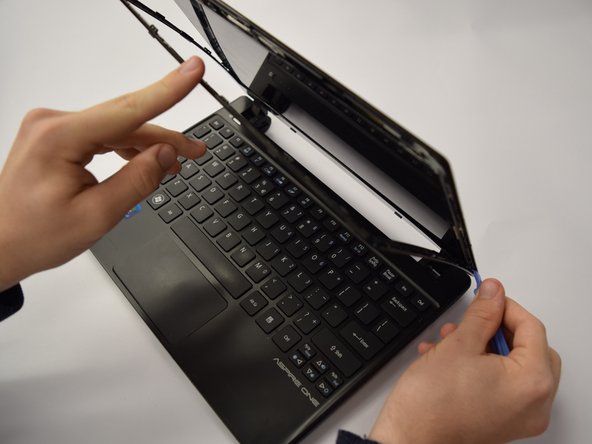
- Identify the four 6 mm Phillips screws that are necessary to remove the LCD screen.
- Remove all four screws using a Phillips #0 Screwdriver.
- Pull away the LCD screen from the back cover of the laptop without ripping the ribbon cable connecting it to the bottom of the laptop.
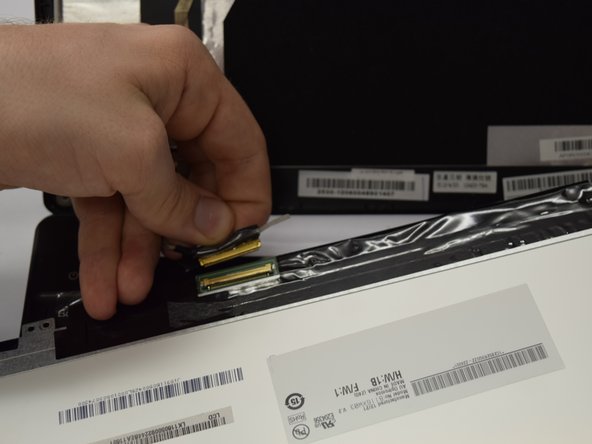
- Remove the tape covering the port connecting the screen to the bottom of the laptop.
- To remove the LCD screen, gently pull the cable straight out of the screen.
- In the first and second photos, the screen is lying face down on the keyboard.