Acer Iconia Tab A200 Motherboard Replacement
ID: 61690
Description: Many components of the tablet are included in...
Steps:
- With the plastic opening tool pry open the grey plastic siding on both sides of the tablet.
- Using a Phillips #00 screwdriver remove the 4.0 mm screws on the sides of the tablet.
- There are two screws on each side of the tablet that need to be removed before the back casing can be removed.
- Once the 4 screws have been removed use the plastic opening tool to pry open the device on the side of the device.
- Be careful prying on the sides where you removed the screw as the plastic casing is not very strong and may break.
- After prying open the case with the plastic opening tool carefully remove the case from the device and place the device face down on its screen.
- Using a Phillips #00 screwdriver remove the 4.0 mm screws holding the battery in place.
- Lift the battery out of the device, and disconnect the cable attached to the motherboard by pulling it out to the side not lifting it up.
- Using the plastic opening tool gently lift up the charging component out of its slot in the case.
- Continue to lift up the cord until it is free from the case and only attached to the motherboard.
- You may need to continue using the plastic opening tool to lift the cord out of the case due to limited hand space.
- Disconnect the power component from the motherboard by pulling it out horizontally. Do not pull up on the cord only pull out
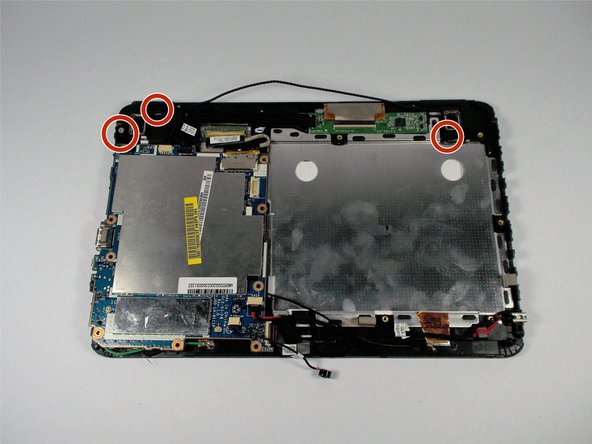
- After removing the battery use a Phillips head #00 screwdriver to remove the 3.0 mm screws holding the dual speakers in place.
- Once the screws are removed, lift up on the speakers to remove them from the case.
- Once you have removed the speakers from the case, disconnect the speakers from the motherboard by pulling the cable out horizontally. Do not pull up on the cable.
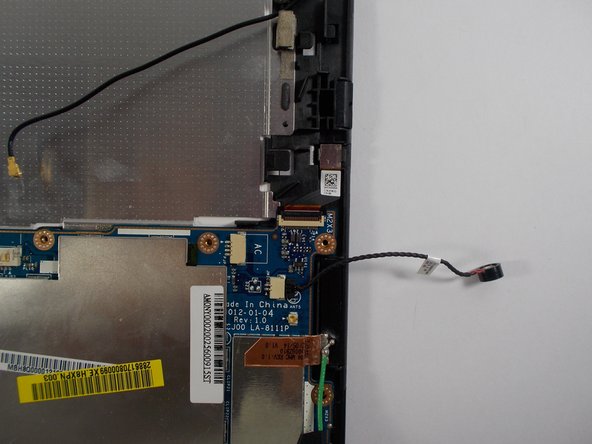
- Lift up on the microphone cable to lift the microphone component away from the case.
- Once the microphone has been lifted away from the case, disconnect the microphone cable from the motherboard by pulling the cable out horizontally. Do not lift up to remove.
- Using the plastic opening tool unplug the green cable by placing the tool under where the cable meets the plug and lifting up.
- After unplugging the green cable remove the black tape that secures the green cable to motherboard.
- Only unplug the end connected to the motherboard. Do not disconnect the soldered end of the cable.
- Using the plastic opening tool unplug the black cable by placing the tool under where the cable meets the plug and lift up.
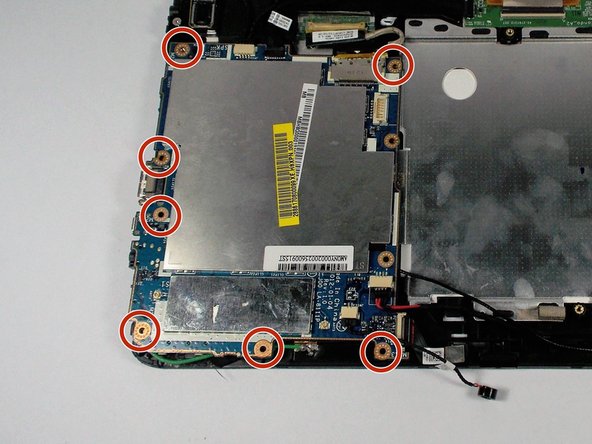
- Once all cables have been disconnected from the motherboard, remove the seven remaining 3.0 mm screws with a Phillips head screwdriver size #00.
- After the screws have been removed lift up on the motherboard to remove it from the case.
- If you feel any pull when removing the motherboard, check to see if you did not disconnect a cable connected to the board.