Wireless Charging Pad Teardown
ID: 65196
Description: This guide will run through how to teardown a...
Steps:
- First thing to do is remove the pad that covers the screws. This is what the phone sits on when charging (on top of device).
- Use a spudger or some other kind of flat tool you can pry under the padding with to loosen the adhesive and pry off.
- Pry gently as you don't want to rip or tear this padding. NOTE: It is only held on with a sticky adhesive tape.
- For an original Samsung charger, there are no screws. Insert a plastic spudger into the side where the rotation lock clip is (Circled red). use the charge port reference (Blue square) to locate the correct side. Then simply rotate the top from the bottom anti-clockwise.
- Once you have removed the padding ring you will notice (4) phillip head screws.
- Use a small screwdriver to remove these screws. (I used a #1.2 phillip head screwdriver).
- Once the screws are removed you should be able to remove the bottom cover of the device exposing the circuit board.
- Once you have the bottom cover off you can access the circuit board and charging unit.
- To access the top of the charging unit just pry away the top cover and the piece the circuit board is connected to.
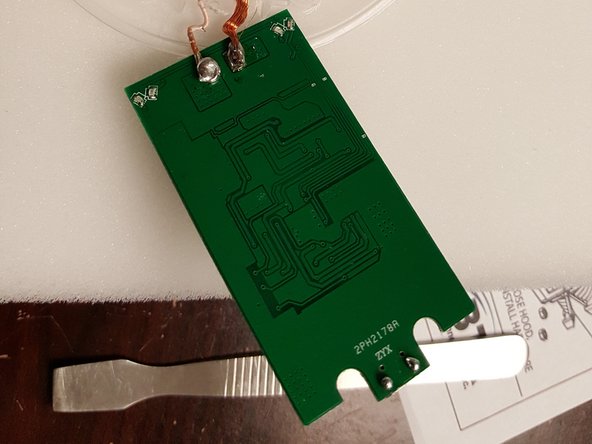
- To remove circuit board: There are two clips holding the board in place (see photo 1). Using a spudger or a flat tool pry one of the clips away while lifting up on that end of the board. Once the board clears the clip the board will come out.
- To remove charging unit: The charging unit is held in by adhesive and connected to the circuit board (see photo 3). Just pry from adhesive.
- Whether replacing circuit board or charging unit... Any work done here will have to be soldered.
- The charging unit is soldered to the back of the circuit board. (see photo)
- You can put back together in reverse order.
- No modelo EP-NG930 Samsung wireless chager (Vietnam), os parafusos da placa de circuitos ficam embaixo. É necessário retirar o adesivo emborrachado para acessar.