Visual Land Prestige Elite 9Q Front and Rear Facing Camera Replacement
ID: 65705
Description: This guide demonstrates the proper way to...
Steps:
- Using the large plastic opening tool, start along a side of the device and apply light pressure in the seam between the top and bottom outer covers.
- Maneuver the smaller plastic opening tool at the spot of the large opening tool and slowly slide along the edge.
- You should feel each plastic connections begin to loosen.
- Move tool around each connection, and continue around the device until all connections have been loosened.
- The user risks damaging the connections if tool is slid to fast
- Once all connections have been loosened and using a soft surface, place the device onto its screen.
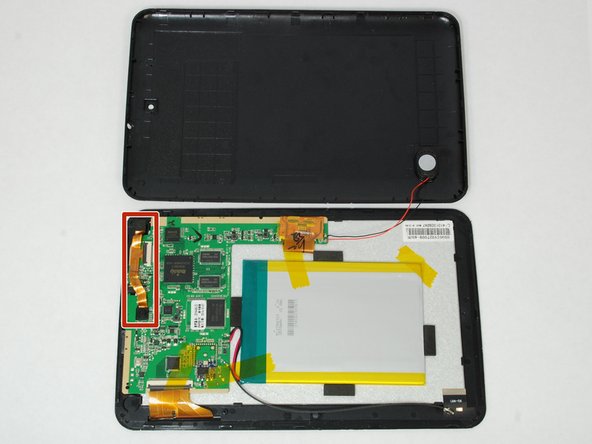
- Open the casing and lay as shown keeping the speaker wire loose, and the camera component is highlighted in red.
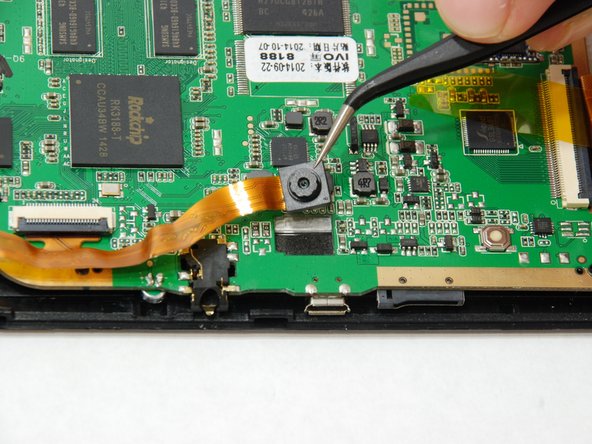
- Using hook tweezers, gently separate the glued cameras away from the circuit board.
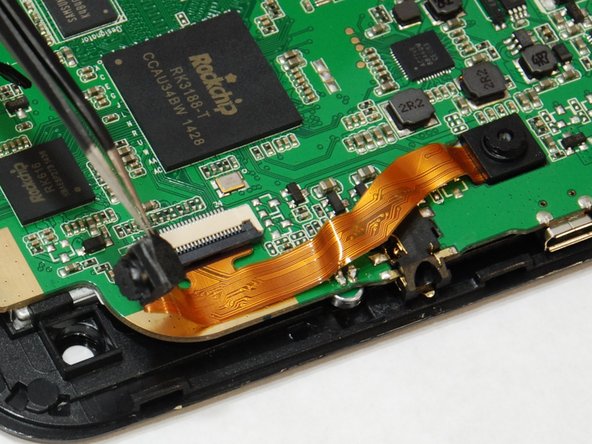
- Allow each camera to rest on circuit board while proceeding to the ZIF (zero insertion force) on the circuit board.
- Avoid touching camera lens with the tweezers.
- Maneuver the hook tweezers to flip up the black hinged ZIF connector to disconnect camera module.
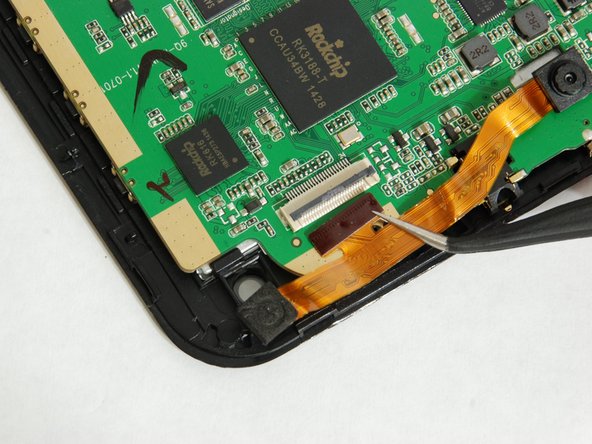
- After ZIF connector is flipped up, the camera module may be removed.