Tune-up A Rancilio Silvia Espresso Machine
ID: 66173
Description: This guide is for the DIY'er who wants to do a...
Steps:
- This section assists in identifying the version of machine you are repairing. The version matters because there are slight variations in the way the repairs are performed.
- This is the version 3. It is identified by the ergonomic handle, the larger steam handle with a silver cap on it, and a steam wand that is mounted on a ball joint.
- Version M has the same group head configuration as Version 3. In appearance, Version M has two lights on the front of the machine and no light on the power switch. Version M is the newest version.
- This is the version 2. It is identified by the smooth handle, the steam knob with ridges, and the plastic Rancilio logo.
- This is version 1. The handle has ridges on it. The logo is silk screened on the machine.
- Lift the water tank cover and put it aside.
- Lift hoses from the tank and pull to the side.
- Pull tank straight out of machine.
- Make sure to tuck both hoses inside machine.
- Remove Drip Tray
- Flip machine upside down.
- Make sure hoses stay tucked in machine. They could get cut by the case laying on them.
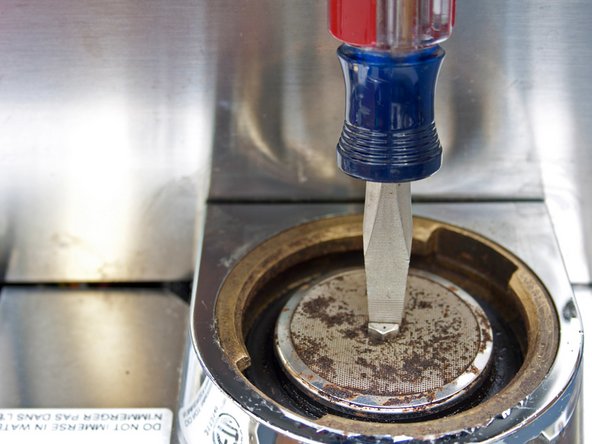
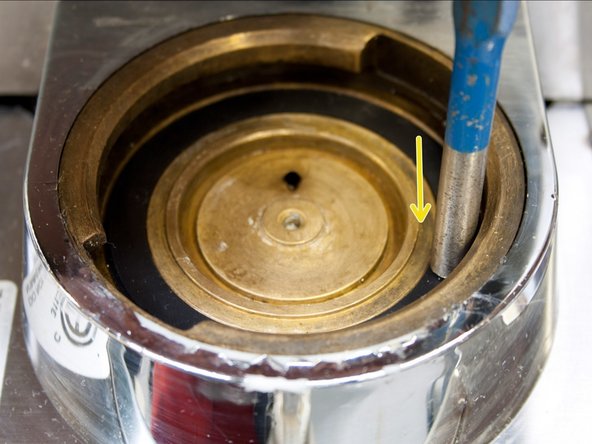
- Remove screw with flathead screwdriver.
- The new parts kit comes with a 8mm hex head screw.
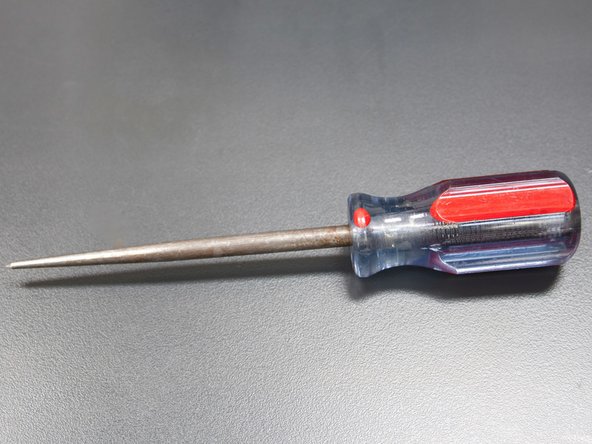
- Our favorite screwdriver for extracting difficult to remove screws. It has a big handle for a good grip. The screwdriver cannot be too long or it will hit the drip tray and won't fit. This is a Craftsman 5/16" x 1 3/4" slotted screwdriver.
- Remove the screen. It may take some prying. If it is really stuck you can use a channel lock pliers.
- It is okay to damage the old screen. Just be careful not to damage the brass housing.
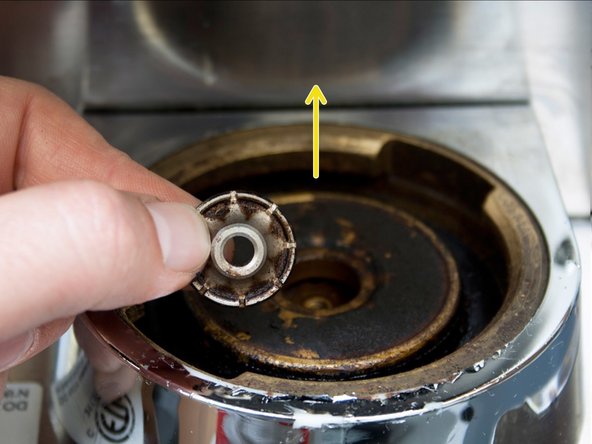
- Remove the small stainless steel diffuser.
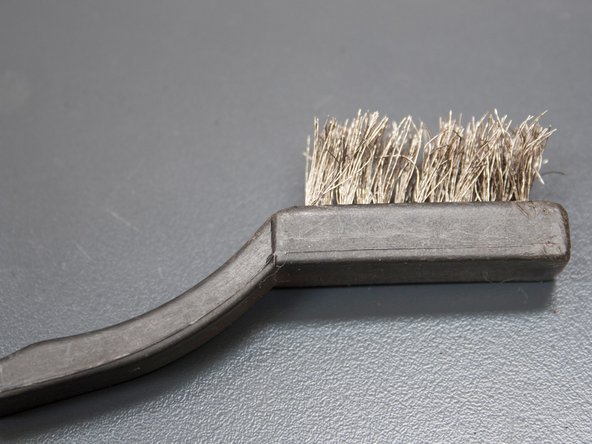
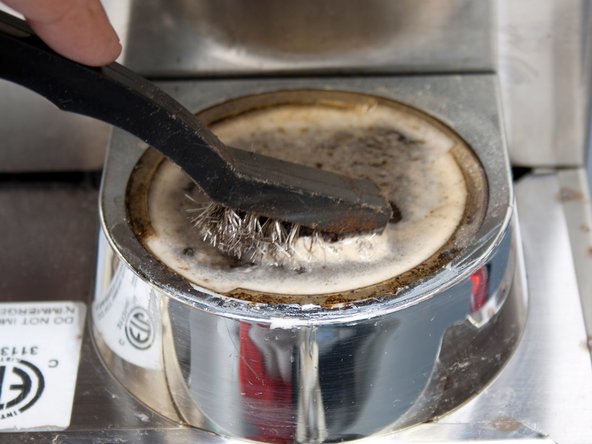
- Soak this dirty little guy in coffee detergent with hot water. Then clean it again with a wire brush if needed.
- Make sure to clean out all the water channels on the back side of the diffuser.
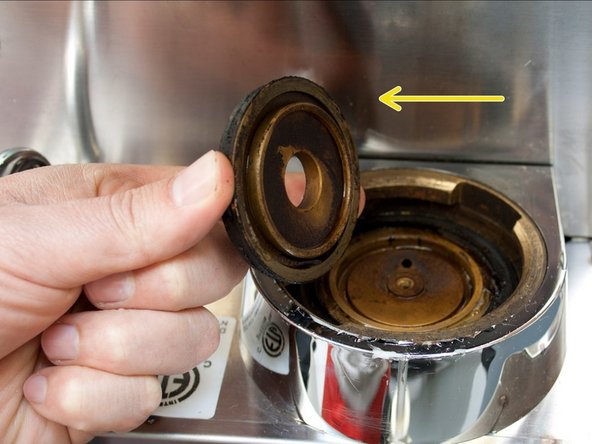
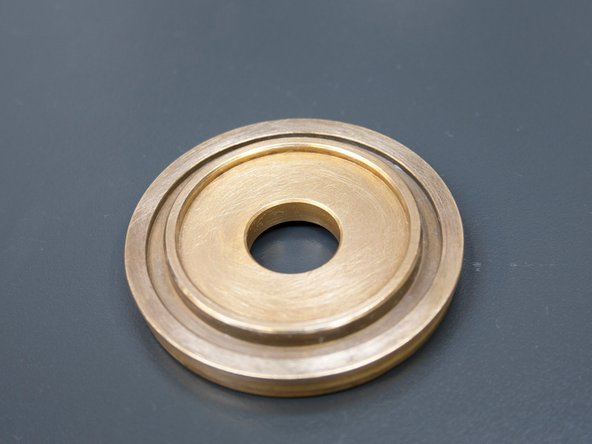
- On Version 3 you will need to remove the brass disc. Just lift it out. If it is stuck you can use a channel lock pliers to get it loose. Be gentle! Careful not to damage the brass. You cannot remove the brass disk on Version 1 & 2
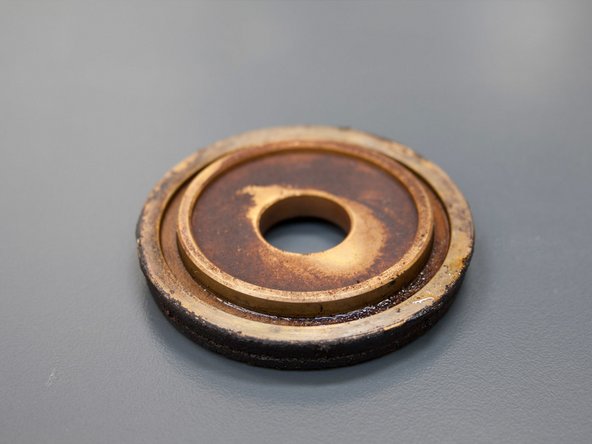
- This is the brass disc after it is been removed. Soak it in coffee cleaner with hot water for about 10 minutes. Then, scrub both sides with a steel brush. Get leftover coffee residue off disc.
- Picture of grouphead with brass disc removed on Version 3.
- An awl works great for removing grouphead gaskets from espresso machines.
- Pry the gasket up with the sharp tip of the awl.
- Patience! You don't want to stab or poke yourself.
- If you are lucky the gasket will still be intact after you remove it. However the gasket may be hard as a rock and difficult to remove.
- You may need to use the awl and a hammer to split the gasket into pieces before removal.
- Careful not to damage the brass grouphead when splitting the gasket.
- It's time to clean the bottom of the grouphead.
- We like to pour about a 1/2 tsp of coffee cleaner on the bottom of the grouphead.
- Pour boiling hot water on the grouphead and let it soak for about 10 minutes.
- Take a wire brush like the one in the picture. Scrub the top of the grouphead clean.
- Take some paper towel and soak up the liquid in the grouphead. The grouphead doesn't need to be perfectly dry at this point.
- Get a pick like the one in the image. Clean the inside edges of the grouphead.
- Clean all surfaces. First, focus specifically on the top rim that comes in contact with the portafilter. This helps the portafilter to seat correctly.
- Focus on the bottom surface. Cleaning this surface helps the gasket to seat correctly.
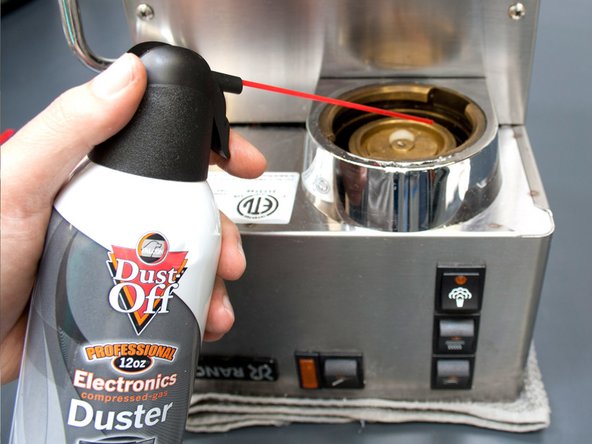
- Use compressed air to remove all excess debris from the grouphead.
- If you have Version 3 do not install the brass disk until you are finished installing the new gasket.
- Get the New grouphead gasket.
- Make sure it is a Rancilio Brand gasket. if it is an imitation it may not be exactly the right size. This could cause many problems.
- Next with the lettering down insert the gasket into the grouphead. We use a 3/16" punch to gently push the gasket into place. Make sure the gasket is level on the entire surface.
- If you have difficulty getting the gasket in or getting it level you may need to do a deeper cleaning of the grouphead.
- if you have version 3 insert the brass disk you scrubbed earlier.
- Then insert the stainless steel diffuser that you cleaned earlier.
- The slotted side with the water channels should be facing down. Therefore, you will not be able to see the water channels when the diffuser is installed correctly.
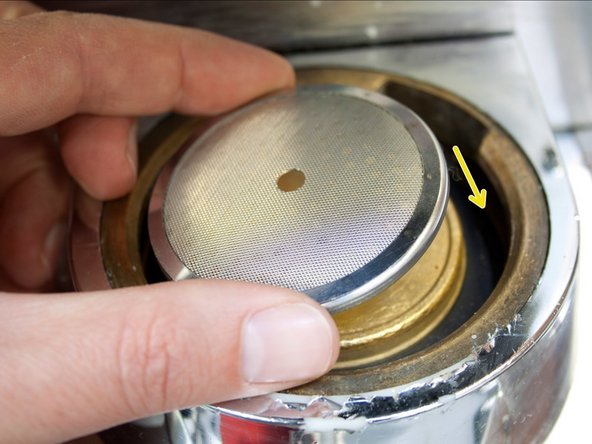
- Install the new screen.
- We highly recommend against using the old screen. It can be almost impossible to get perfectly clean because it has two layers.
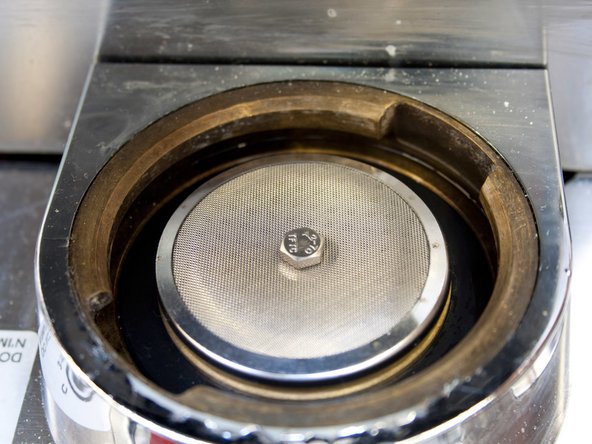
- Now put the screw in nice and tight. Use a 8mm socket wrench to do so. The screen should flex downward toward the grouphead when tightening the screw.
- Congratulations! You have finished the repair.
- We will be happy to hear about your experience! Please share it with us on our Facebook pagehttps://www.facebook.com/pages/Kanen-Cof... Thank you!