Samsung Captivate Earpiece Replacement
ID: 6825
Description: Sometimes the earpiece can become damaged or...
Steps:
- Remove the back cover by pressing on the bottom section of the phone and sliding the bottom piece downward.
- Lift up the back cover.
- Place your finger on the bottom of the battery and lift to remove.
- Replace the old battery with the new one.
- Insert the spudger underneath the bottom section of the phone.
- Gently lift and push the spudger to slide the bottom section down to reveal two hidden screws.
- Remove the six 4.5mm #000 Phillips screws.
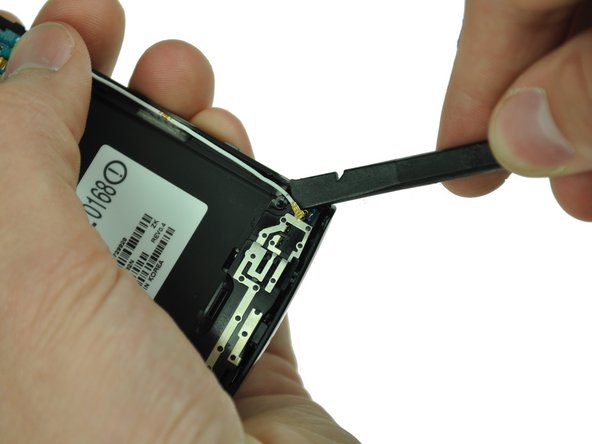
- Starting at a bottom corner, use the spudger to separate the rear case from the front display.
- Move the spudger towards the top on both sides. The plastic opening tool is easier to use for this step.
- Be careful when detaching the top. Free each side, stopping short of the center of the cover. Apply backward pressure on both corners with a finger applying pressure on the center, and slide the whole back cover toward the bottom of the device. Note: forcing the cover can result in cracked plastic.
- Separate the rear case from the phone.
- Use a spudger tool to pry up the antenna cable from the connector on the motherboard.
- Pry up the other end of the cable from the connector on the antenna array.
- Use the spudger tool to pry up the chip labeled "NEC." This releases the chip.
- Gently lift the camera assembly out of the plastic housing.
- Using the spudger slide the tool under the three highlighted connectors to begin disconnection
- Excluding the motherboard socket, pry straight from up under the connectors, Therefore ending disconnection.
- Be careful to not pry against the connector. Prying against could further damage to the device.
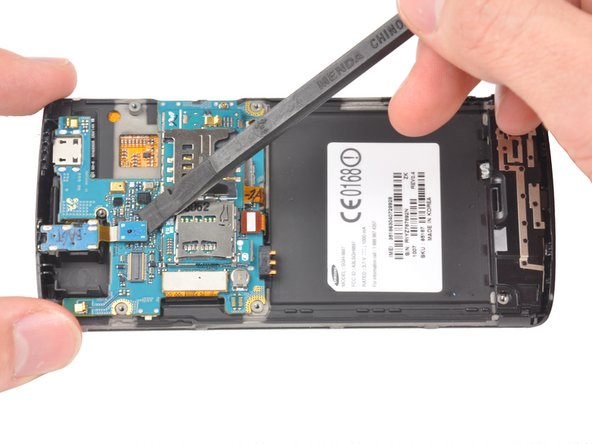
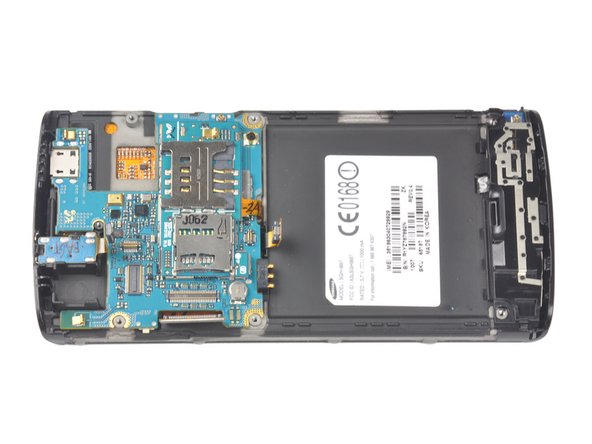
- Use your fingers to carefully lift up the Samsung Capivate's Motherboard from the assembly.
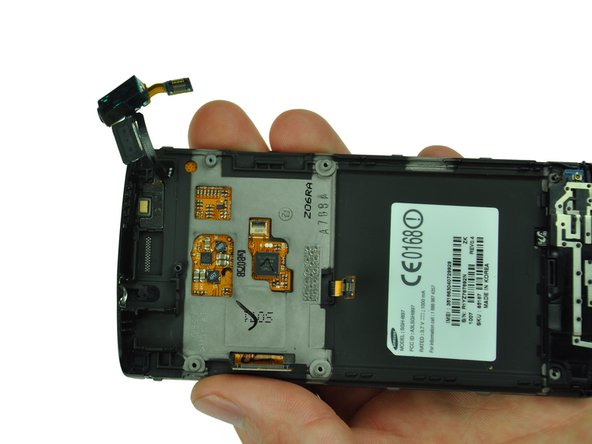
- Gently pull up on the audio jack, taking the attached ribbon cable with it.
- There is a small amount of glue holding the ribbon cable that attaches the audio jack to the earpiece.
- The earpiece is attached to the 3.5mm audio jack. You will need to replace the entire assembly.