Acer One 10 S1002 145-A Camera Replacement
ID: 72728
Description: This guide shows you how to replace a broken or...
Steps:
- Make sure that the tablet is turned off and disconnected from any power source.
- Disconnect the tablet from the keyboard attachment.
- If you have a Micro SD card in the tablet, remove it now.
- Remove the two 3.5 mm Phillips #0 screws on either side the keyboard connection.
- Starting from a corner of the tablet, use the plastic opening tool to create a gap between the screen and the back covering.
- Slowly maneuver the plastic opening tool along the perimeter of the tablet to pry the screen and back covering apart.
- Separate the back covering from the screen.
- Peel off all of the Polyimide tape (yellow tape).
- Remove the metallic tape covering the keyboard connection.
- Unscrew the two 3.5mm Phillips #0 screws and open the ZIF latch.
- Gently remove the silver part covering the battery and set it aside.
- Open the ZIF (Zero Insertion Force) connectors .
- Gently remove the ribbon cables.
- Remove the four 4mm screws at the corners of the motherboard with the Phillips#0 bit screw.
- The screw beneath the metallic tape also needs to be removed.
- Disconnect the three cables on the motherboard closest to the battery.
- These cables require some extra prying power to be removed.
- Slide out the motherboard and put it aside.
- Use the plastic opening tool to separate the glue that holds the battery to the screen.
- Avoid putting pressure on the glass while separating the battery from the screen.
- Remove the battery and set it aside.
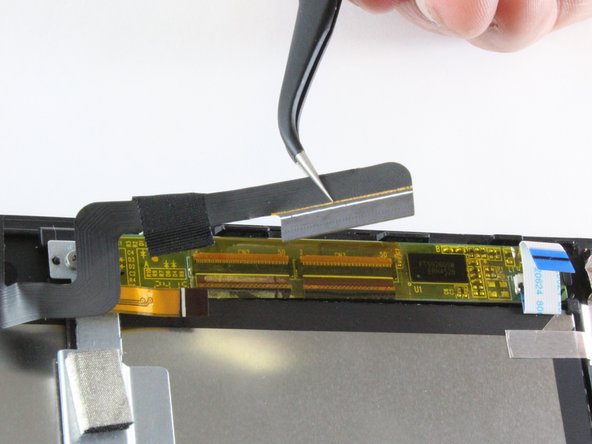
- Separate the adhesive cable from the underlying copper ribbon cable.
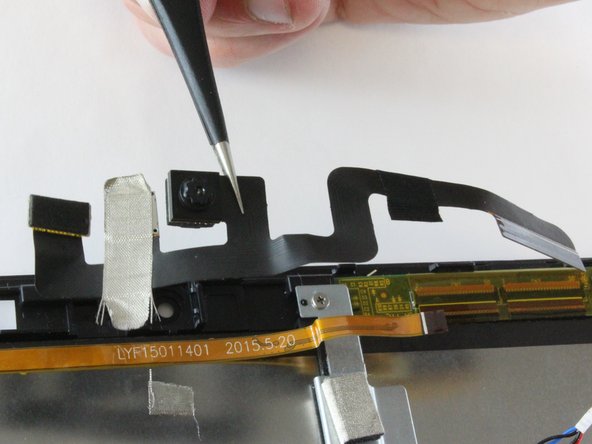
- Gently pry off the camera from from tablet backing.
- Remove the camera and set it aside.