Asus Chromebook C202 Battery Replacement
ID: 72756
Description: The following guide supplies information to...
Steps:
- What you need: 10 8mm screws, Tweezers, and a Phillips #1 Screwdriver
- Remove Phillips #1 screws from the bottom of the Chromebook using a Phillips #1 screwdriver.
- Use tweezers to get two of the screws are hidden by rubber caps along the rubber rest of the device out.
- What you need: plastic opening tool, Chromebook
- Open the top portion of the Chromebook
- To unhinge the top portion of the Chromebook, push down on the plastic opening tool.
- Place the plastic opening tool facing upward using the upper scoop, into the edges between the front and back of the Chromebook.
- In order to avoid damaging ribbon cables, gently lift the top portion of the Chromebook from the bottom portion.
- Gently disconnect the ribbon cable connecting the trackpad and the keyboard to the motherboard.
- Use a spudger or a clean fingernail to flip up the locking flap on each end of the cable—this is the unlocked position.
- Gently remove the ribbon cable connecting the I/O board to the motherboard.
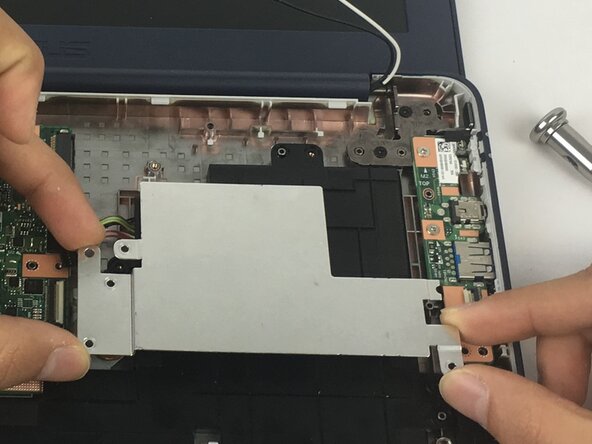
- Remove two 4 mm Phillips #1 screws from the metal grate connected to the battery.
- Remove metal grate from battery.
- Remove six 4 mm Phillips #1 screws from the battery.
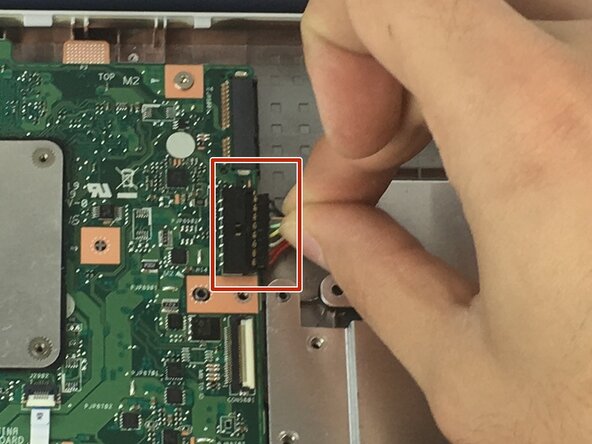
- Use the point of a spudger to push on alternating sides of the connector to "walk" it out of its socket and disconnect the battery from the motherboard.
- It may take a lot of alternating before the connector comes out. Be patient.
- If that doesn't work, grip all the cables at once as close to the connector as possible and pull the connector slowly and steadily out of its socket.
- Lift the battery from the bottom edge to to remove it from the Chromebook.