Dell Inspiron 11-3162 Motherboard Replacement
ID: 72975
Description: This will show you how to remove & replace your...
Steps:
- Before you begin, be sure to turn off your laptop and unplug it from the outlet.
- Use tweezers to pry and remove the center screw cover on the back cover.
- Use a Phillips screwdriver to unscrew the nine 6.8 mm screws securing the back cover.
- Use a spudger to pry around the base edges of the back cover to loosen it from the laptop.
- Do not fully remove the cover, as it is still attached to the laptop with cables.
- If you are only replacing the battery, you can skip this step. Be careful not to strain the still-connected cable as you work.
- Unlock the wide ZIF connector securing the flex cable.
- To unlock a ZIF connector, use the tip of a spudger or your fingernail to flip up the small, hinged locking flap.
- Pull the ribbon cable outwards to disconnect the back cover from the motherboard.
- Use a Phillips screwdriver to unscrew the three 4 mm screws securing the battery.
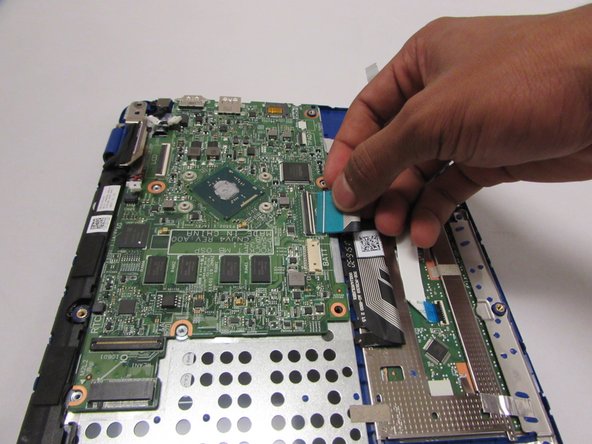
- Use your fingers (or a set of tweezers) to disconnect the battery cable from the motherboard by gently pulling it towards the battery.
- Pull parallel to the battery, not straight up.
- Lift and remove the battery from its recess.
- Use the phillips screwdriver with the PH000 head to unscrew the 3.8mm screw.
- Using the tweezers, pull the white and black wires off of the WiFi Chip.
- Pull out the WiFi Chip.
- Use the tweezers to unplug the DC Jack.
- Use the tweezers unplug the Speaker Cable.
- Use the tweezers to remove the CMOS Cable.
- Use the tweezers to remove the Touchpad Cable.
- Use the phillips screwdriver with the PH0 to loosen the 4 screws and remove the orange plate.
- Use the phillips screwdriver with the PH00 head to unscrew the one 3mm screw. Then, remove the bracket.
- Remove the keyboard cable.
- Remove the motherboard by gently lifting upwards from the edges.