Garmin Dash Cam 20 Motherboard Replacement
ID: 74805
Description:
Steps:
- Be sure to turn off the Dash Cam by pressing the power button.
- Rotate the Dash Cam to where the socket faces you.
- Remove the 9 mm screw using the Torx T6 screwdriver.
- Remove the Dash Cam socket piece.
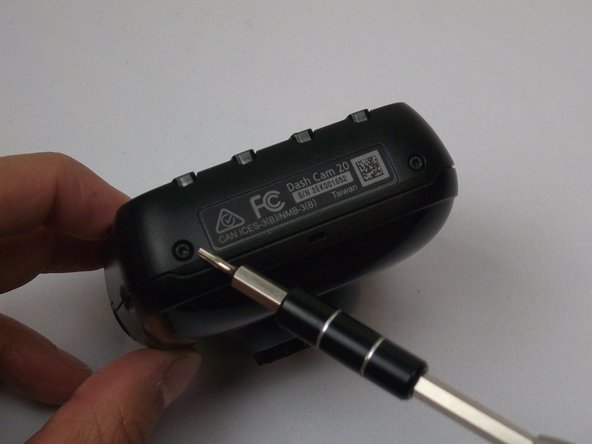
- Rotate the Dash Cam to where the product information faces you.
- Remove the two 5 mm screws using the Torx T5 screwdriver.
- Remove top case from the bottom case.
- The compact nature of the casing requires use of the metal spudger for needed leverage.
- Remove the two 5mm screws using the Torx T5 screwdriver
- By removing the screws, the metal battery frame will now become free from the rest of the device.
- This step shows the use of an incorrect tool. Always use an ESD safe tool, like a nylon spudger, when working with delicate internal components.
- Use the nylon spudger to pry the corner of the case off of the motherboard.
- Remove the metal case off of the motherboard.
- Remove the battery connection.
- Remove the three 5 mm screws using the Torx T5 screwdriver.
- Use tweezers to remove the connector on the top right of the motherboard.
- Remove the motherboard from the case and flip to reveal SD connection.
- Use tweezers to remove the connector next to the SD card slot.
- The motherboard is now removed aside from the copper strip and its connector.
- Disconnect from the front case and the copper strip.