Asus Transformer Book T100TAR Motherboard Replacement
ID: 74857
Description: This guide will teach you how to disassemble...
Steps:
- Detach and separate the screen from the keyboard by pressing the silver release button at the base of the tablet.
- Take the metal spudger and insert it into the seam of the rear cover casing and gently pry upwards.
- If done correctly, you should feel the clips release.
- Ensure that all the clips are released by sliding the metal opening tool along the four edges of the tablet.
- Do not force the clips to release. This will cause them to break, and if broken, the screen will become loose. Open the rear cover gently and with caution.
- Take off the rear case
- Using a plastic opening tool, carefully lift up and detach the large black strip connecting from the camera board to the motherboard.
- Using tweezers, detach the small black cable connected to the motherboard by gently tugging on it.
- Using tweezers, carefully remove the black tape holding the large orange strip.
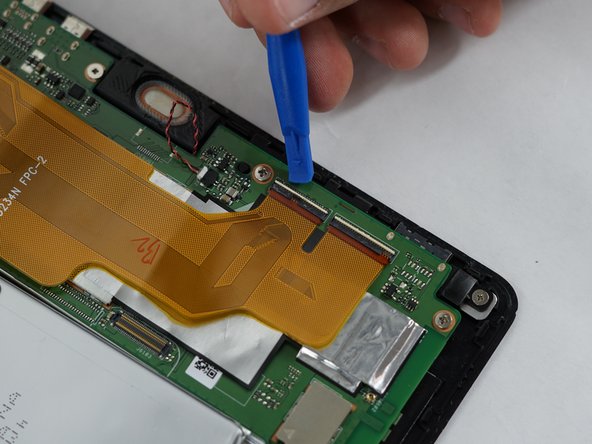
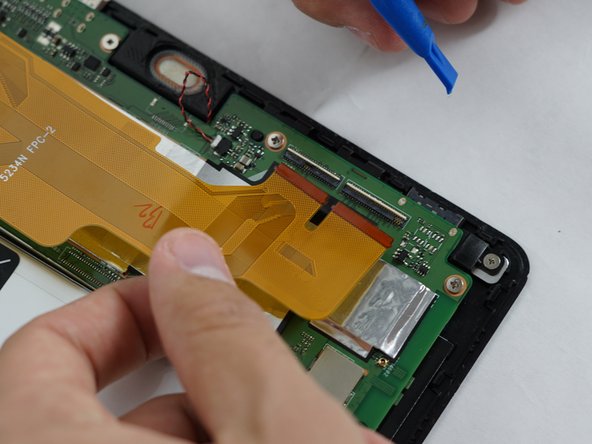
- Using a plastic opening tool, lift up the white tabs and pull the orange strip out of place.
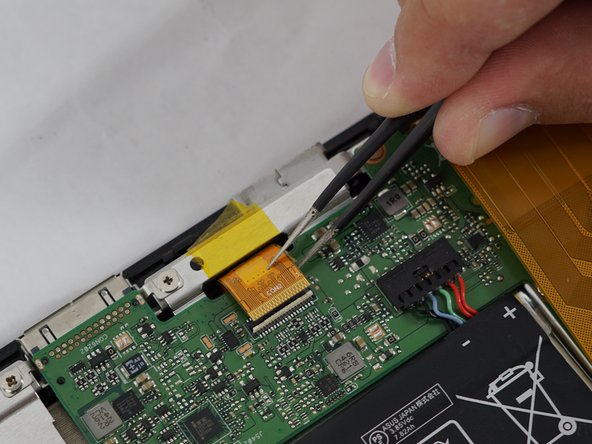
- Disconnect the LCD connection apparatus by carefully removing the black protective strip with tweezers and gently tugging on the orange ribbon.
- Using the nylon spudger, very carefully disconnect the battery by gently pushing the sharper end against the base.
- There should be a small dent in the middle; push from there.
- Using a Phillips #0 screwdriver, unscrew six 5mm screws holding the motherboard in place.
- Also using a Phillips #0 screwdriver, unscrew two additional 4mm screws off the top left ends of the motherboard.
- Disconnect the speaker from the motherboard by gently tugging on the cable head with tweezers.
- Remove the motherboard.