Philips Dynamic Bass Boost AZ 1038 12 Speaker Replacement
ID: 75187
Description: We are going to teach you to replace the...
Steps:
- Take the radio off the net (remove the power cable) and remove the batteries if necessary
- Turn the radio upside down.
- On the places indicated by the red circles, 6 14.8mm Phillips #0 screws need to be removed using a Phillips 00 screwdriver.
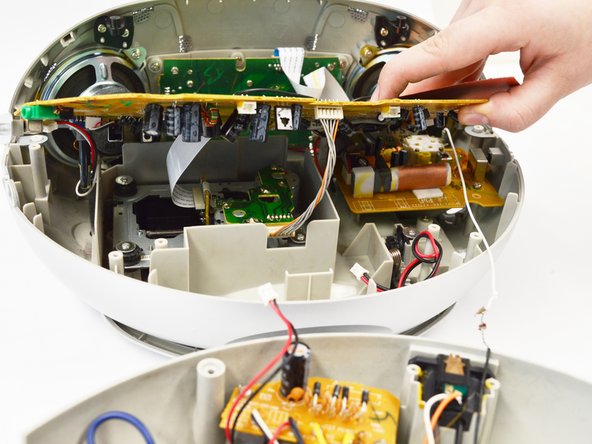
- The bottom can be removed. Attention: the bottom of the radio is still connected to the upper part because of two connections between the PCB’s.
- Attention: there is one PCB in the upper part, and one in the bottom, which are still connected to each other
- Next the different screws indicated in the picture need to be removed.
- The 5 9.5mm Phillips #0 screws indicated by the red circles need to be removed using a Phillips 00 screwdriver.
- One 7.4mm Phillips #02 screw indicated by the blue circle needs to be removed using a Phillips 02 screwdriver
- The two connectors indicated by the red arrows need to be removed next.
- They can be removed by gently pulling, like shown in the picture
- Then the radio should look like shown in the second picture.
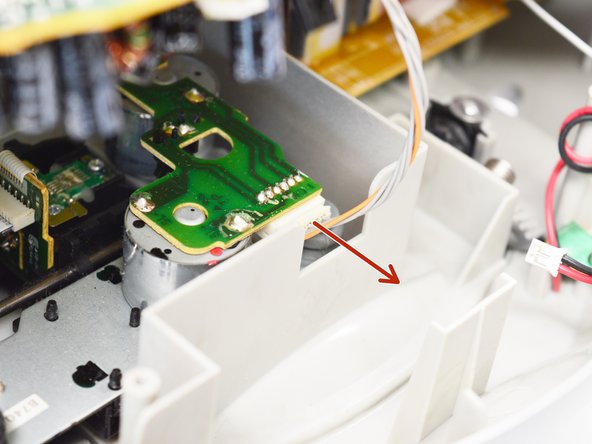
- Then one contact needs to be removed that is not attached at the large PCB, like the rest, but at a smaller PCB connected to the upper part of the casing
- Pull in the direction of the arrow.
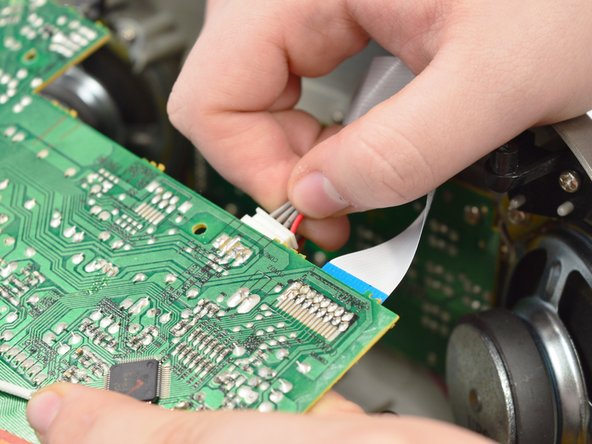
- Then two more contacts need to be removed, in the same way that the other contacts are removed.
- Both these contacts can be found at the back side of the PCB, and are also attached at that place.
- Then the PCB is only connected with these flat white wires. They can be detached by softly pulling on them.
- Now the conductor for the antenna can be removed, by pulling softly.
- The conductor can be found at the yellow PCB in the upper part of the casing.
- Next we will remove the front of the casing from the upper part of the casing.
- Two 13.7mm Phillips #02 screws need to be removed with a Phillips 00 screwdriver, on the picture the right screw is shown.
- After the screws are removed, the front can be removed by pulling it upwards.
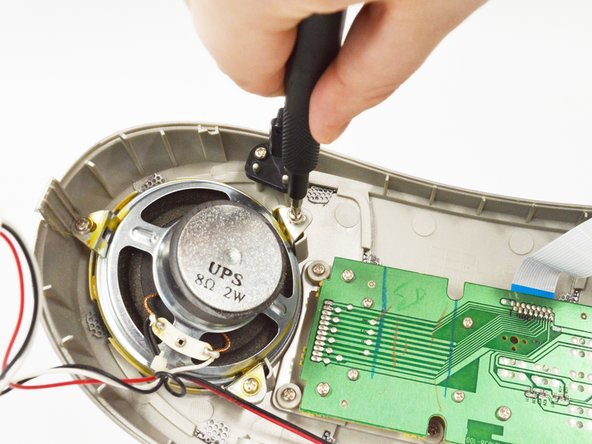
- The speaker is screwed to the front of the casing with three 12.1mm Phillips #0 screws, as can be seen in the picture. Remove these screws with a Phillips 00 screwdriver.
- Right now, the speaker is only attached by glue. Remove the glue by using something sharp, like a spudger, to break it.
- To attach a new speaker, the old one needs to be removed by unsoldering it.
- Turn on your soldering iron, and wait until it has the right temperature.
- Keep the soldering iron against the contact, like shown in the photo. The wires will easily come off.
- Attention: Make sure you do not touch the soldering iron, it will be hot. Also make sure you do not melt any plastic parts.
- The last step is soldering the new speaker on. For this you need solder.
- Melt the wires to the contacts of the new speaker, by melting some solder over the wired, touching the contact of the speaker.
- Make sure to attach the black wire to the negative contact of the speaker (indicated on the speaker) and the white wire to the positive contact.