Windsor Willow Bottom Bracket Replacement
ID: 78648
Description: This is a guide to removing and replacing the...
Steps:
- The chain connects the crank arm to the gear cluster on the back wheel.
- On the chain, locate the master link. It is a lighter gray than the other links of the chain. This is how you can break the chain for easier removal.
- To separate the Master Link, hold the left side of the link in your left hand and the link to the right in your right hand. Push the two links together to enable the release. Pull the links apart, one hand moving towards yourself and the other away from you. This will separate the links of the chain.
- Once you have separated the links of the chain, pull down on the right side of the chain as shown. Pull until the chain has been fully removed from the gears. Place the chain on a paper towel or cloth to prevent getting grease anywhere.
- The crank arms can be located between the front and rear tire, directly below the seat.
- To remove the crank arm, place a proper fitting Allen wrench into the slot at the center of the crank arm as shown. Turn the wrench counterclockwise to loosen the bolt that keeps the crank arm on the bike until it spins easily. Hold the other crank arm in place to ensure that the bolt loosens instead of spinning the crank arm.
- Once the bolt spins easily, keep the Allen wrench in the bolt slot and turn the crank arms to speed up the removal process.
- Remove the bolt from the crank arm. The crank arm will remain in place. Do not try to pull off the crank arm, as a special tool is required for this task.
- Repeat steps 2-4 on the other crank arm. Remember, do not try to pull off the crank arms.
- Obtain a crank puller tool. This tool has two parts, a movable threaded insert and the push bolt. Screw the crank puller into the hole left by the bolt.
- Be sure to be gentle and thread the first few turns by hand as to not accidentally cross thread your crankarms.
- Once the movable piece is tightened firmly inside the hole, turn the tool clockwise. This will pull the crank arm away from the bike and remove it completely.
- Repeat steps 6-7 with the remaining crank arm. Both arms have been successfully removed.
- The Bottom Bracket is located at the bottom of the frame, directly underneath the saddle.
- On the non-drive side, insert the bottom bracket removal tool into the splines on the inside of the bottom bracket mounting ring.
- Fit the crescent wrench onto the bottom bracket removal tool.
- Use the crescent wrench to turn the mounting ring counterclockwise until it is loose enough to turn by hand.
- Turn the bottom bracket removal tool counterclockwise by hand until the mounting ring is free of the bicycle frame
- Fit the bottom bracket removal tool into the splines on the drive-side of the bottom bracket.
- Use the crescent wrench to turn the bottom bracket removal tool clockwise until the bottom bracket is loose enough to turn by hand.
- Turn the bottom bracket removal tool clockwise by hand until its threads are no longer in contact with those of the frame.
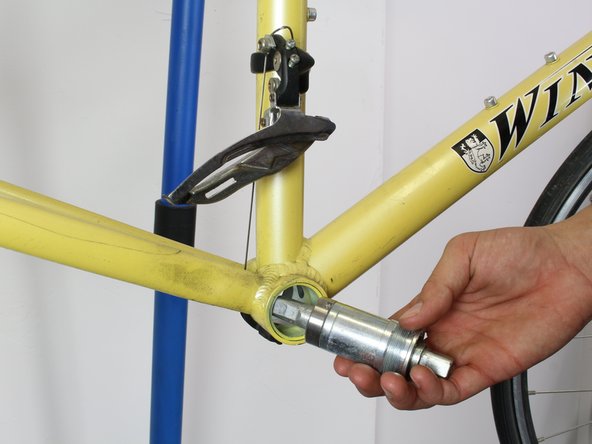
- Pull the bottom bracket out of the bike frame.