Golf 6 TDI brake pads front and rear Replacement
ID: 78851
Description: With a little skill you can relatively easily...
Steps:
- The car must be jacked up with a jack. Then dismantle the wheel in its engaged state. Push back the brake piston with a screwdriver. Remove the two plastic caps on the brake caliper retaining screws
- Remove circlip with a screwdriver. Loosen screws with a 7mm Allen key. Then the caliper can be removed by pulling it backwards. If the brake pad has a wear sensor, it must first be removed. Here with a screwdriver behind the lock release.
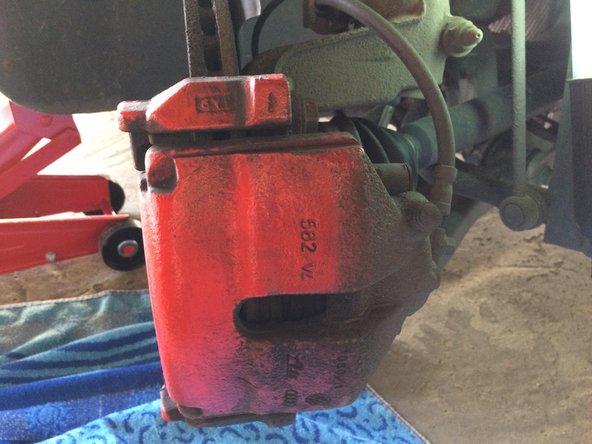
- Hang the removed caliper with a strap, because of the brake hose can be bent. Remove the old brake lining on the piston, this is clipped. Pull off the second brake pad laterally. Then clean the brake with a steel brush.
- Click in the new brake pad in the brake piston. With a screw clamp back the whole Bremskoben so that he goes over the pads later. Apply the second brake pad. The running surfaces of the brake pads should be slightly greased.
- When the pads are in place, replace the brake caliper and tighten. Replace the protective caps. Then check the seat.
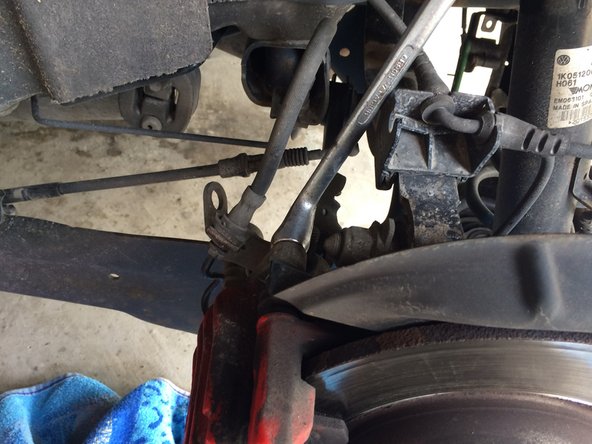
- Jack up the rear of the car and remove the rear wheel. Release brake caliper screws. Unhook the parking brake cable and remove completely to the rear.
- Completely unscrew the brake caliper screws with a 15 mm open-end wrench. Remove brake caliper and remove old brake pads. Then clean the brakes and install new brake pads. Lubricate the treads a little.
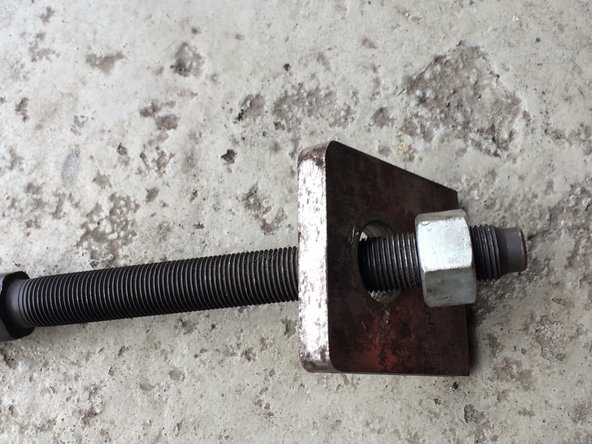
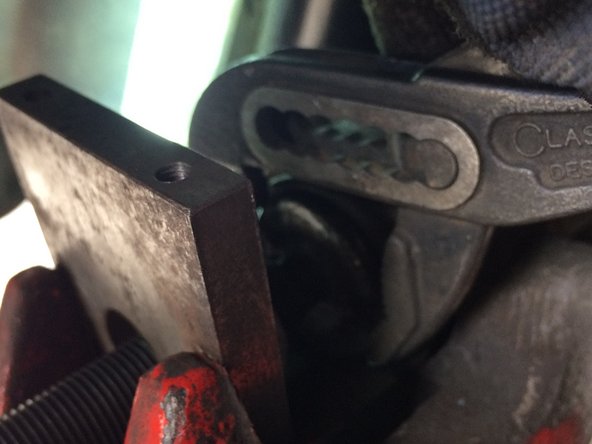
- So now comes the hardest part. Normally you need a special tool for turning back the brake piston, but I have come up with a solution for myself. While pressing with my special device on the piston with the W-forceps, the piston must be screwed to the right.
- Be careful when turning with the water pumping pliers that the rubber on the brake piston is not damaged. As you turn, there must be constant pressure on the piston, which is achieved by tightening the screw on my special tool. If the piston is turned back far enough, you can attach the brake caliper and then install the handbrake cable.
- Here is my needed tool.