How to Tie a Tie: Half-Windsor
ID: 79679
Description: Active End: The end of the tie that will be...
Steps:
- Fold the collar of your shirt up.
- Wrap the tie around the back of your neck with the narrow end on the left side of your body and the wide end on the right side.
- The wide end of the tie will be your active end.
- Note: The narrow end of the tie should be around the height of your belly button or a little higher. It may need to be adjusted for personal height.
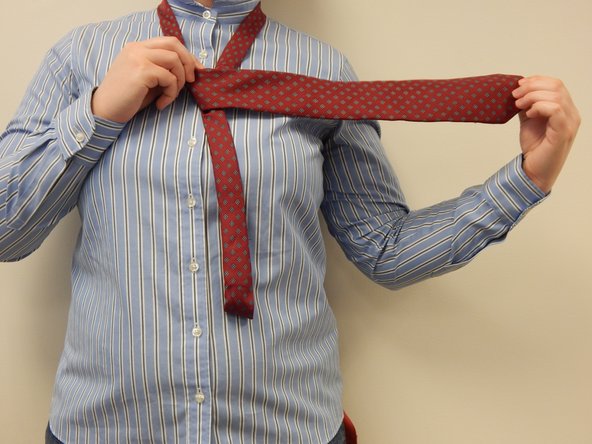
- Take the active end and cross it over the narrow end, so it is pointing to the left.
- Note: Be sure that the tie always lays flat so that there are no twists in the fabric.
- Cross the active end underneath the narrow end, so it is now pointing to the right.
- Lift the active end up over the right side of the neck loop, so it is pointing up.
- Pull the active end down through the loop around your neck so that it is pointing down and to the left.
- Cross it over the top of the knot to the right, so that it is now pointing to the right.
- Note: leave this wrap a little loose, as it will be used in step 9.
- Pull the active end up through the loop around your neck, so that it is pointing straight up.
- Pull the active end down through the wrap you created in step 7 (see second picture).
- Tighten the knot by pulling down on the active end and up on the knot, adjusting for size and evenness.
- Tighten the neck loop by pulling down on the narrow end of the tie and sliding the knot up toward your neck.
- Tuck the narrow end of the tie through the keeper loop.
- Note: if the narrow end is too long, a simple solution lies in tucking the narrow end between two buttons of your shirt.
- Fold your collar down when the knot is finished.