Sony Xperia T2 Ultra Dual Dual SIM Slot Replacement
ID: 79963
Description: This guide is to show what components need to...
Steps:
- Using the spudger, pry open the back cover by starting alongside the edge of the back cover.
- Once the part of the back cover has been opened up. Slide the spudger to pry completely detach the cover from the phone.
- Using the Phillips #00 Precision screwdriver, take out 8 silver screws (3.15mm) and 5 gold screws (3.9mm) for a total of all the screws attached to the flat plate. 3 of the gold screws are located at the top of the phone and the other 2 screws are located at the bottom of the phone.
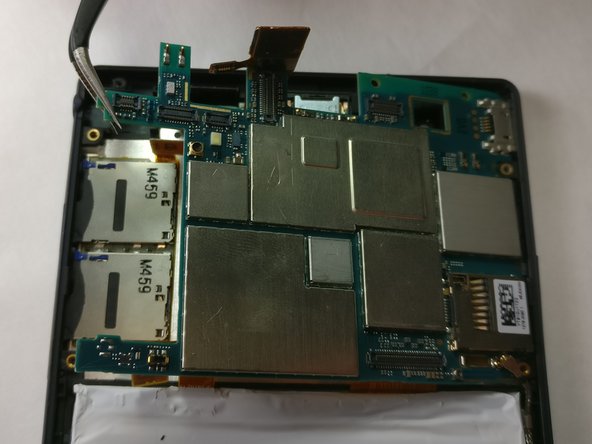
- To remove the internal cover, use the plastic spudger tool and pry the cover from the phone as shown in the picture.
- To take out the back facing camera, flip open the flap labelled ‘film’ to reveal the chip that connects to the motherboard.
- Use the tweezer, carefully pry open the chip for the back facing camera.
- Then using the tweezer, carefully remove the back facing camera component.
- Using the tweezer, carefully pry open the chip for the front facing camera as shown. Then using the tweezer, carefully remove the front facing camera component.
- Using tweezer, locate the audio jack as shown and pull out the chip connected to the motherboard.
- Carefully remove the audio jack by using the tweezers and pull firmly straight out of the motherboard.
- Using tweezers, locate the battery connector and carefully pull up to disconnect it.
- Carefully remove the button circuit connector by using tweezers and gently pulling up.
- Carefully remove the silver plug by using the tweezers to lift straight up.
- Carefully remove the SIM card connector using tweezers by gently pulling it straight up.
- Using tweezers, carefully remove the motherboard by pulling it up and out of the backing.
- Using the Tweezers, carefully pry the the dual SIM slot off the sticky substance used to hold it down.