Sony Cyber-shot DSC-HX90V Motherboard Replacement
ID: 80522
Description: This guide will show you the steps to removing...
Steps:
- Place the device so bottom of the camera is facing up .
- Remove the five black M1.4 X 3.5 Phillips head screws with a Phillips #000 screwdriver.
- Remove the marked black M1.4 X 3.5 Phillips head screws on the side of the camera with a Phillips #000 screwdriver.
- Remove the marked screw with a Phillips #000 screwdriver.
- Use the plastic opening tool to remove the button board.
- Disconnect the control board data cable with care. Permanent damage may occur to the control board if tools are used to disconnect the data cable. Use your fingers only.
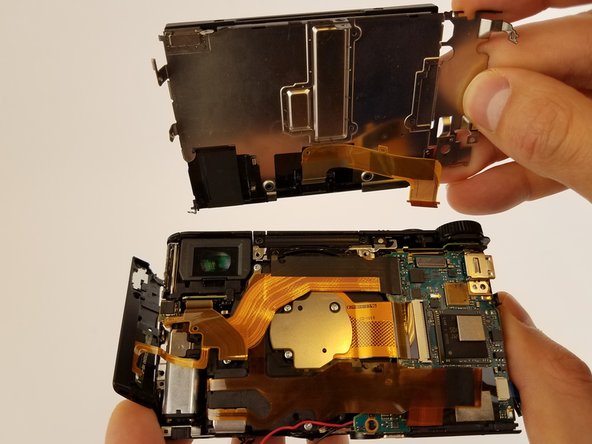
- Disconnect the control board data cable by wiggling carefully with your fingertips. Set the control board to the side once it is disconnected.
- Use the plastic opening tool with a prying motion to remove the side cover of the camera.
- The cover should come off easily but you might hear light snapping or popping.
- Orient the device so the lens is facing down.
- Remove the two black M1.4 X 3.5 Phillips head screws using Phillips #000 screwdriver.
- Orient the device so the lens is facing down.
- Remove the black M1.4 X 3.5 Phillips head screw.
- LCD screen is very fragile. Handle with care. Do not use tools to remove the screen.
- Remove the ribbon cable connecting LCD display to camera sensor and battery housing.
- Make sure all ribbon cables are unplugged and remove the motherboard.
- Ribbon wires can be easily damaged.