Fujifilm FinePix F505EXR Selector Button Replacement
ID: 87602
Description: In this guide, readers will be taught how to...
Steps:
- Power the device down before taking any other actions.
- Hold the camera with the lens facing towards youself.
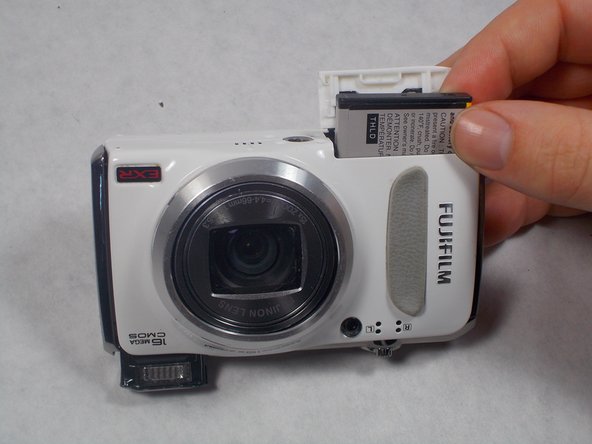
- Turn the camera upside down and place your right thumb on the battery chamber cover.
- Hold the camera, then pull the battery chamber towards yourself with your right thumb.
- Pull the cover entirely out and release it to reveal the battery.
- Locate the orange battery latch that holds the battery in place.
- Use your finger to push the latch away from yourself to release the battery.
- Remove the battery manually from the battery chamber.
- Place the battery into a charger if it is dead.
- Remove battery before performing any other repairs.
- Replace defective battery if previous steps fail
- Contact support on the Fujifilm website for further assistance
- Remove four 2.5mm Phillips #1 screws on the bottom of the camera near where the camera mount attaches.
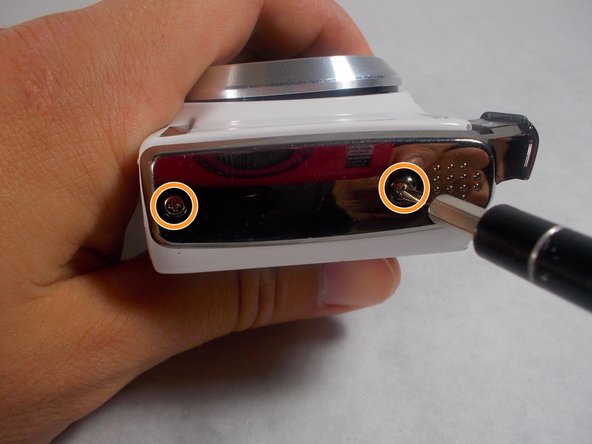
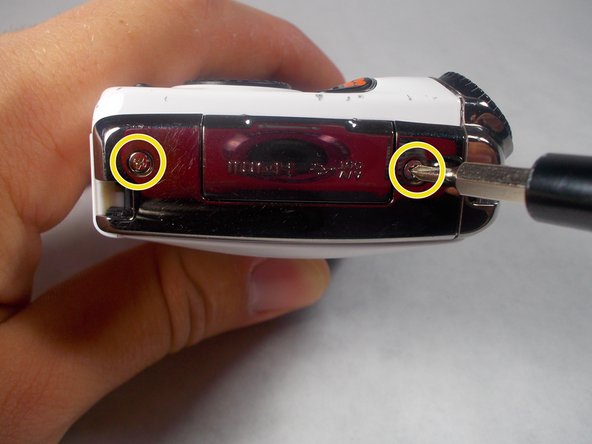
- Remove two 5.1mm Phillips #1 screws on the left side of the camera relative to the LCD screen.
- Remove two 5.1mm Phillips #1 screws on the right side of the camera relative to the LCD screen nearest to the mode wheel.
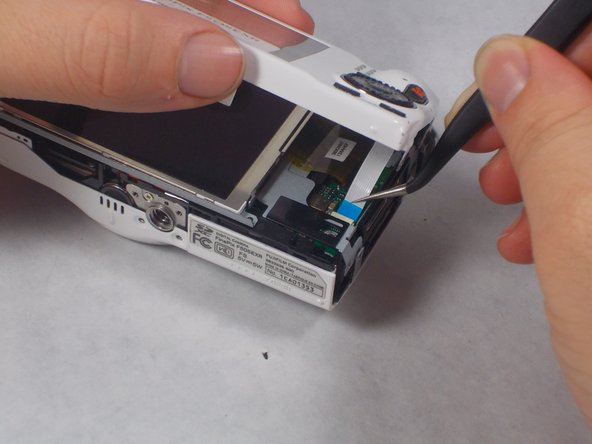
- Place the camera lens face down with the LCD screen face up on a flat surface, or hold it. Carefully lift the camera’s back cover approximately 1 inch.
- Carefully lift the ribbon clamp connector back using the tweezers and remove the blue ribbon.
- Do NOT pull on ribbon if the ribbon clamp connector still grasps the blue ribbon. This could cause severe damage to the ribbon.
- If you are replacing the LCD monitor you can skip steps 6 and 7 for the selector button circuit board guide and go directly to the LCD monitor repair guide.
- If you are replacing the Mode Dial you can skip steps 6 and 7 for the selector button circuit board guide and go directly to the Mode Dial repair guide.
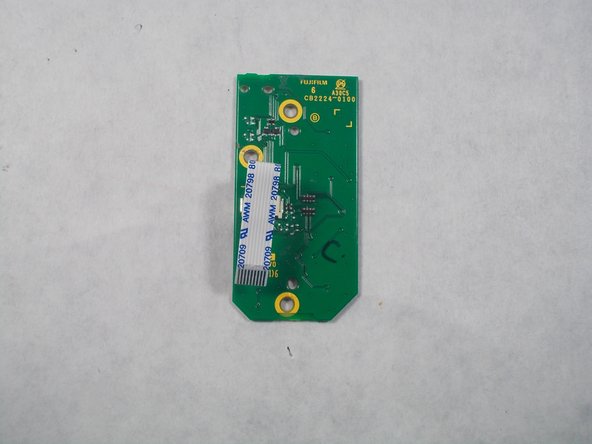
- Remove the back of the camera case and place it on a flat surface with the selector button circuit board facing up.
- Remove the three 3.5mm Phillips #1 screws located on the chip seen in the image.
- Lift the chip with tweezers to remove it from the other remaining components.
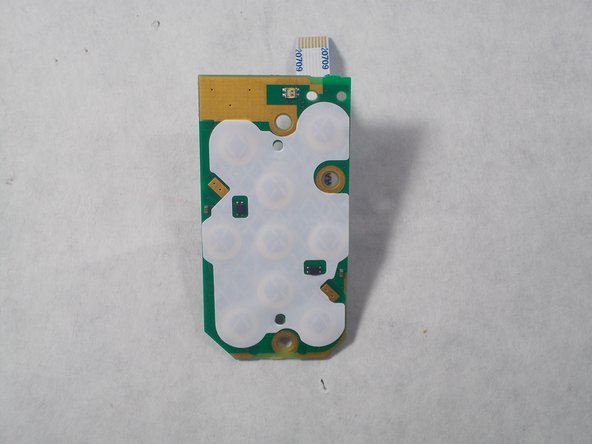
- After the selector button circuit board is taken out. There will be a black rubber display for the front buttons, remove this.
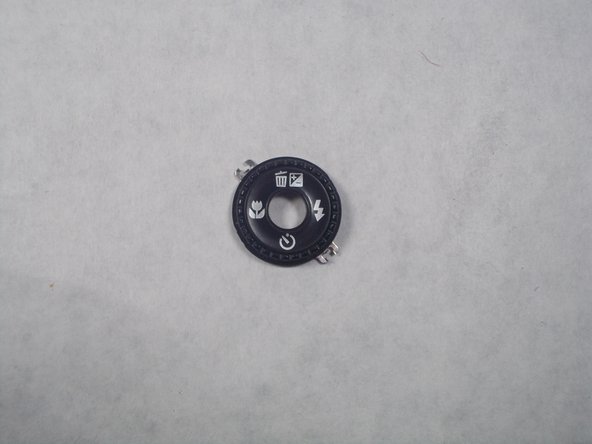
- After taking the rubber button selector out, there will still be a circular metal selector button. This is what makes the camera delete pictures and do various tasks. Remove this and set aside.
- Finally replace the selector button with the new replacement.