Dell Alienware M11x R3 Keyboard Replacement
ID: 87631
Description: If your Dell Alienware M11x R3 has missing or...
Steps:
- Loosen the eight retaining screws on the base of the computer with a small Phillips screwdriver.
- The screws have retaining washers to hold them in place, so you don't have to remove them from the base plate.
- Remove the bottom cover from the laptop.
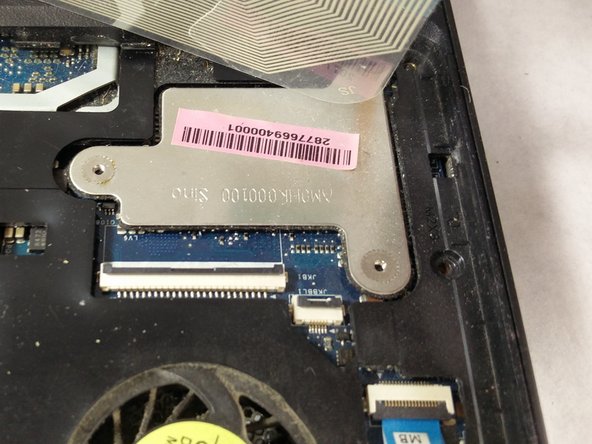
- Unscrew the two circled screws holding the battery in place. These screws have retaining washers, so they won't completely detach from the device.
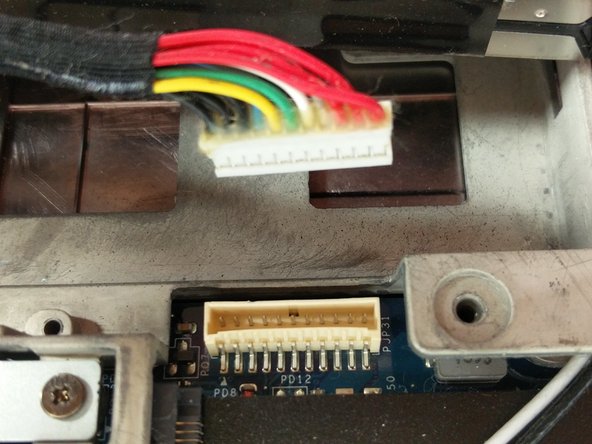
- Next, unplug the battery cable (PD12) from the motherboard by gently pulling up.
- Now, remove the battery by gently pulling on the tab located between the two screws. The battery will pivot, and you will be able to completely detach the battery from the device.
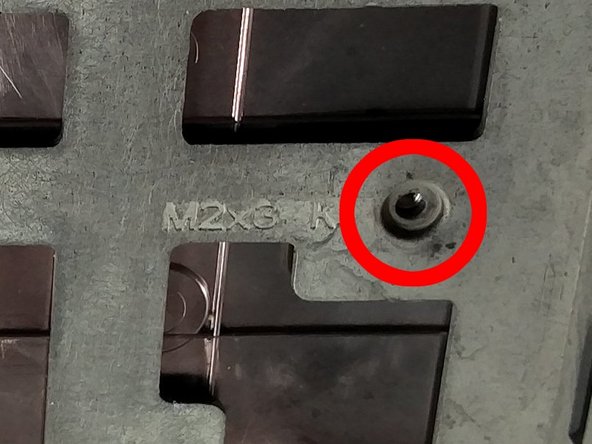
- Once the battery is removed, take out the two screws circled. These screws are labeled "M2x3 K" by engravings in the frame located next to their corresponding holes.
- These screws will be completely removed. Keep them somewhere safe.
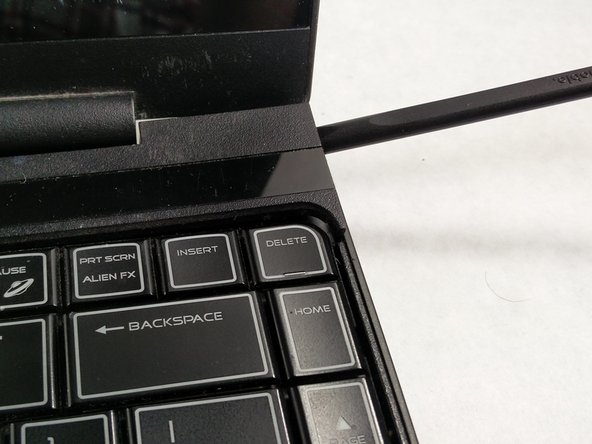
- Now, flip the computer back over. Above the "DELETE" key on the edge of the computer is a small indent. Here you will use the spudger to pry this plastic piece up.
- Push the monitor back as far as the hinges will allow.
- Continue to pry the plastic piece off along the top of the keyboard. Remove this piece.
- Now remove the two screws located directly above the F3 key and the PAUSE key.
- These screws will also be completely removed, so keep them in a safe place.
- With both screws removed, gently lift up on the keyboard, and slide it towards the monitor. It will come out.
- Caution: Do not tug too hard on the keyboard, as it has two fragile connection ribbons underneath that you do not want to tear.
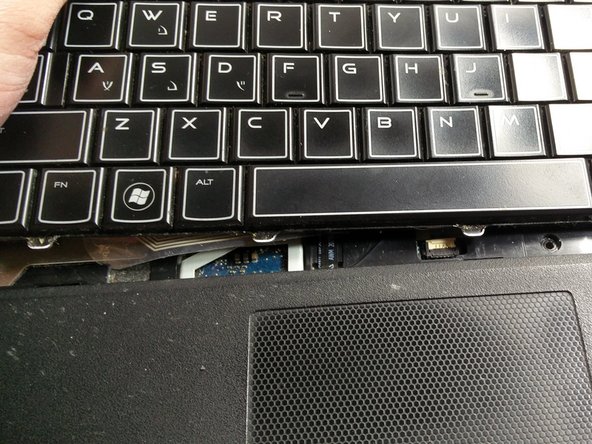
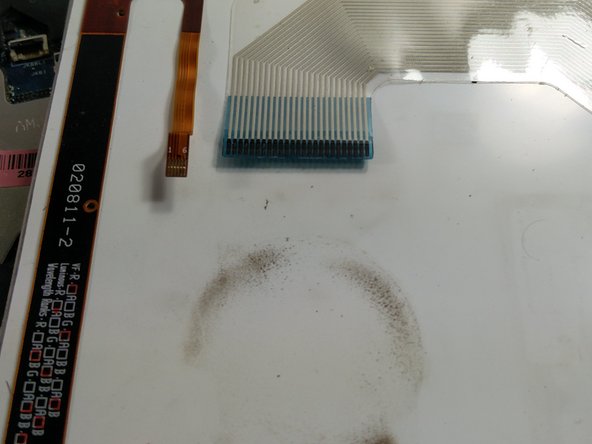
- Now unlock and unplug the two ribbons cables underneath the keyboard. They are held in place by black locks.
- To unlock them, gently slide a finger nail or spudger tool under them and lift up. You need to do this for both ribbons.
- With the old keyboard removed, you can now install your new one and reassemble the computer!