Insignia Flex Elite 7.85 Motherboard Replacement
ID: 87725
Description: This is a motherboard replacement guide for the...
Steps:
- Make sure the device is turned off before taking it apart to avoid any injuries.
- Use a plastic opening tool to remove the metal backing of the tablet.
- Insert the plastic opening tool between the screen and metal backing. Use a prying motion to lift the front case from the metal panel.
- Move the tool around the perimeter of the device until the screen separate.
- The volume and power button will become free from device when the screen and metal backing are separated. These small pieces are easy to lose, be careful. They’re easy to put back into place when reassembling the tablet.
- Use a plastic opening tool to free the orange connector ribbon by placing the tool on the connector.
- Peal the connector ribbon and bend it backwards so it is not in the way.
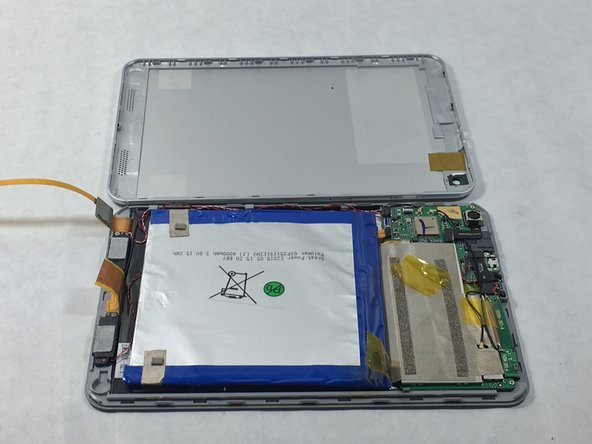
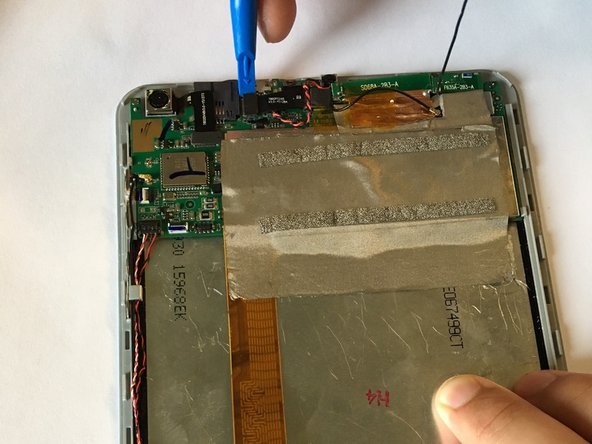
- Peel back the three pieces of tape circled in the picture.
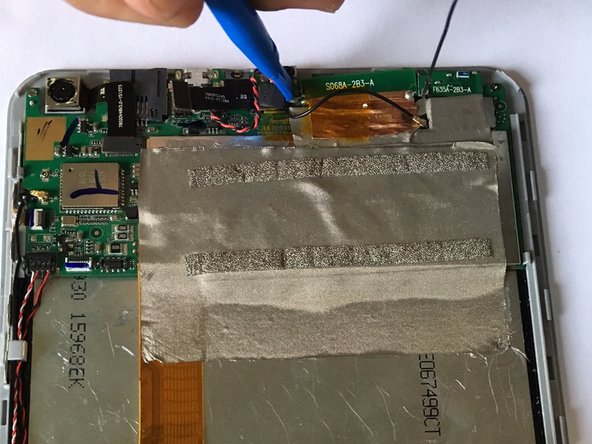
- Free the battery from the motherboard by prying slightly with the opening tool.
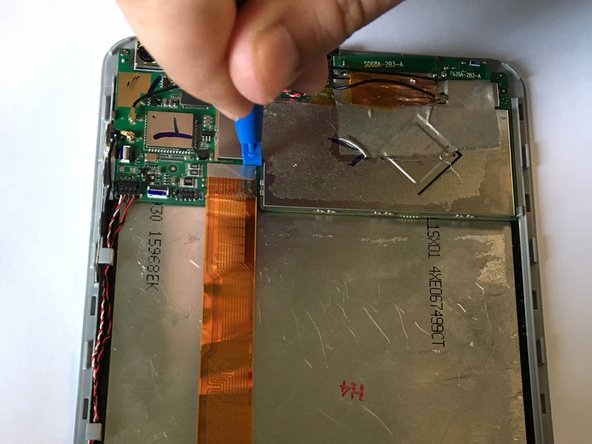
- Use the plastic opening tool to remove the battery from the screen.
- Place the tool between the battery and casing. Move the tool around the border of the battery until it is free.
- Do not bend or puncture the battery or the battery will begin to leak.
- This step is very crucial. Be careful and do not rush through it.
- The glue on the back of the battery is difficult to free up.
- Take the battery out carefully from the tablet
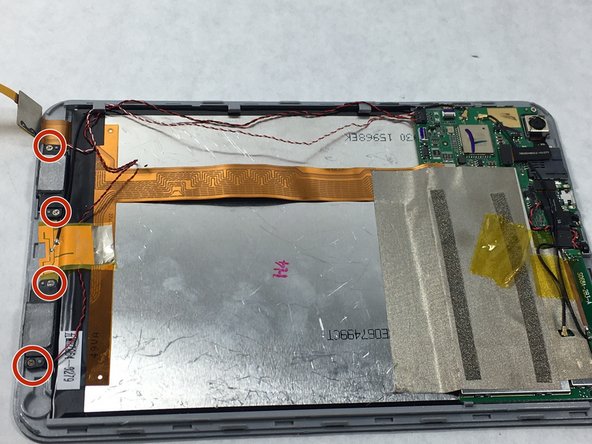
- Remove the four screws with a #000 Phillips screwdriver.
- Place the speakers on the side.
- Locate both front and back cameras.
- There are two black ribbon connectors that connects the cameras to the mother board.
- Use a plastic opening tool to pry slightly on the black ribbon connectors.
- Bend them backwards slightly so they will not be in the way.
- Using a plastic opening tool, pry the cameras from their mount.
- Pry around the perimeter of the cameras until they come free.
- Be careful, make sure the plastic mount does not break.
- Once the cameras are free, now it is time to peel the grey tape away from the connector
- Using plastic opening tools, carefully pry the connector from the motherboard.
- Using a plastic opening tool, pry the black wire connectors pointed to in the picture.
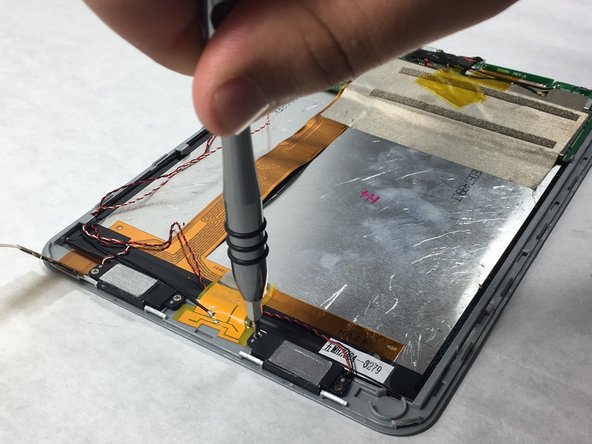
- carefully, using a plastic opening tool, take the screen sensor from its molding.
- Be careful not to break the plastic molding.
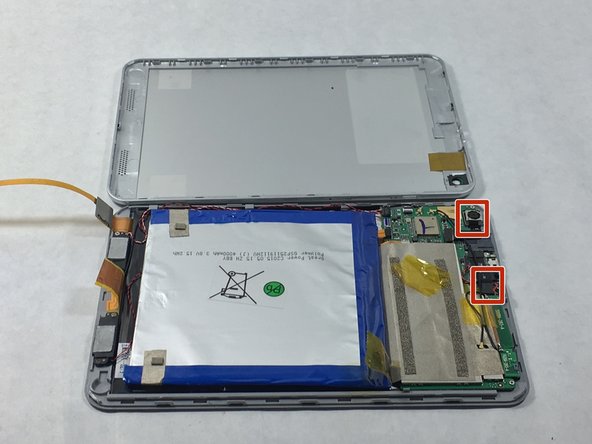
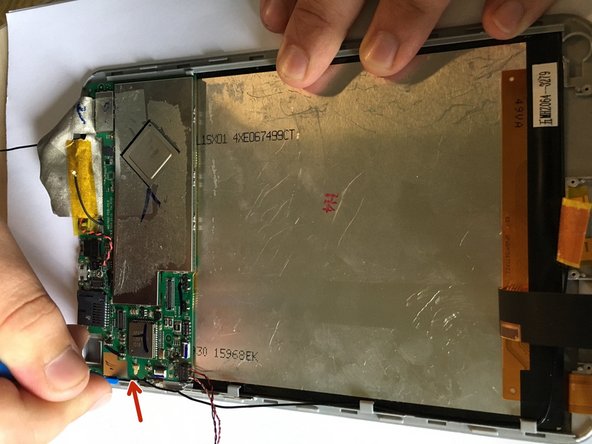
- Using a 000 philips screw driver, take out the four screws holding in the motherboard
- Carefully, using a plastic opening tool, pry up on the motherboard.
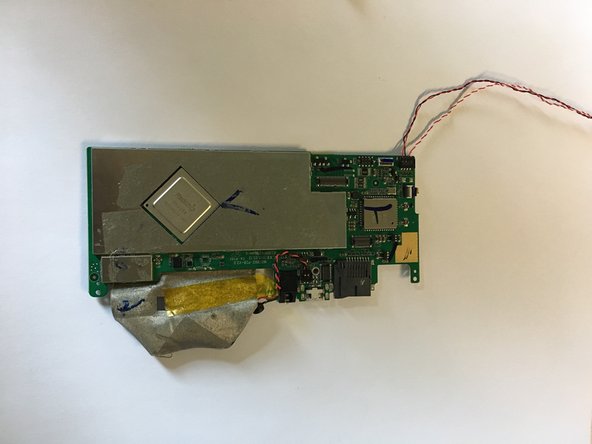
- The Motherboard should pop right out.
- The motherboard should be free from the tablet.
- Replace the motherboard with the new one.