Sony Vaio VGN-TXN25N Hard Disk Drive Replacement
ID: 8883
Description:
Steps:
- Flip the computer so that the bottom is facing up.
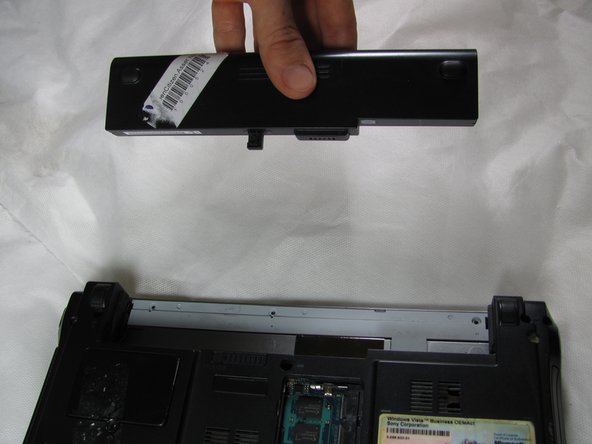
- Look to the long edge where the computer screen is hinged and find the "release slide". It is located at the top left corner of the square indent.
- Use your finger to slide the release to the left.
- While holding the release slide with one hand, use your opposite hand to pull the battery from its slot by gently shaking the battery left and right to help slide it out.
- Take out the screw in the center of the computer.
- Flip the computer right side up.
- Open screen so that keyboard is visible.
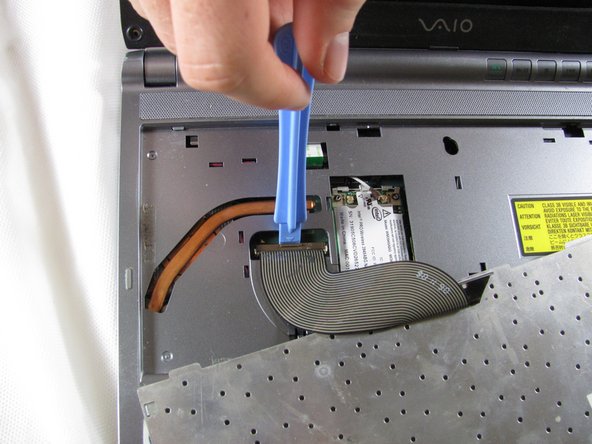
- Use a plastic opening tool to gently lift the keyboard at a corner.
- Make sure you get below the keyboard itself and not just the keys.
- Slide the tool around the perimeter of the keyboard and it will start to lift.
- Do not pull the keyboard away from the computer. There is a ribbon cord attaching the keyboard to the computer.
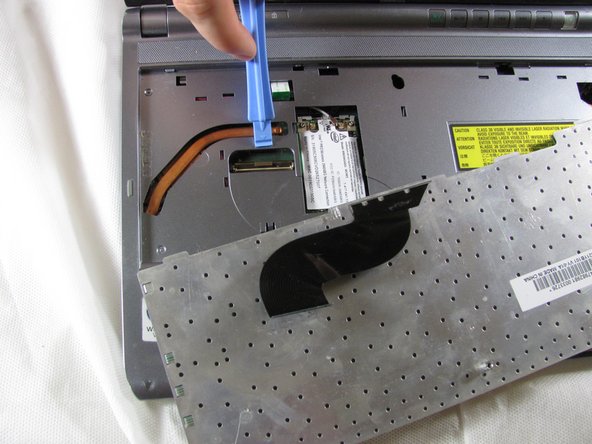
- Once the keyboard has been lifted at a few edges, lift the keyboard with both hands.
- Locate the ribbon cord behind the keyboard.
- Locate a brown clamp attaching the keyboard to the computer.
- Use a plastic opening tool to lift the clamp and release the cable.
- Now the keyboard can be pulled away entirely.
- Take out the screw under the keyboard.
- Flip computer over and remove the 6 screws.
- Flip computer over again and unclip the plastic cover.
- Do not be afraid to be rough, since the cover is hard to remove.
- Be sure to remove the case slowly and unclip any ribbon cords that are attached.
- Locate the hard drive disk. The hard drive disk will be covered by a shiny lid.
- Unscrew the lid with a #00 Phillips Head Screwdriver.
- There are 3 screws holding it in.
- Grab the lid by one corner and pull off the lid.
- Find the brown clip attached to the hard disk drive on the side facing the optical disk drive.
- Carefully pull out the brown clip with your fingers.
- Hold the hard disk drive on the side where the brown clip was attached and lift it upwards to pull it out.