Sony Cyber-shot DSC-T1 CCD chip Replacement
ID: 9067
Description: Follow this guide for the process of replacing...
Steps:
- Locate the cover on the bottom of the camera.
- Slide the cover towards the back of the camera.
- Be careful—the battery can slide out on its own.
- Carefully remove the exposed battery.
- If it is difficult to remove, flip over the camera and the battery will slide out.
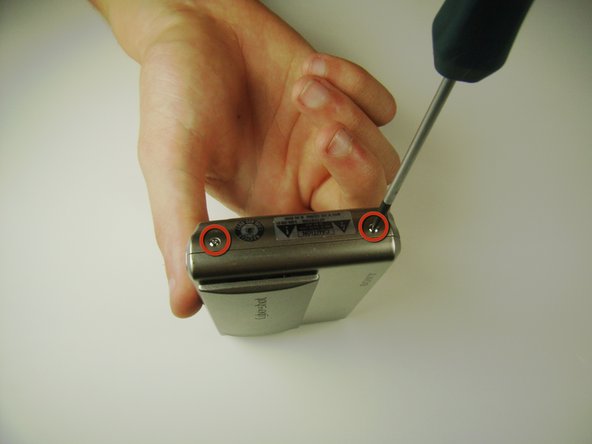
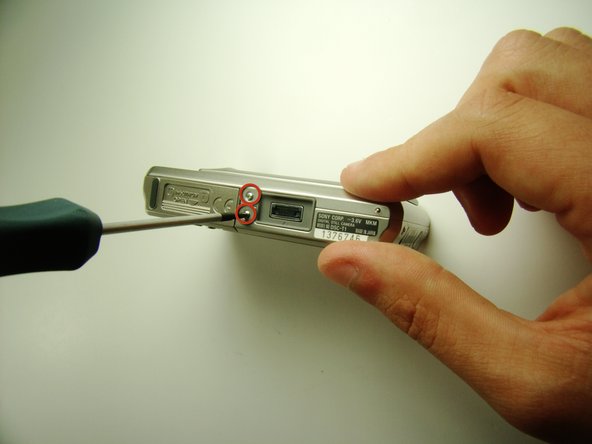
- Locate and remove the 3mm screws on the bottom and sides of the camera with a JIS size #0 screwdriver.
- Pull the two halves of the camera apart.
- Place the two halves down with the insides facing you.
- Find the two clips holding the motherboard to the black lens box.
- Slide the plastic opening tool in between the ribbon and the black part of the clip, then flip it up. (If difficult, your fingernail can also be used)
- After releasing the clips, pull out the black lens box.
- If the black lens box does not come out, go back to the previous step and make sure you released the correct clips.
- Locate and unscrew the two 3mm screws on the bottom of the black lens box with the JIS #0 screwdriver.
- With the tweezers remove the black tape to detach the chip from the lens box.
- Grab the chip with your thumbs and carefully pull it off.
- The copper tab will be glued to the lens box. Be careful not to rip it.
- The attached copper ribbons are part of the CCD chip.