LG Voyager Antenna Replacement
ID: 9138
Description:
Steps:
- Turn over the phone so the front screen is facing down and the back side is up.
- Pull down on the button at the bottom of the phone. The battery will pop up and can then be safely removed.
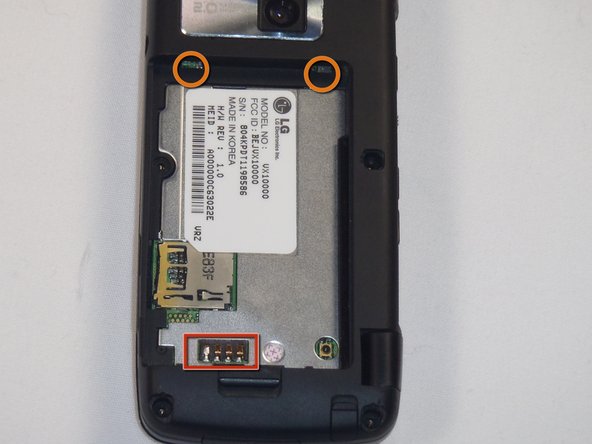
- To install the new battery, position the battery so that the three small metal contacts of the battery are facing the three metal contacts of the phone
- Insert the top of the battery, with the two plastic tabs, into their respective holes in the top
- Then press down on the bottom of the battery and it should snap into place
- First remove the battery by pulling the tab away from the device
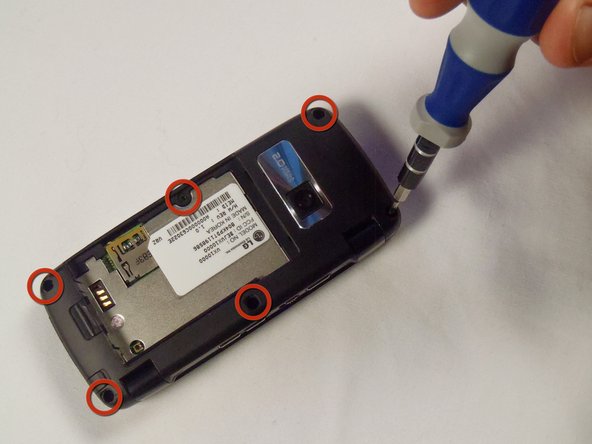
- Next remove the 5 rubber modules by gently prying underneath them. This will expose the screws underneath
- Next remove the 6 #00 Phillips screws holding the back in place
- screws: 1.43mm head, 3.61mm length
- Now, slide a plastic opening tool in between the two plastic pieces that form the outside of the back case
- Gently work the plastic opening tool around the edge of the case to separate the two pieces
- Once the case has been separated you should be able to see the circuitry inside the phone
- Remove the #00 Philips screw holding the antenna in place
- Screw: 4.52mm length, 2.68mm head
- Once the screw is removed, lift the small case around the antenna off
- Now that you have the antenna exposed, you can remove it